Scheduled data exports
Last updated: August 17, 2026
A scheduled data export automatically generates a CSV of your ATS data on a recurring basis, daily, weekly, or monthly, and emails it to the recipients you choose. Unlike exporting a single job's candidate list, a data export can pull from Applications, Jobs, Referrals, Interviews, Offers, and Scorecards at once, across your whole account.
Use a scheduled export to keep a recurring extract flowing into a spreadsheet, a data warehouse inbox, or a stakeholder's email without anyone having to remember to run it manually; for example, a weekly applications export for a BI tool, or a monthly offers export for finance.
Path: Admin configuration > Data export > Scheduled data exports
Scheduled exports live in Settings > Data export, alongside on-demand exports and your export history.
Step 1: Start a new export
Go to Settings > Data export.
Click Create new export.
Step 2: Select data points
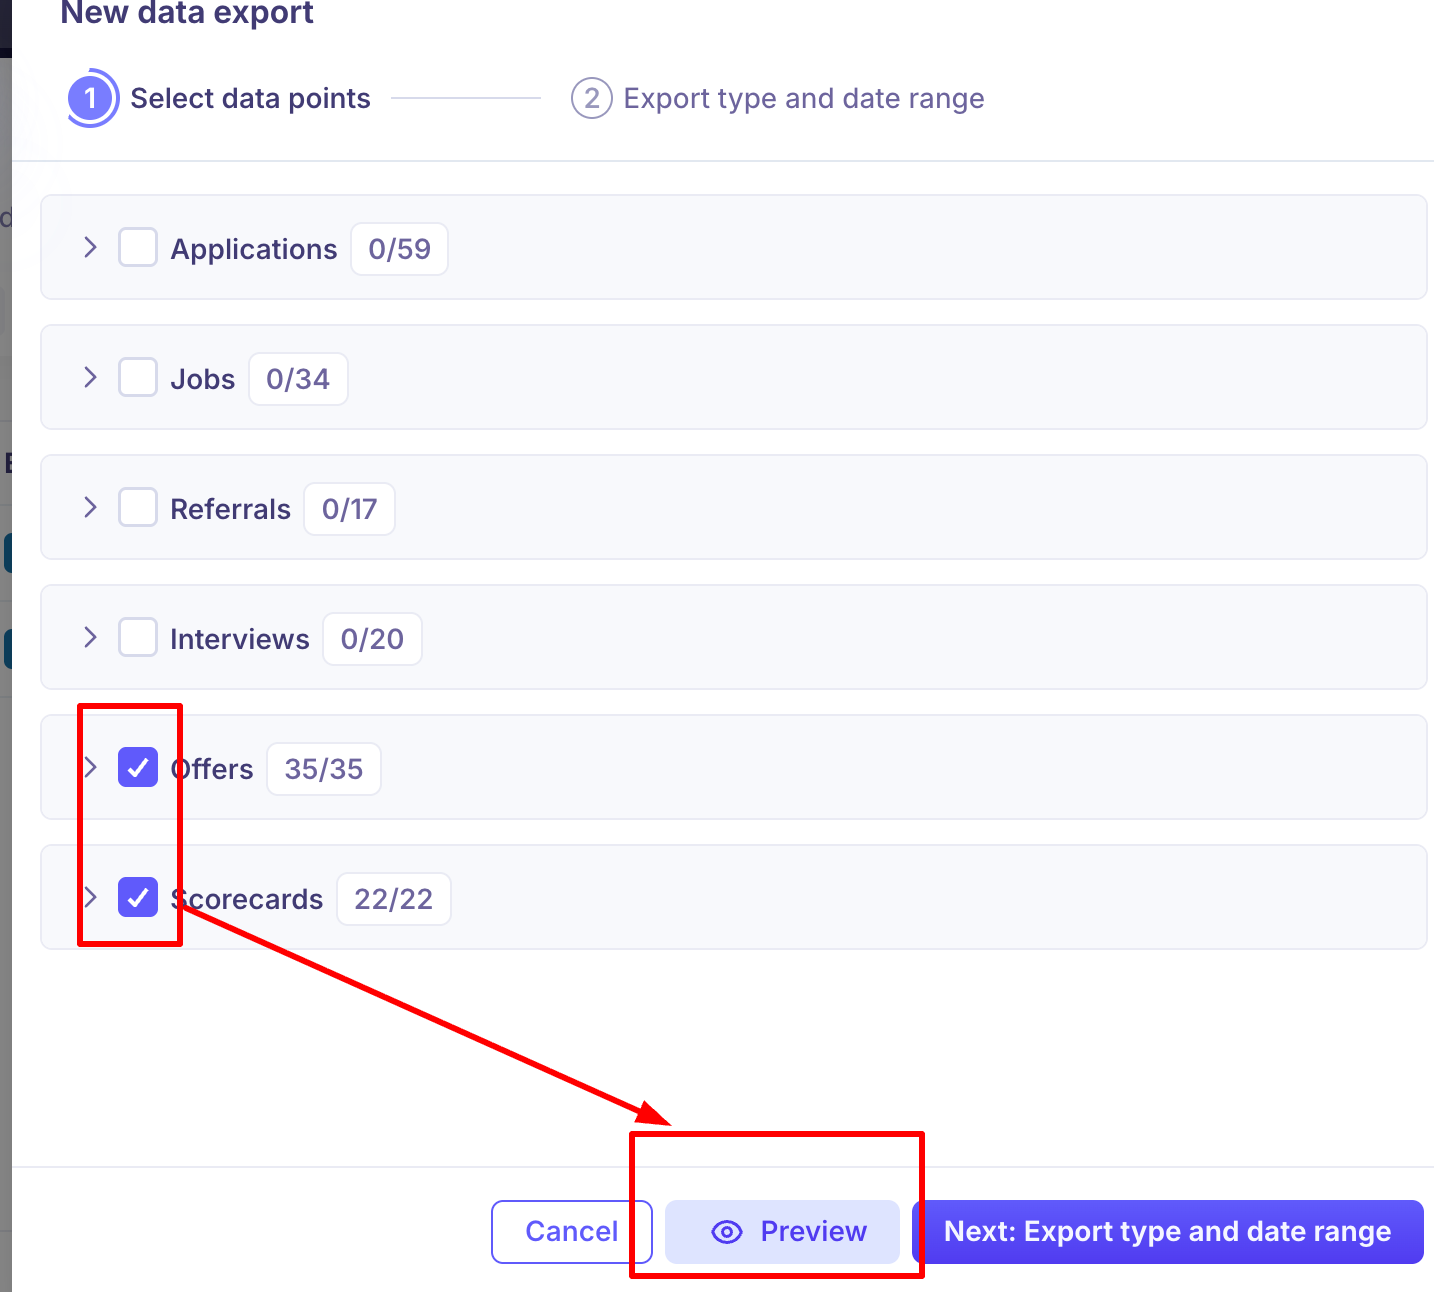
Under Select data points, open each module you want to include: Applications, Jobs, Referrals, Interviews, Offers, or Scorecards.
Check the specific fields you want in the export from each module.
Click Preview if you want to see a sample of the export before saving it.
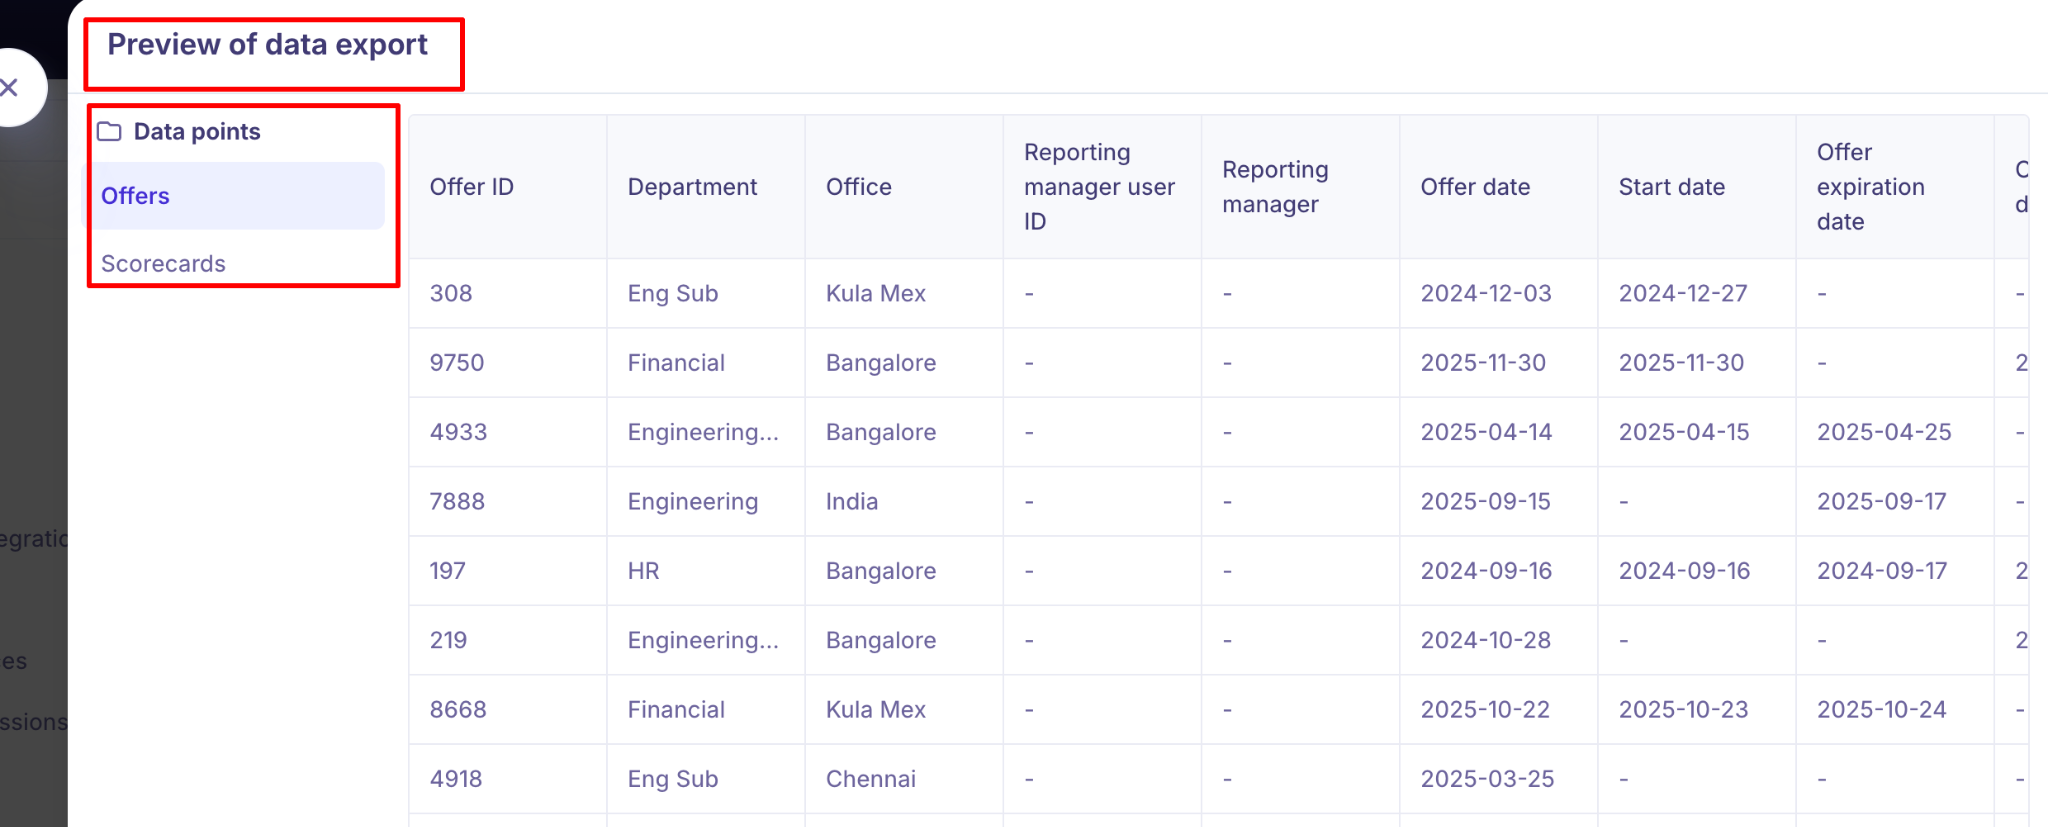
After selecting your data points, you can click the Preview button to see a sample of the data 20 count) that will be included in your export. This helps you verify that you have selected the correct data before proceeding.
If you select multiple data points, the preview will display all selected data types in separate tabs, allowing you to review each category individually.
Step 3: Set the schedule, date range, and recipients
Under Export details, enter an Export name and set Export type > On Demand or Scheduled export.
Choose a date range: a preset like Last 7 days, Last month, or Last quarter, All time, or a custom range.
Choose a frequency: Daily, Weekly, or Monthly. Weekly exports let you pick a day of the week; monthly exports let you pick a day of the month. Both let you set a delivery time.
Under Recipients, add the teammates who should receive the export. You can also type in an email address directly to send it to someone outside Kula.
Save the export.
Managing scheduled exports
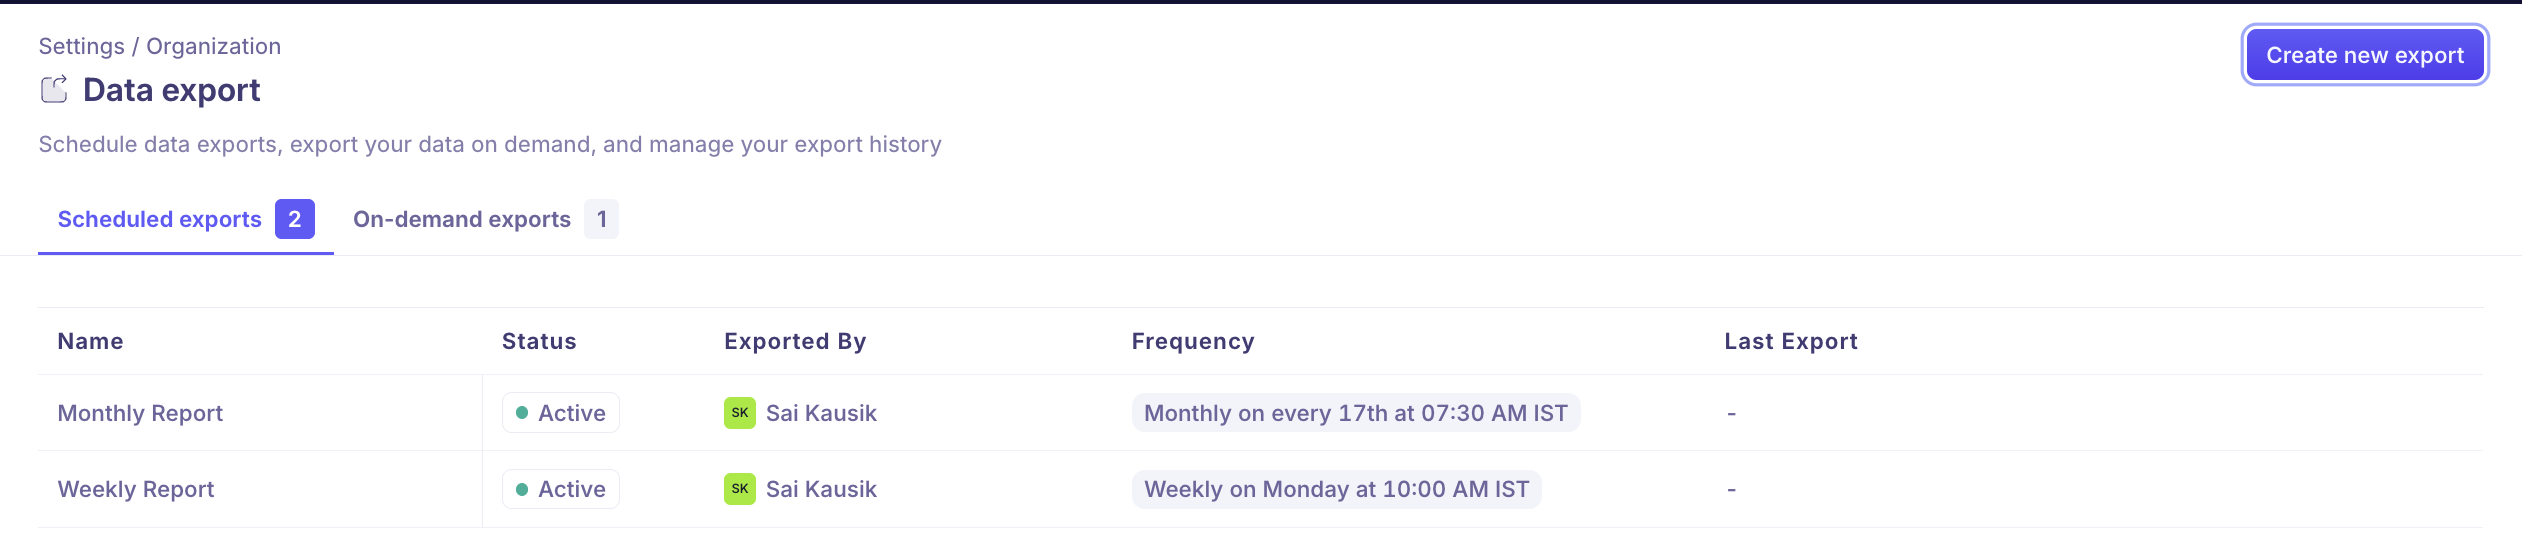
The Scheduled tab lists every scheduled export with its status (Active or Paused), who created it, its frequency, and when it last ran. From here you can:
Click the export's name to see which modules and fields it includes.
Pause or resume it, to stop or restart deliveries without deleting the configuration.
Delete it permanently.
Note: Create and manage data exports and View data exports are permissions in a role's settings, under the Data exports group. You need Create and manage data exports to set up, edit, pause, or delete a scheduled export; View data exports alone lets you see them. By default, only the built-in Super Admin and Admin roles have either permission.
Need Help?
If you have questions or need assistance with setup, feel free to reach out to us at support@kula.ai or use the in-app chat for assistance.