Data Export
Last updated: February 13, 2026
The Data Export feature in Kula allows you to extract and download your recruitment data in a flexible, user-friendly way. Whether you need to export data immediately or set up recurring scheduled exports, Kula provides comprehensive options to manage your data export needs.
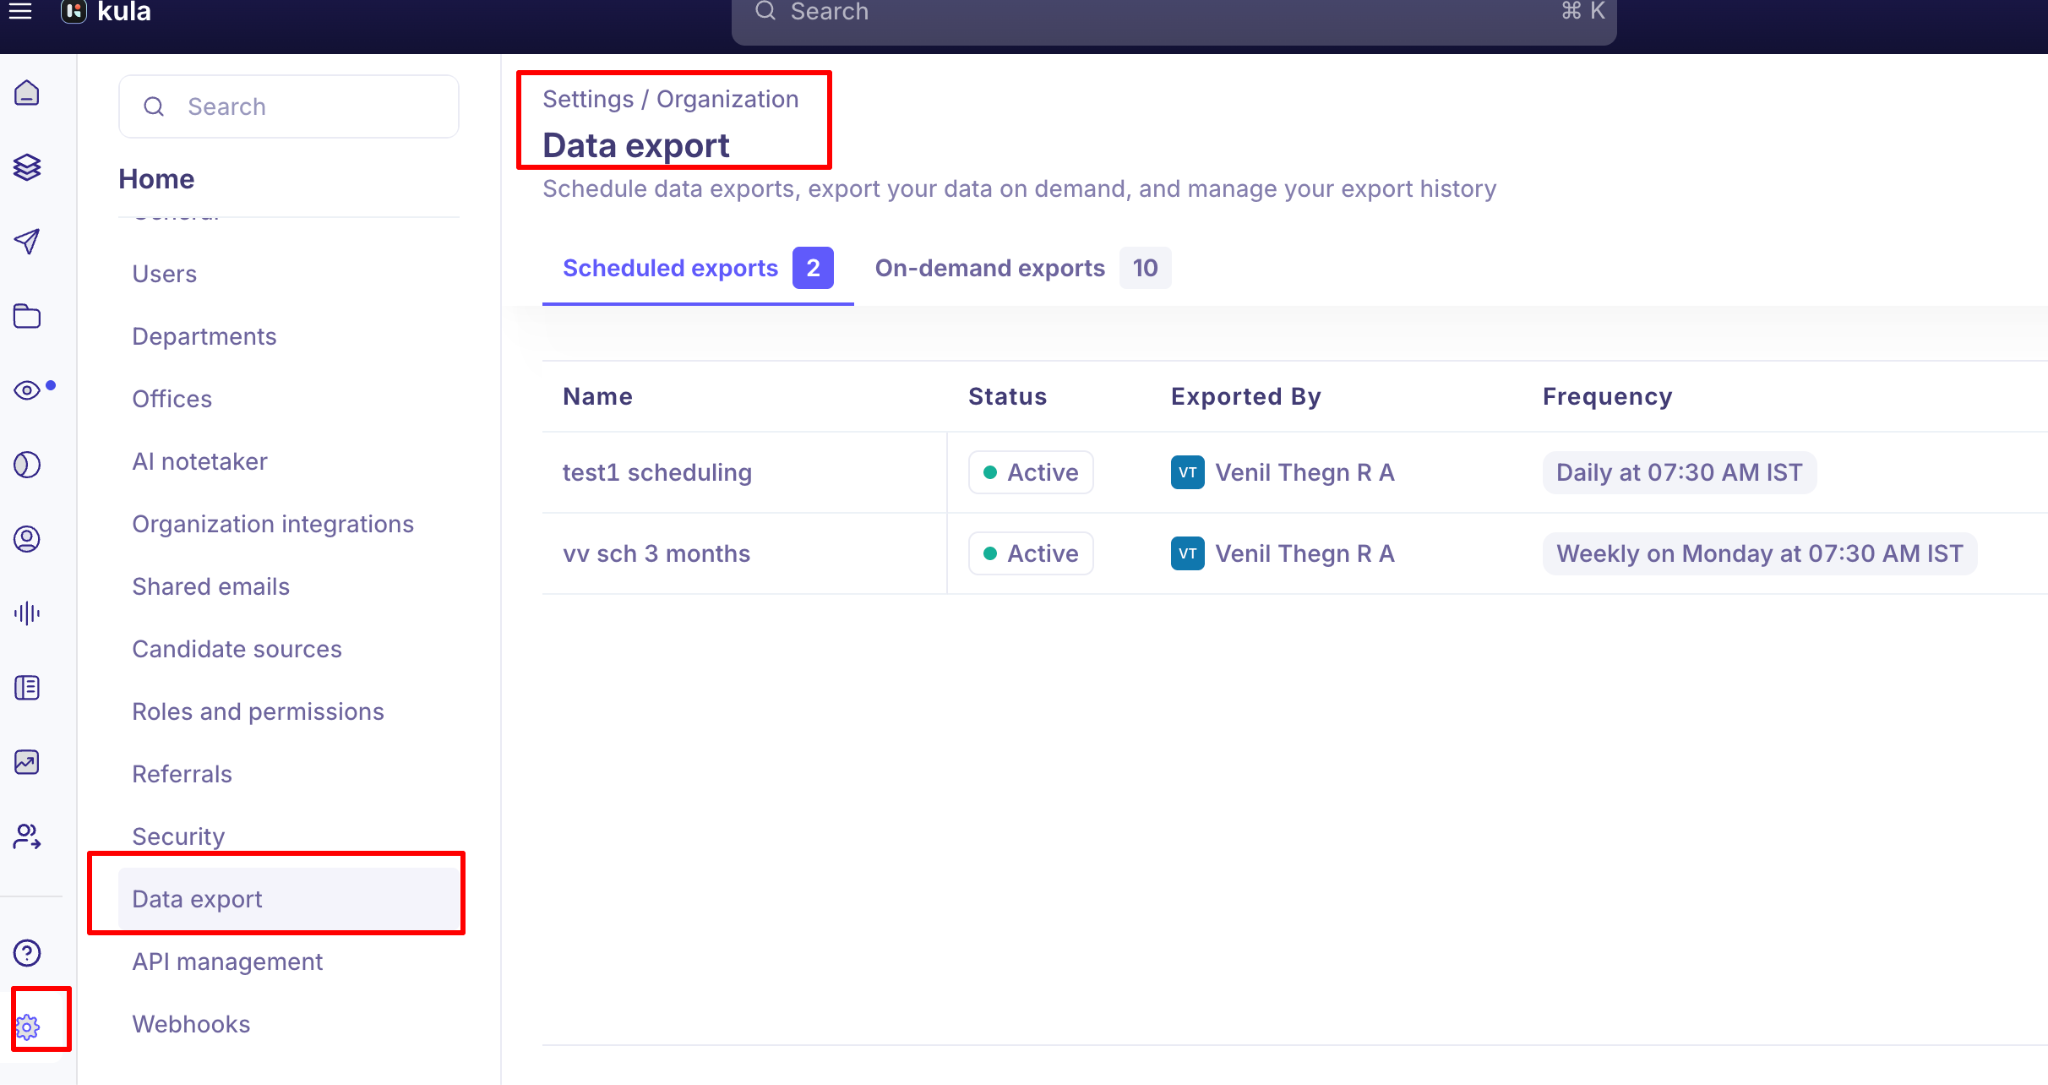
To access the Data Export feature, navigate to Settings → Data export
Export Types
Kula offers two types of data exports:
On-Demand Exports: On-demand exports allow you to immediately export your data whenever you need it. These exports are perfect for:
One-time data extraction needs.
Ad-hoc reporting requirements.
Quick data snapshots for analysis
Note: On-demand exports are available for download for 7 days after they are created. After this period, they are automatically removed from the system.
Scheduled Exports: Scheduled exports automate your data export process by running at regular intervals. You can configure:
Daily, weekly, or monthly export frequency.
Specific days of the week.
Exact time and timezone.
Email recipients who will receive the export
Note: For scheduled exports, the date range is based on when the export runs
Creating a New Export
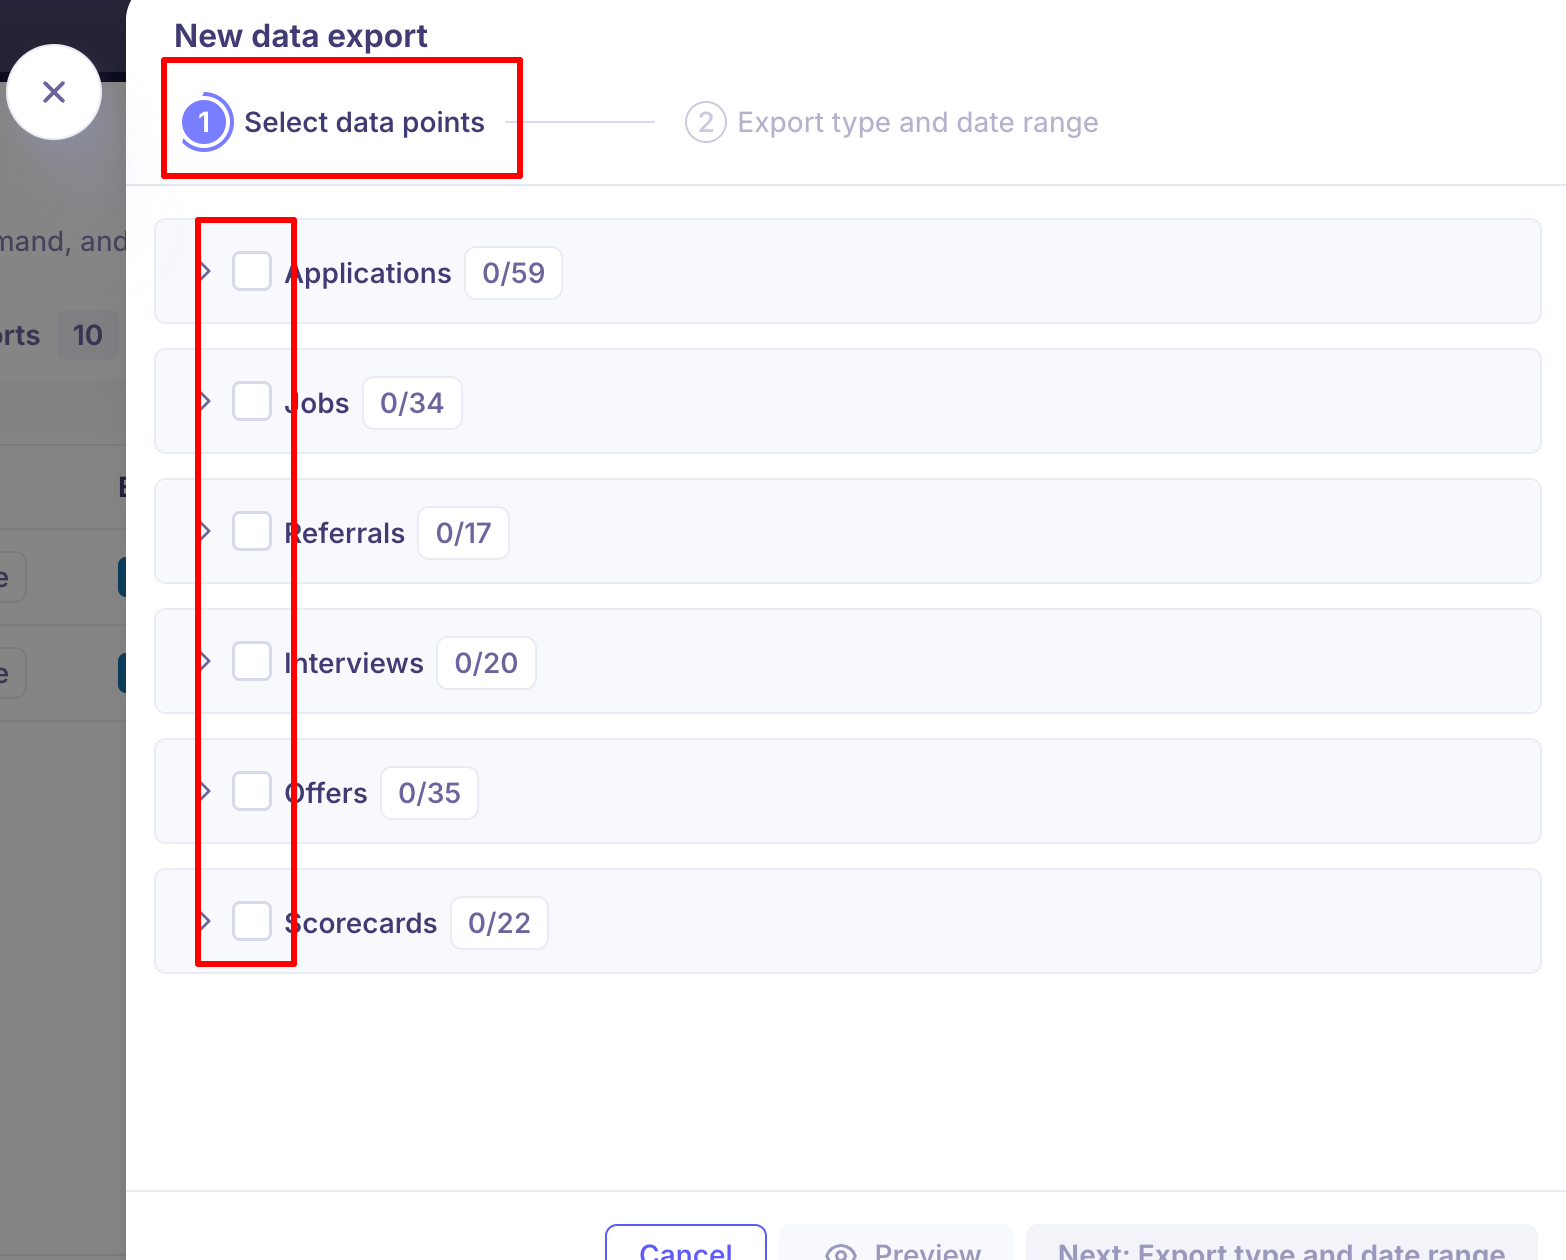
To create a new data export, click the "Create new export button" in the top-right corner of the Data Export page.

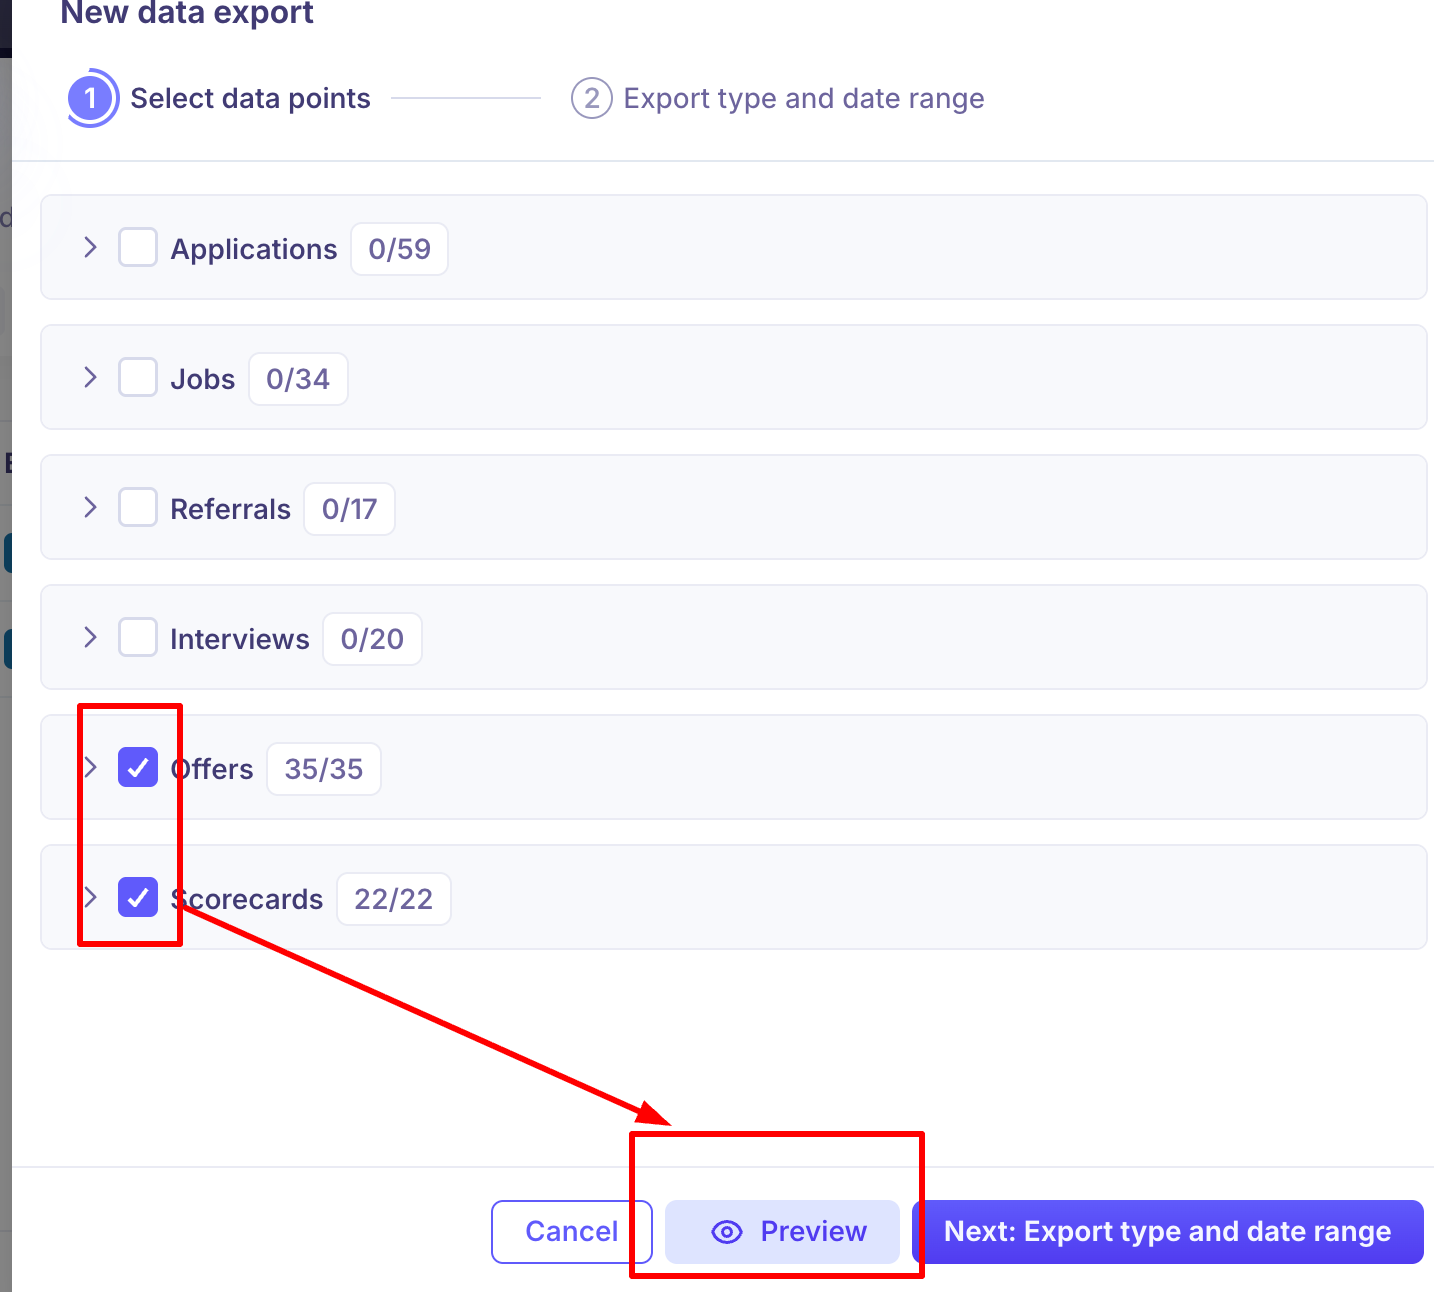
Select Data Points: You can select multiple data points in a single export. Choose which data you want to export from the following options:
Applications - Applicant information, Activities within the job, job details,Hires rejections and offers, Application details.
Jobs - Job info, Job post, Hiring team.
Referrals - Referral information, Applicant information, Job information.
Interviews - Interview information, Job information, Applicant information.
Offers - Offer information, Job information, Applicant information.
Scorecards - Scorecard information, Job & Activity information, Applicant information.
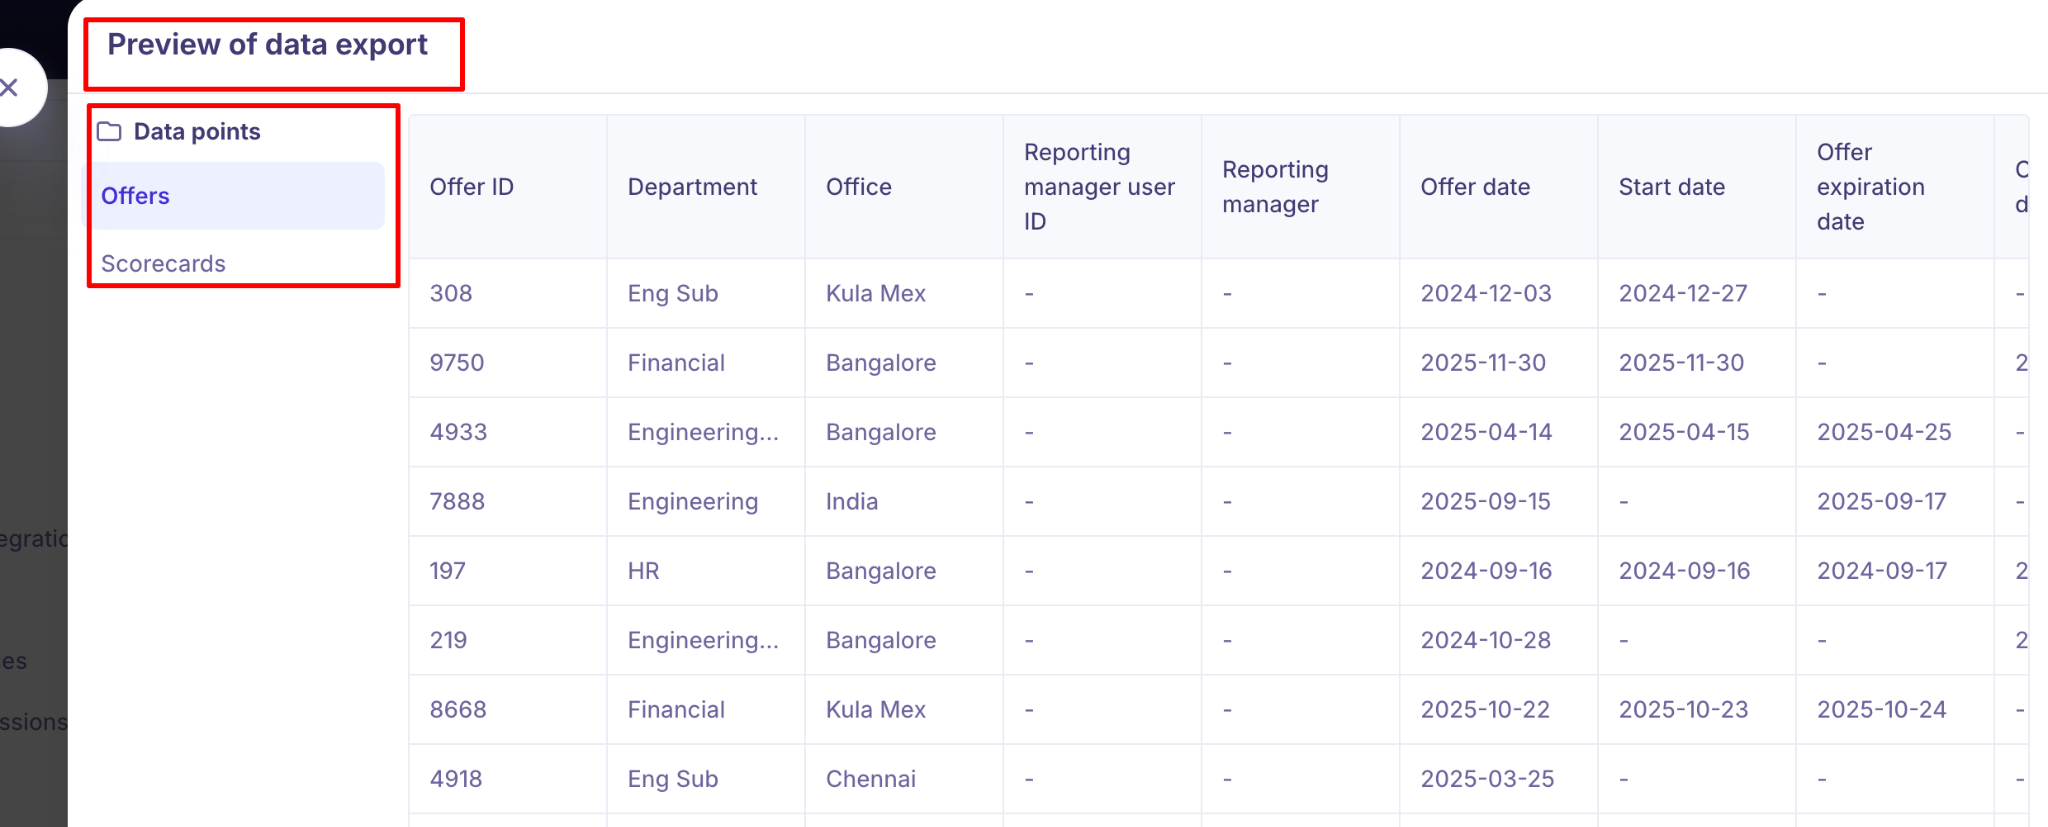
Preview Your Export.
After selecting your data points, you can click the Preview button to see a sample of the data( 20 count) that will be included in your export. This helps you verify that you have selected the correct data before proceeding.
If you select multiple data points, the preview will display all selected data types in separate tabs, allowing you to review each category individually.
Export Type and Date Range: After selecting your data points, configure your export settings:
Export Details.
Export Name: Give your export a descriptive name to easily identify it later.
Export Type: Choose between On-demand export or Scheduled export.
Date Range: Select the date range for the data you want to export.
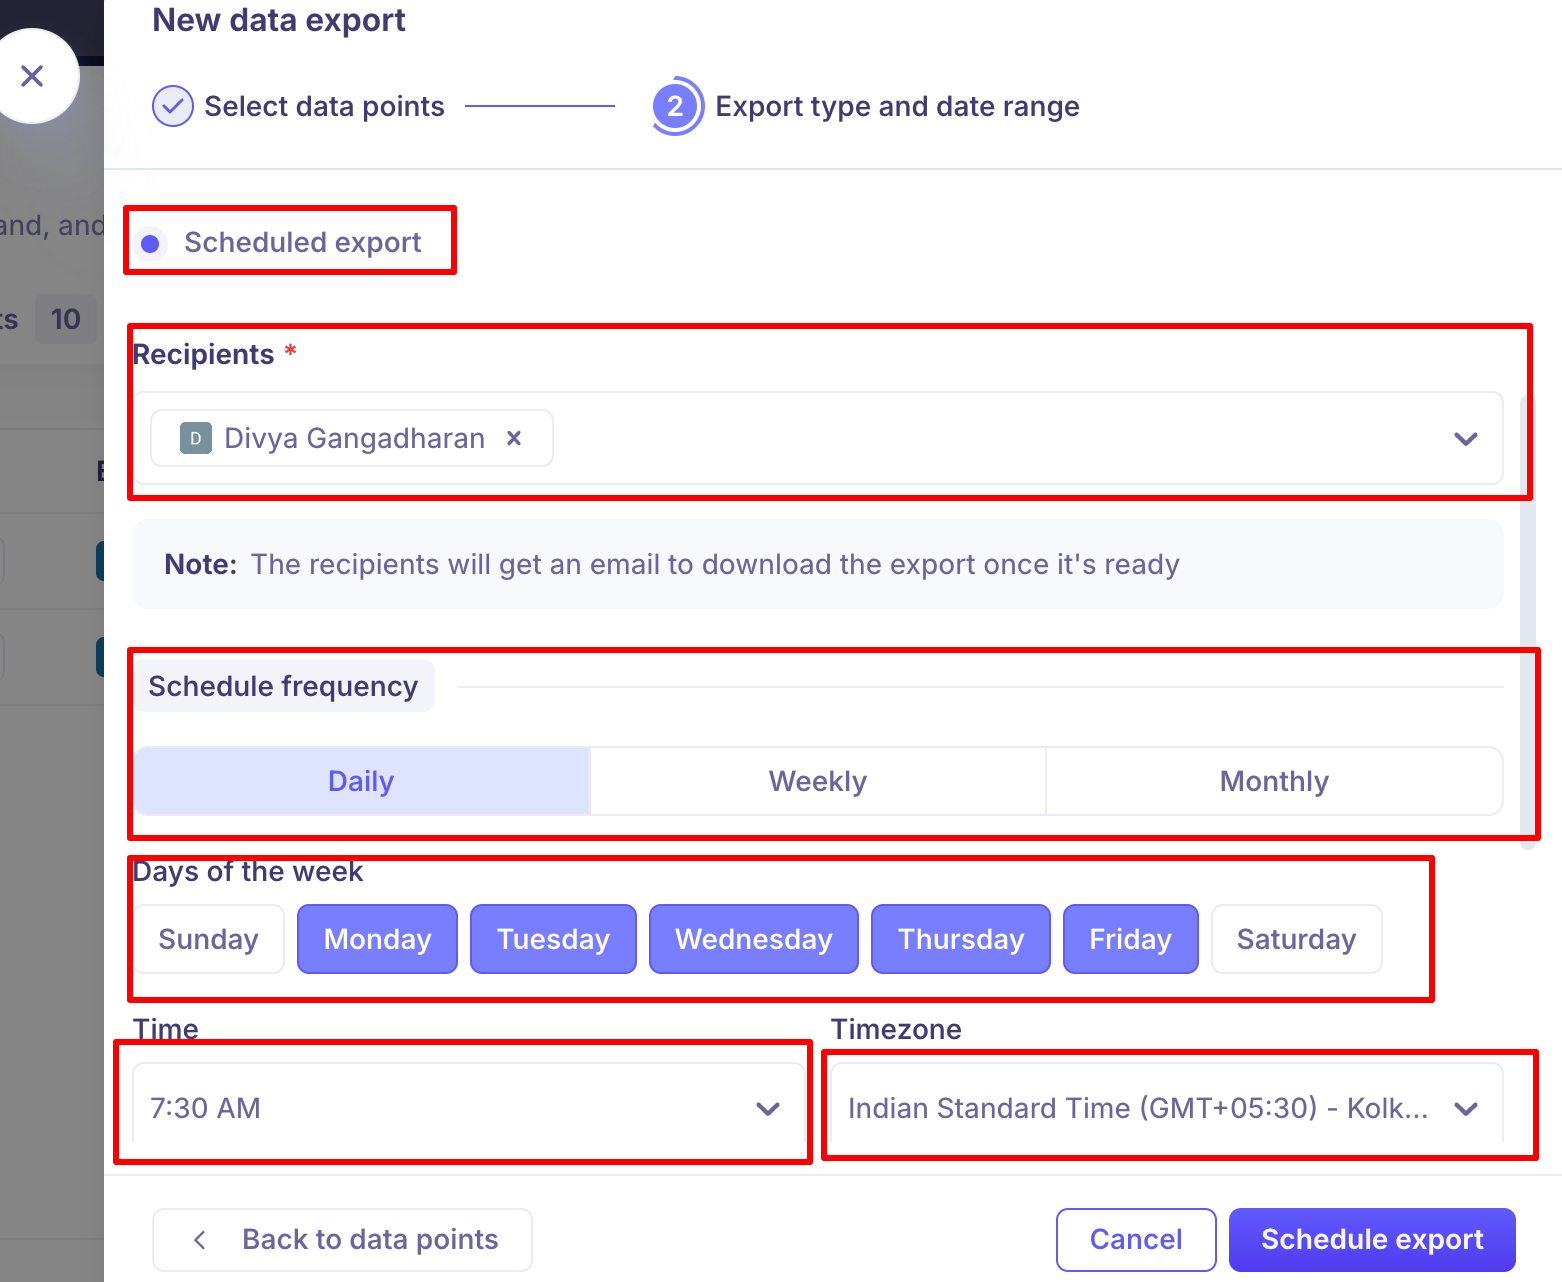
Scheduled Export Configuration: If you choose Scheduled export, you will need to configure additional settings:
Recipients: Add the email addresses of team members who should receive the export. Recipients will receive an email notification with a download link once the scheduled export is ready.
Schedule Frequency: Choose how often the export should run:
Daily: Export runs every day at the specified time
Weekly: Export runs on selected days of the week
Monthly: Export runs once per month on the selected day
Days of the Week: For daily or weekly schedules, select which days of the week the export should run. You can select multiple days for weekly exports.
Time and Timezone: Set the exact time when the export should run and specify the timezone. This ensures the export runs at the correct time regardless of your location.
Date Range for Scheduled Exports: For scheduled exports, the date range is based on when the export runs, not when you create it. Common options include:
Last 24 hours
Last 7 days
Last 30 days
Custom date range
Managing Your Exports
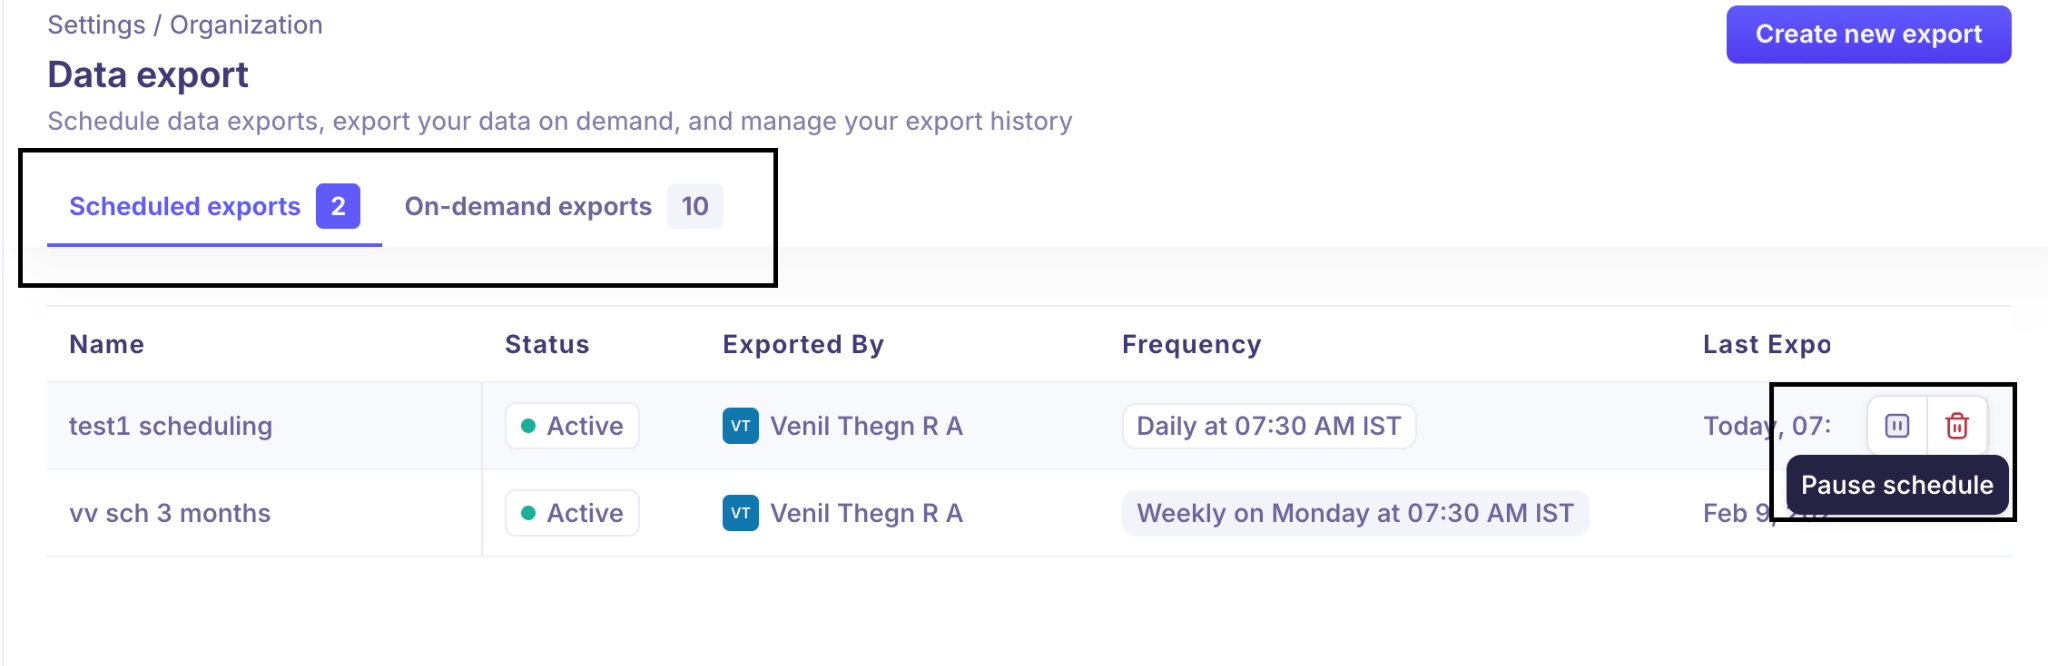
Export History: The Data Export page displays all your exports in two tabs:
Scheduled exports: Shows all your recurring scheduled exports with their status, frequency, and last export date
On-demand exports: Shows all your one-time exports with download links (available for 7 days)
Export Information: Each export displays the following information:
Status: Active or inactive (for scheduled exports)
Exported By: The user who created the export
Date Range: The date range of data included in the export (for on-demand exports)
Frequency: How often the export runs (for scheduled exports)
Exported On: When the export was created or last run
Download: Download link (available for 7 days for on-demand exports)
Managing Scheduled Exports: For scheduled exports, you can:
Edit: Modify the export settings, schedule, or recipients
Pause: Temporarily stop the export from running without deleting it
Delete: Permanently remove the scheduled export
Best Practices
Use descriptive names: Give your exports clear, descriptive names that indicate what data they contain and their purpose.
Preview before exporting: Always use the preview feature to verify the selected data points
Download promptly: Remember that on-demand exports are only available for 7 days, so download them as soon as you receive the notification
Set appropriate date ranges: For scheduled exports, choose date ranges that match your reporting needs
Consider timezone: When scheduling exports, ensure the timezone setting matches your team’s working hours.
Review scheduled exports regularly: Periodically check your scheduled exports to ensure they are still needed and running correctly
Tips and Troubleshooting
Scheduled export recipients receive an email notification when each export is ready to download.
You can export multiple data points in a single export, which will create a combined file with separate sheets or sections for each data type.
If you need to export data from more than one date range, you’ll need to create separate exports for each range.
Summary
Kula’s Data Export feature provides flexible options for extracting your recruitment data. Whether you need immediate access through on-demand exports or regular automated reporting through scheduled exports, the platform makes it easy to get the data you need, when you need it.
By following the steps outlined in this guide and implementing the best practices, you can efficiently manage your data exports and ensure your team always has access to the latest recruitment insights.
Need Help?
If you have questions or need assistance with setup, feel free to reach out to us at support@kula.ai or use the in-app chat for assistance.