Send Offers
Last updated: July 9, 2026
Sending an offer letter is the final step before onboarding a candidate. Kula uses a 3-step workflow to create and send professional offers: fill in employment details, select an offer template, and route through approvals. Once sent via DocuSign, you can track offer status in real-time and automate next steps when candidates accept. This article explains how to create and send offers efficiently.
This article covers:
Starting the 3-step offer creation flow
Step 1: Filling in offer details and compensation
Step 2: Selecting offer letter templates and attaching documents
Step 3: Routing through approvals and sending
Tracking offer status and candidate responses
Frequently asked questions
Starting the 3-Step Offer Creation Flow
Kula guides you through offer creation with a simple 3-step modal: Details, Offer Letter Template, and Approval. You can save drafts at any time and return to complete the offer later.
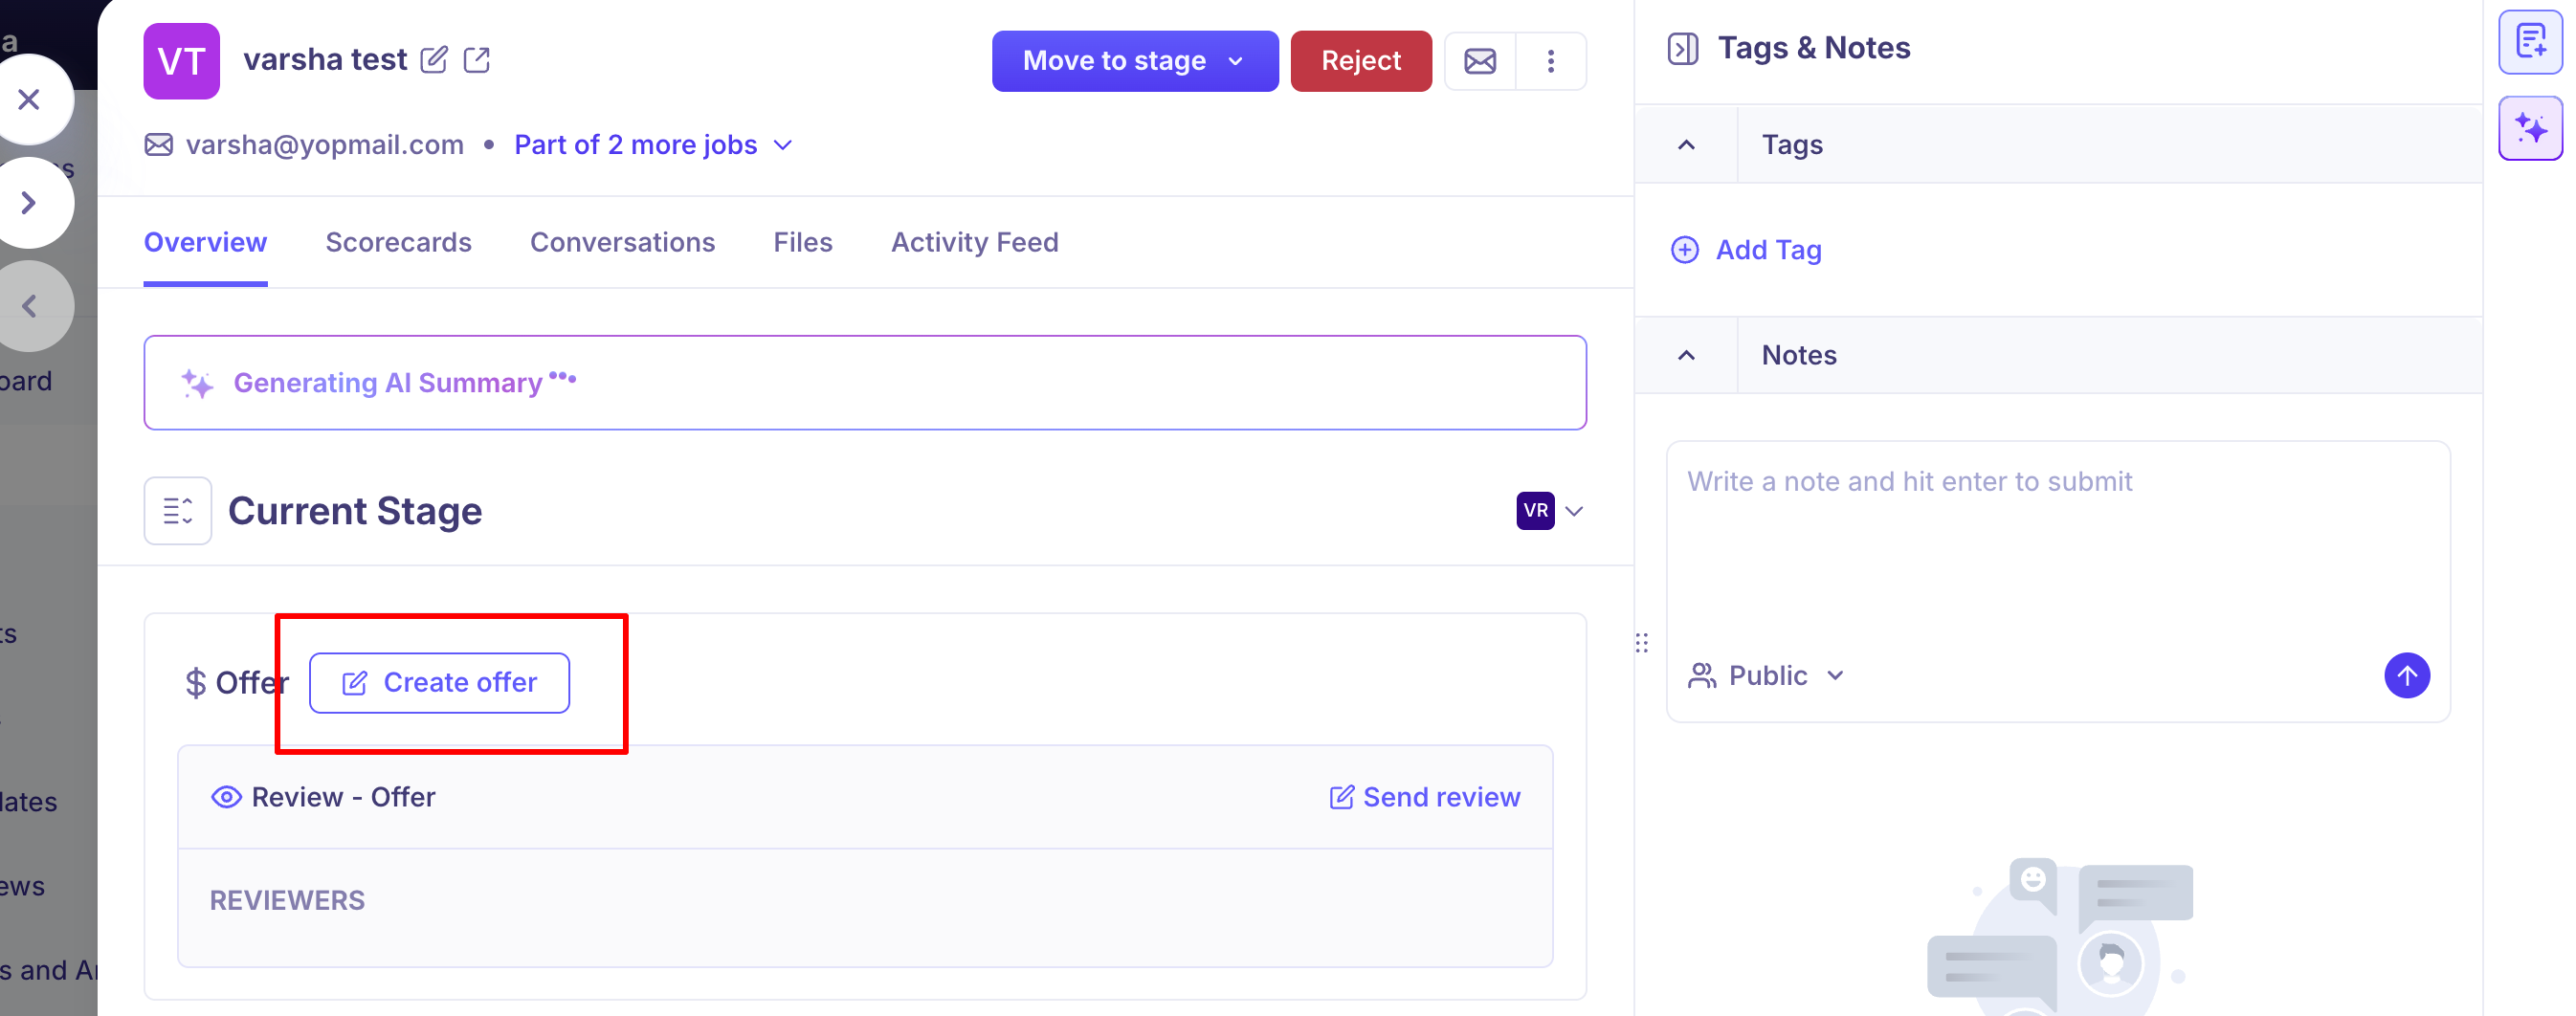
Navigate to the candidate's profile.
In the "Current Stage" section, locate the "Offer" card.
Click "Create offer" to open the offer creation modal.
You'll see the 3-step flow with Step 1 (Details) active. Begin filling in the required information.
Step 1: Filling in Offer Details and Compensation
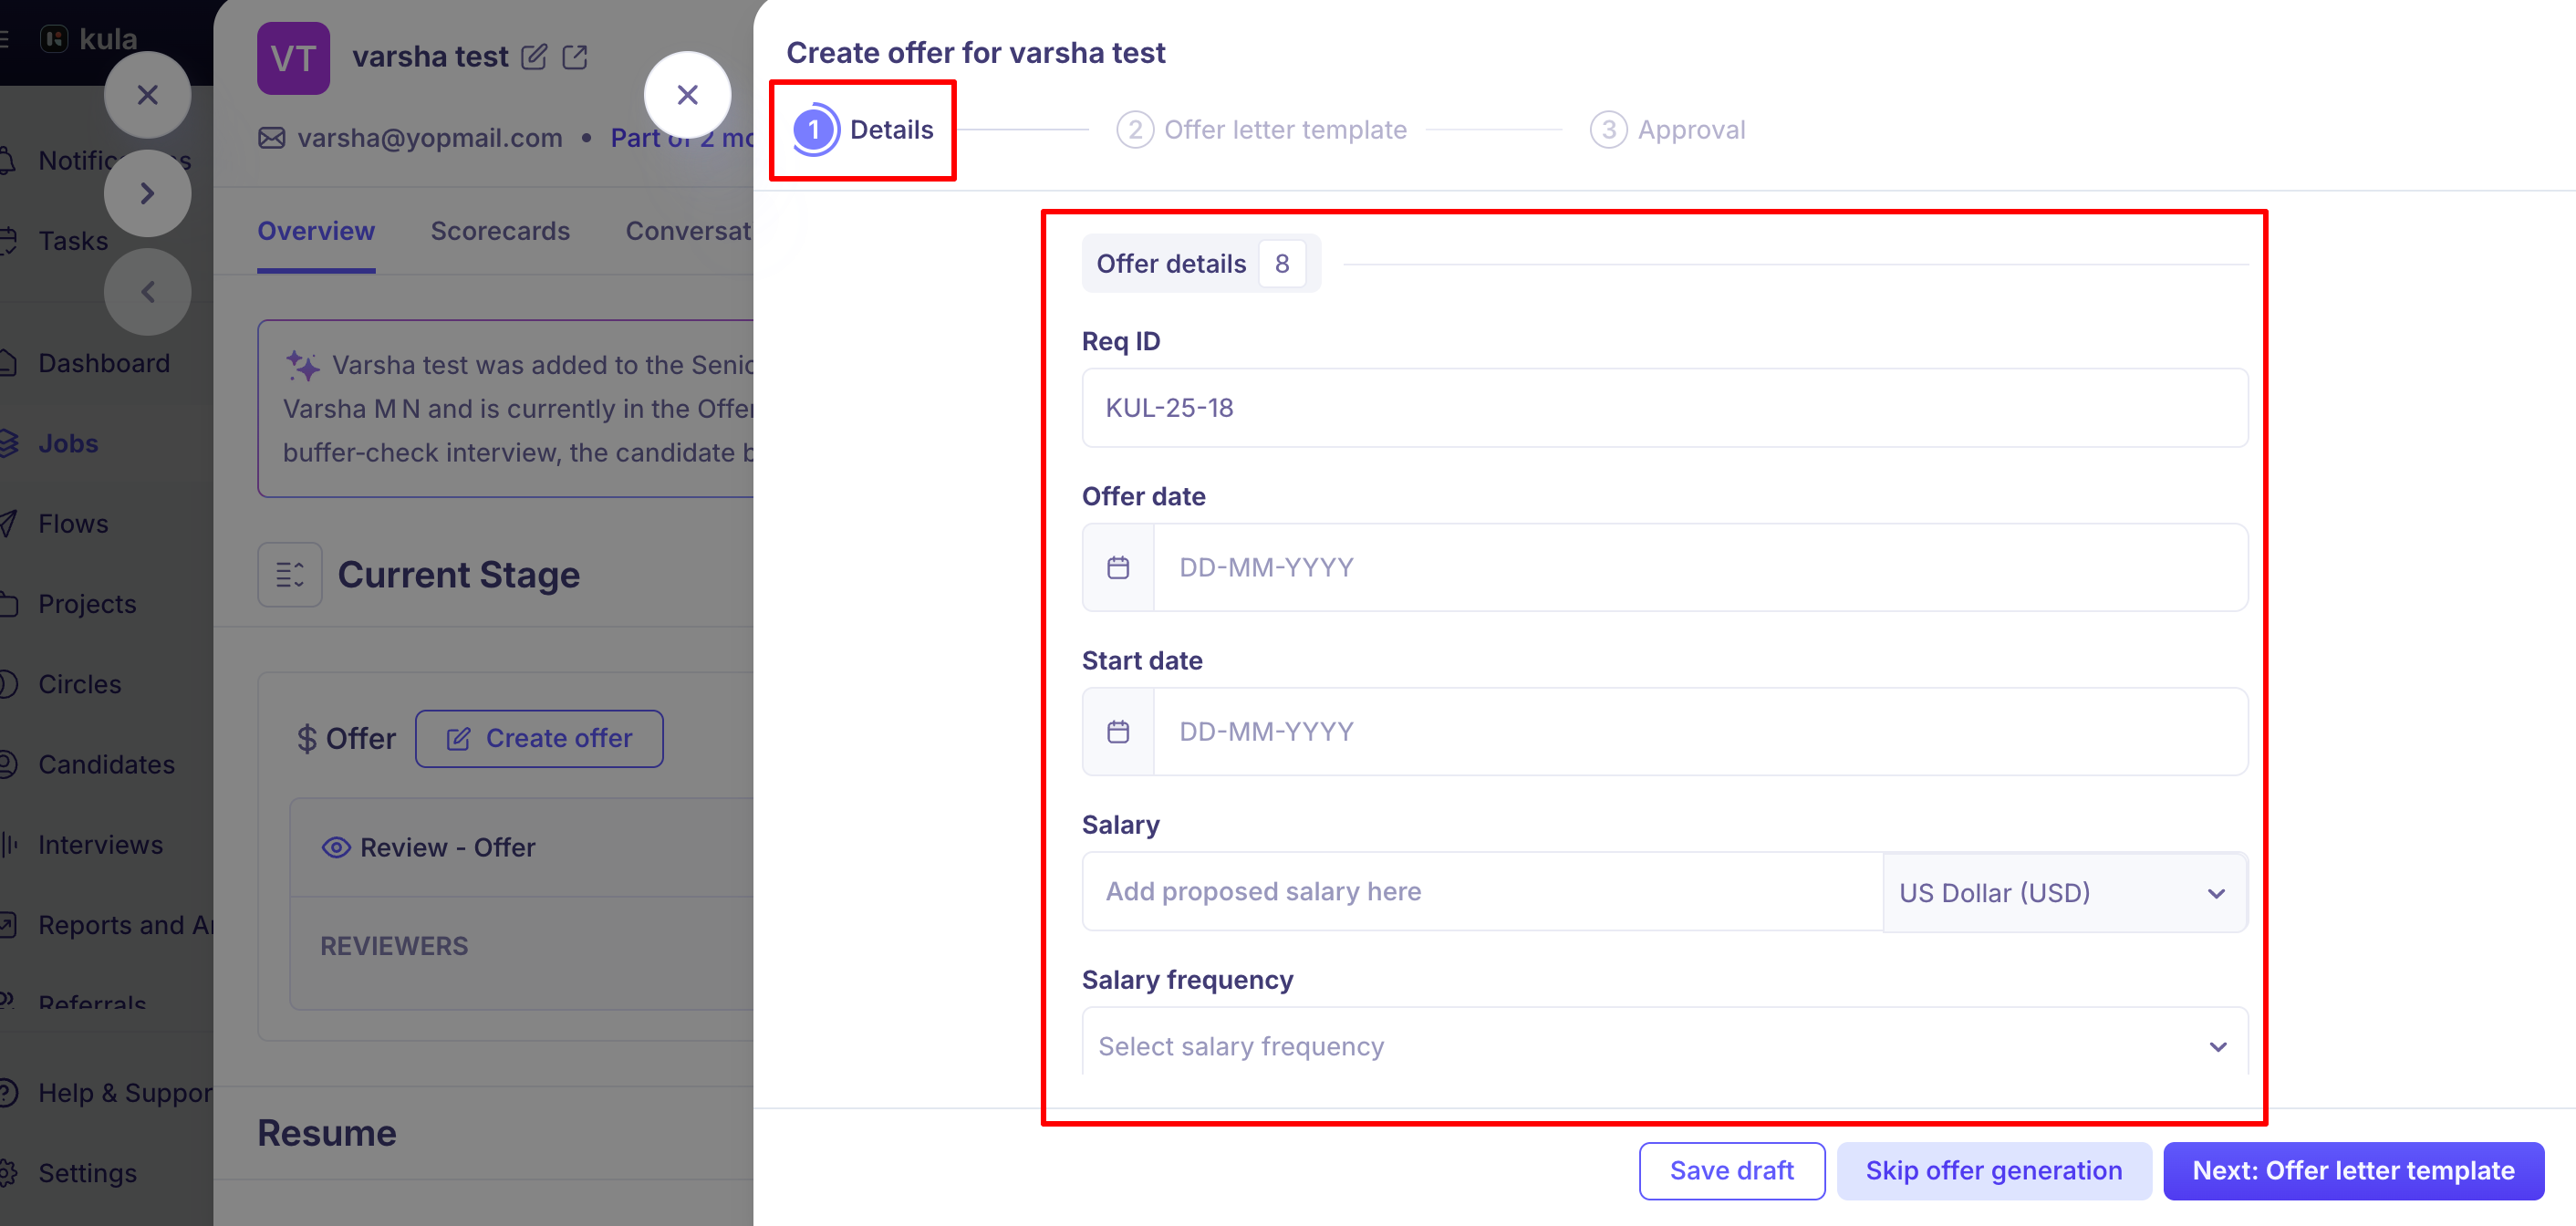
The first step captures the candidate's employment terms and compensation. All fields shown are configured by your organization admin.
On the Details tab, you'll see an "Offer details" section showing the number of fields to fill (e.g., "5" fields).
Fill in the required fields:
Requisition (Required): Select the job requisition this offer is for. Click "See all requisitions" to browse available openings.
Offer Date: The date the offer is being made (format: DD-MM-YYYY)
Start Date: When the candidate will begin employment (format: DD-MM-YYYY)
Salary: Base annual or hourly compensation. Select currency from the dropdown (e.g., US Dollar USD).
Salary Frequency: How often the salary is paid (annual, monthly, hourly, etc.)
Additional custom fields may appear depending on your organization's configuration (bonus, equity, benefits, location, etc.).
Click "Save draft" to save your progress and return later
Click "Next: Offer letter template" to proceed to Step 2
Once you click Next, all details are saved and you move to template selection.
Tip: Double-check all details before proceeding. Salary, start date, and offer date will populate the offer template. You can return to edit these on Step 1 if needed.
Step 2: Selecting offer letter templates and attaching documents
Step 2 is where you choose the offer document template and attach any additional files (handbooks, agreements, etc.) that should be signed along with the offer.
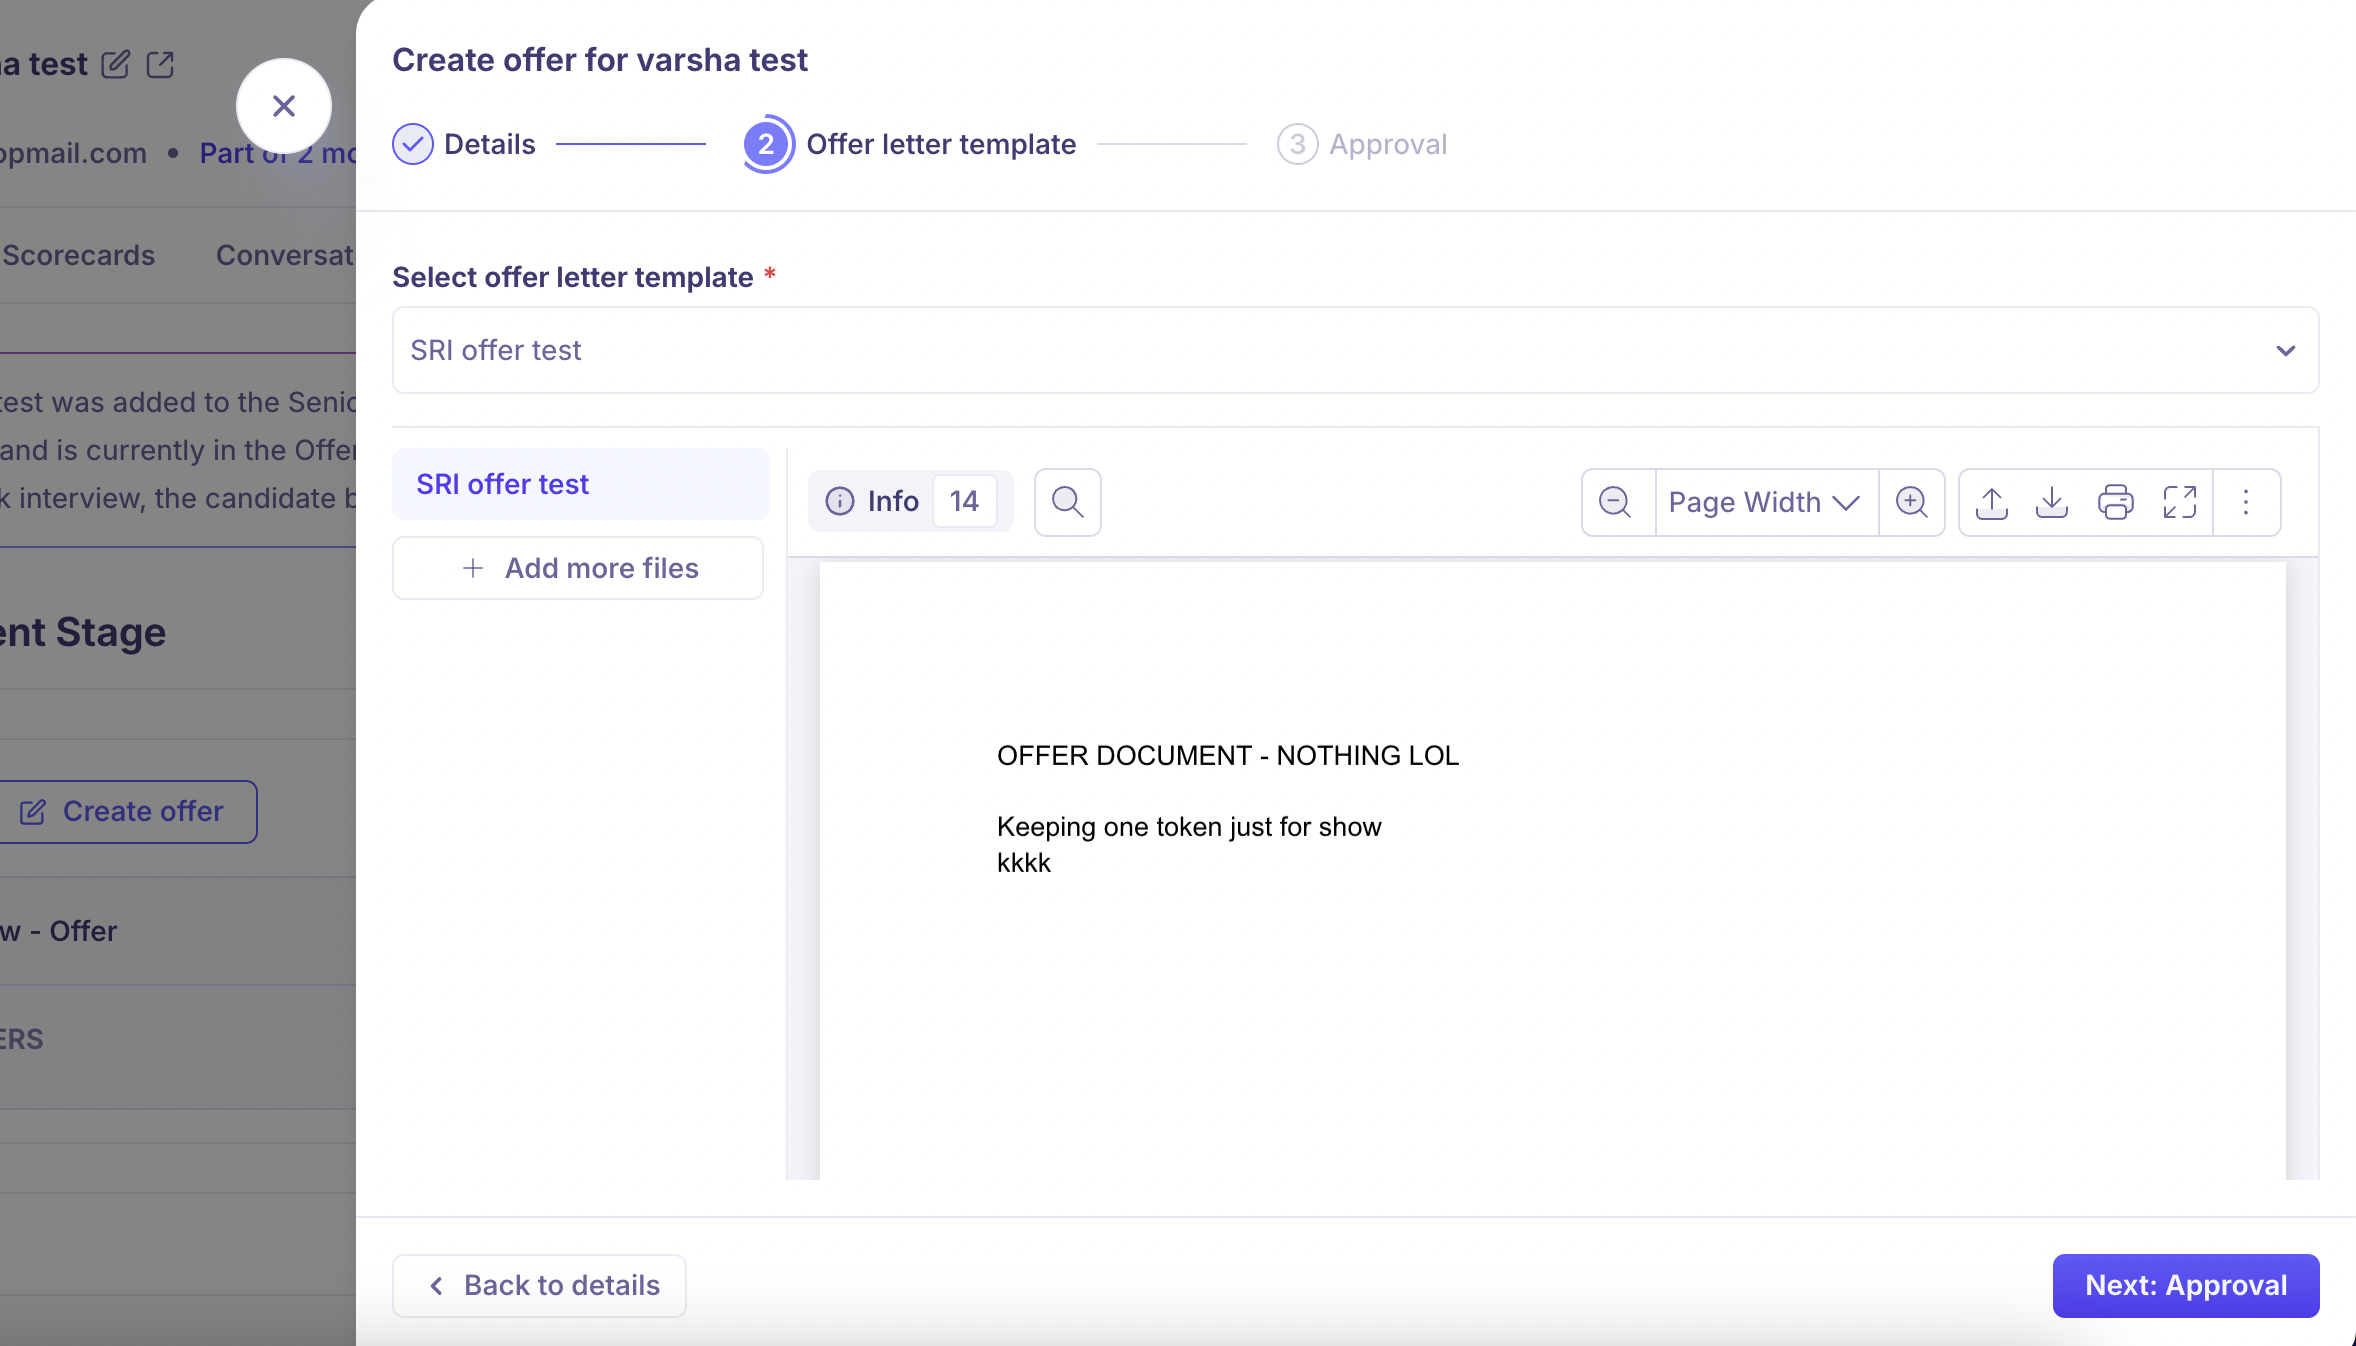
On the "Offer letter template" tab, select a template from the dropdown. Required field.
Once selected, a preview of the offer letter appears showing how it will look with the candidate's details populated.
To attach additional documents (optional): Click "Add more files" button
Upload documents like employee handbook, benefits guide, NDA, arbitration agreement, or other standard documents
These files will be included in the DocuSign envelope alongside the offer letter
Click "Next: Approval" to proceed to Step 3
Step 3: Choosing Flexible Approval Order and Sending
Step 3 lets you choose your approval workflow: approve compensation and terms first, then generate the letter, or generate the letter first and approve after. Choose whatever fits your process.
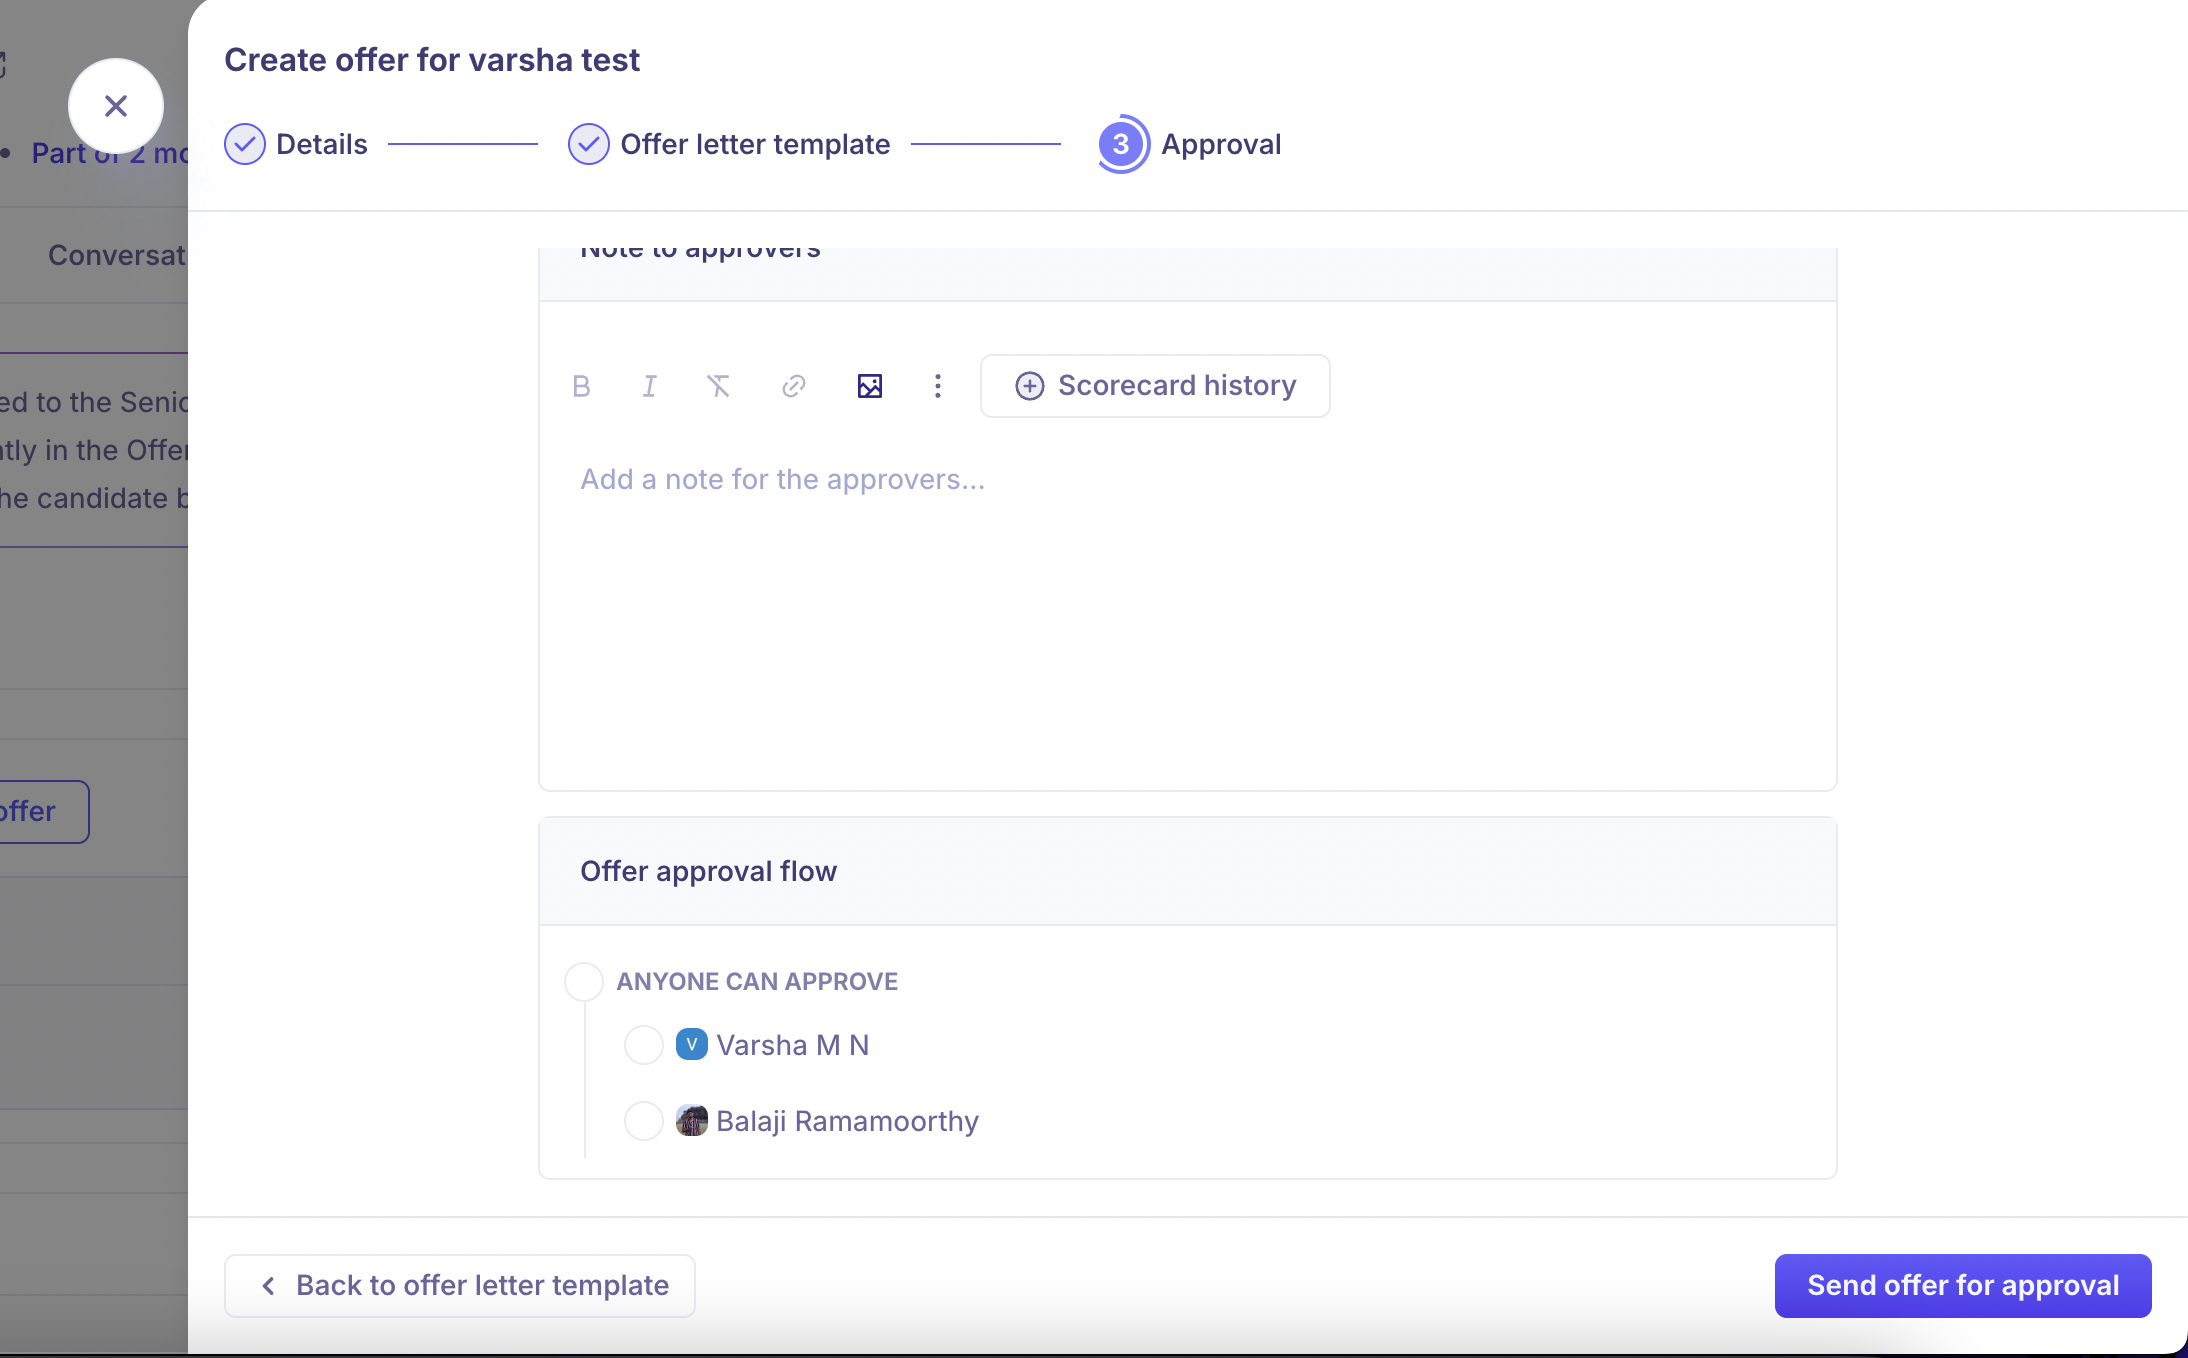
On the "Approval" tab, you can add a note to Approvers
Click "Send offer for Approval" to proceed
The offer moves to the next stage of your workflow.
Tip: Choose the approval order that matches your hiring team's workflow. Some teams prefer approving numbers first; others prefer reviewing the full letter.
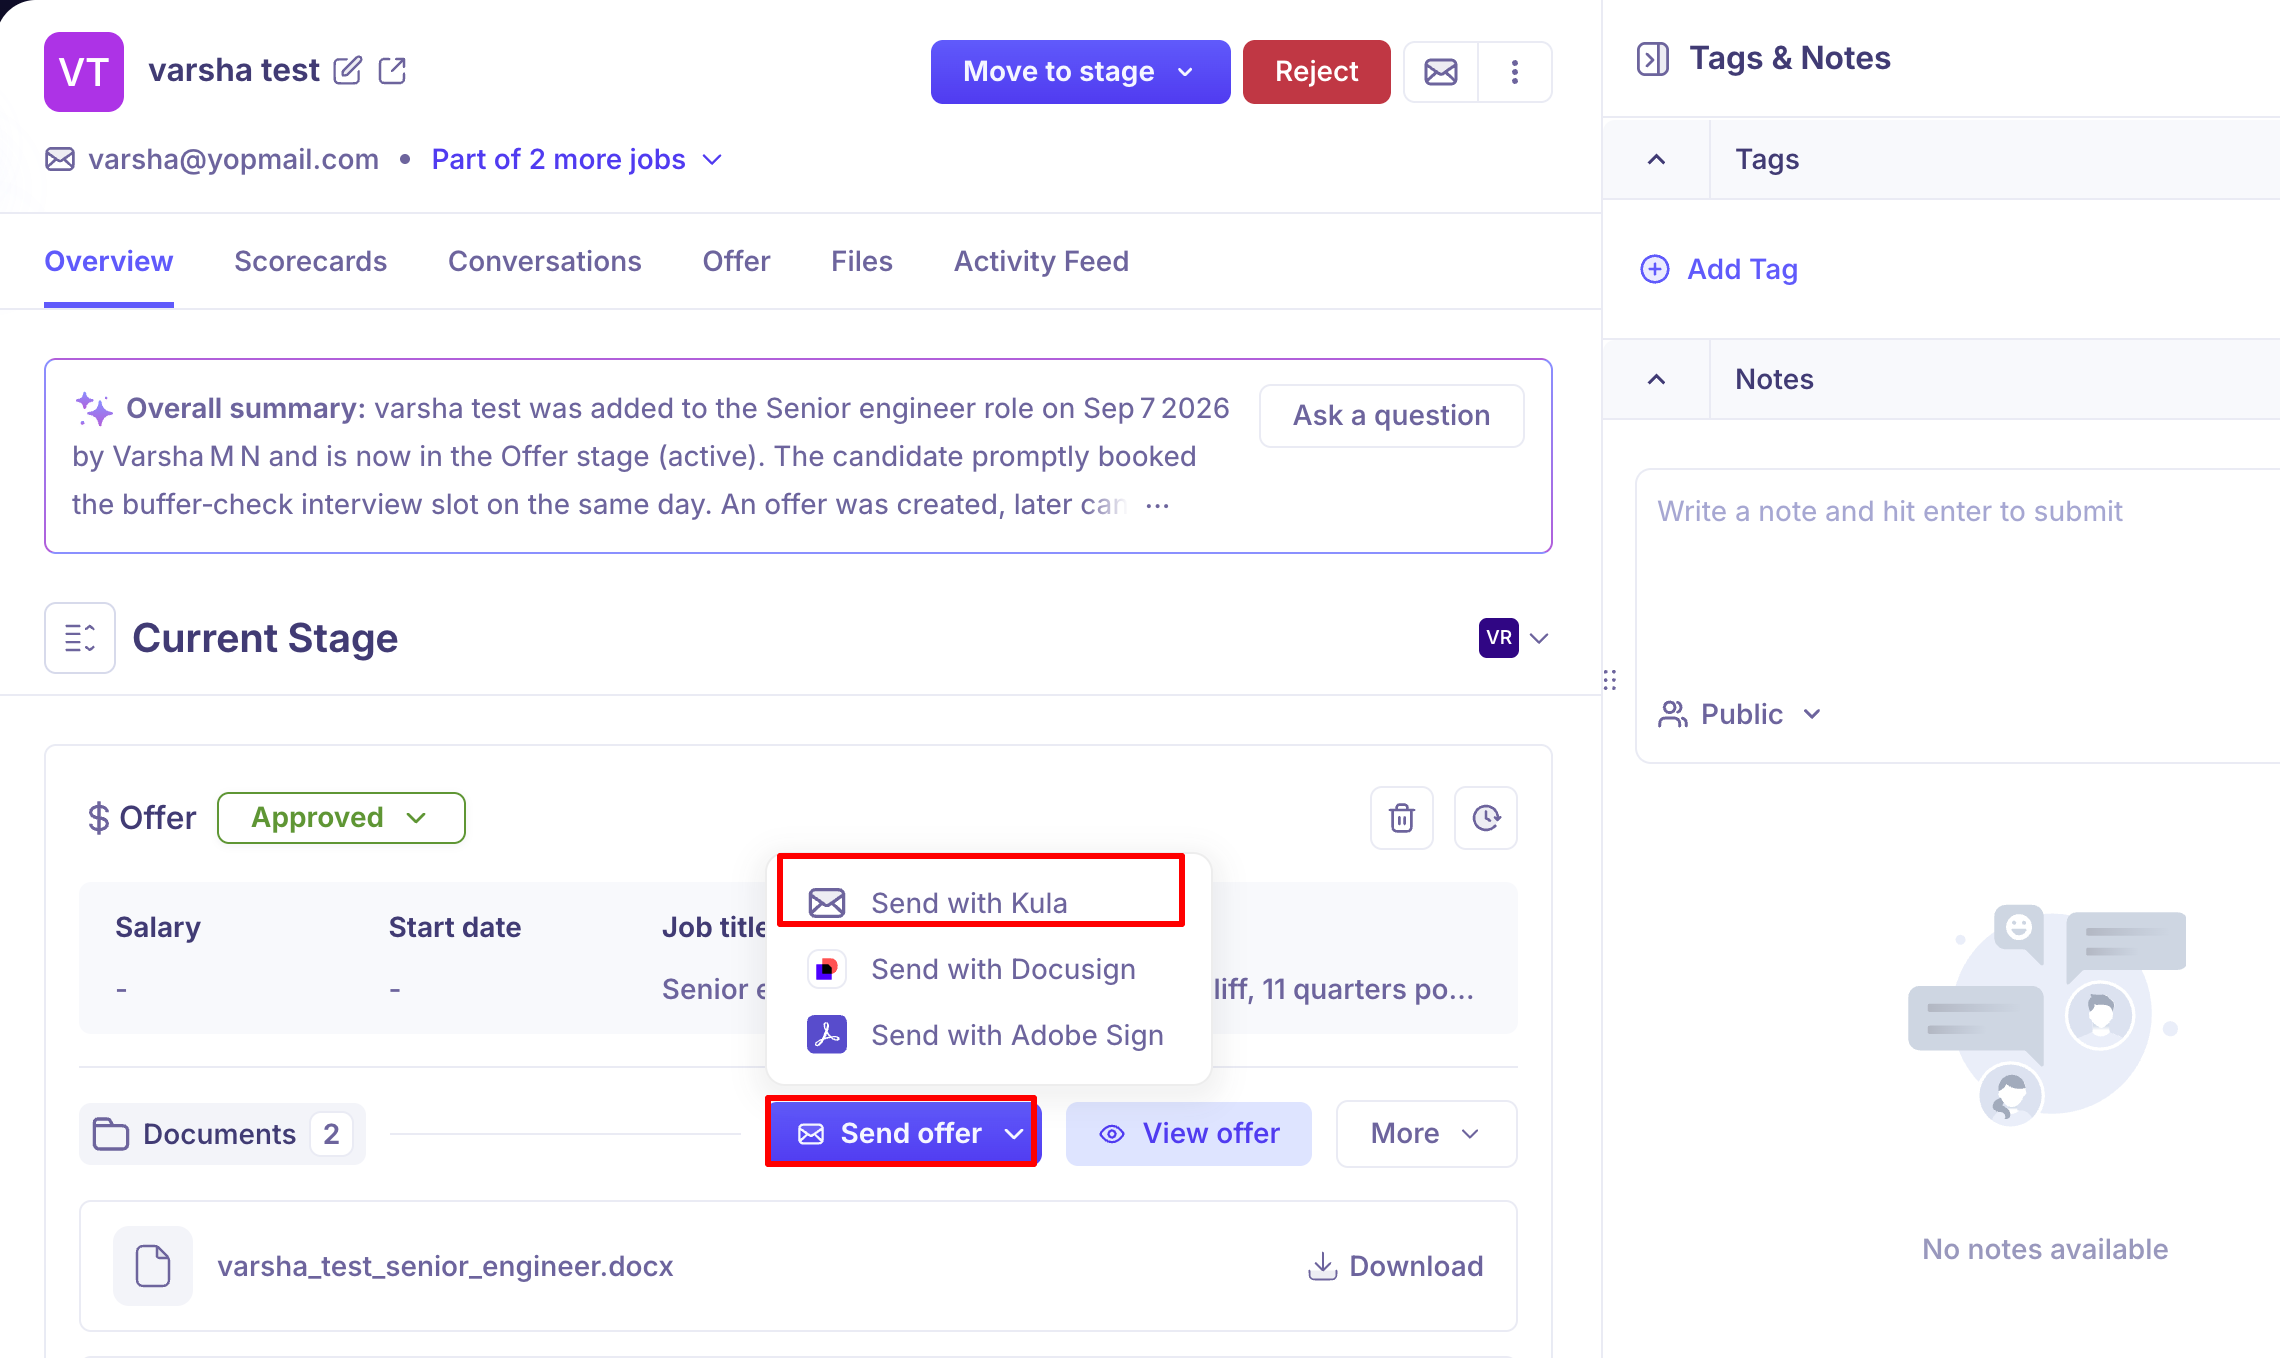
Sending Offers Directly Through Kula
You can send offers directly through Kula for quick sharing . This is useful for drafts, internal approvals, or when sharing with team members who need to review before formal signing.
After completing Steps 1-3 (Details, Template, Approval), you'll see sending options.
Select "Send via Kula" instead of DocuSign to share the offer directly through the platform.
The candidate receives the offer via email notification.
They can view, download, and print the offer document.
Once the candidate accepts the offer, you can mark the Offer as accepted using the "Mark as accepted" button
Preview, Edit, and Schedule Before DocuSign Send
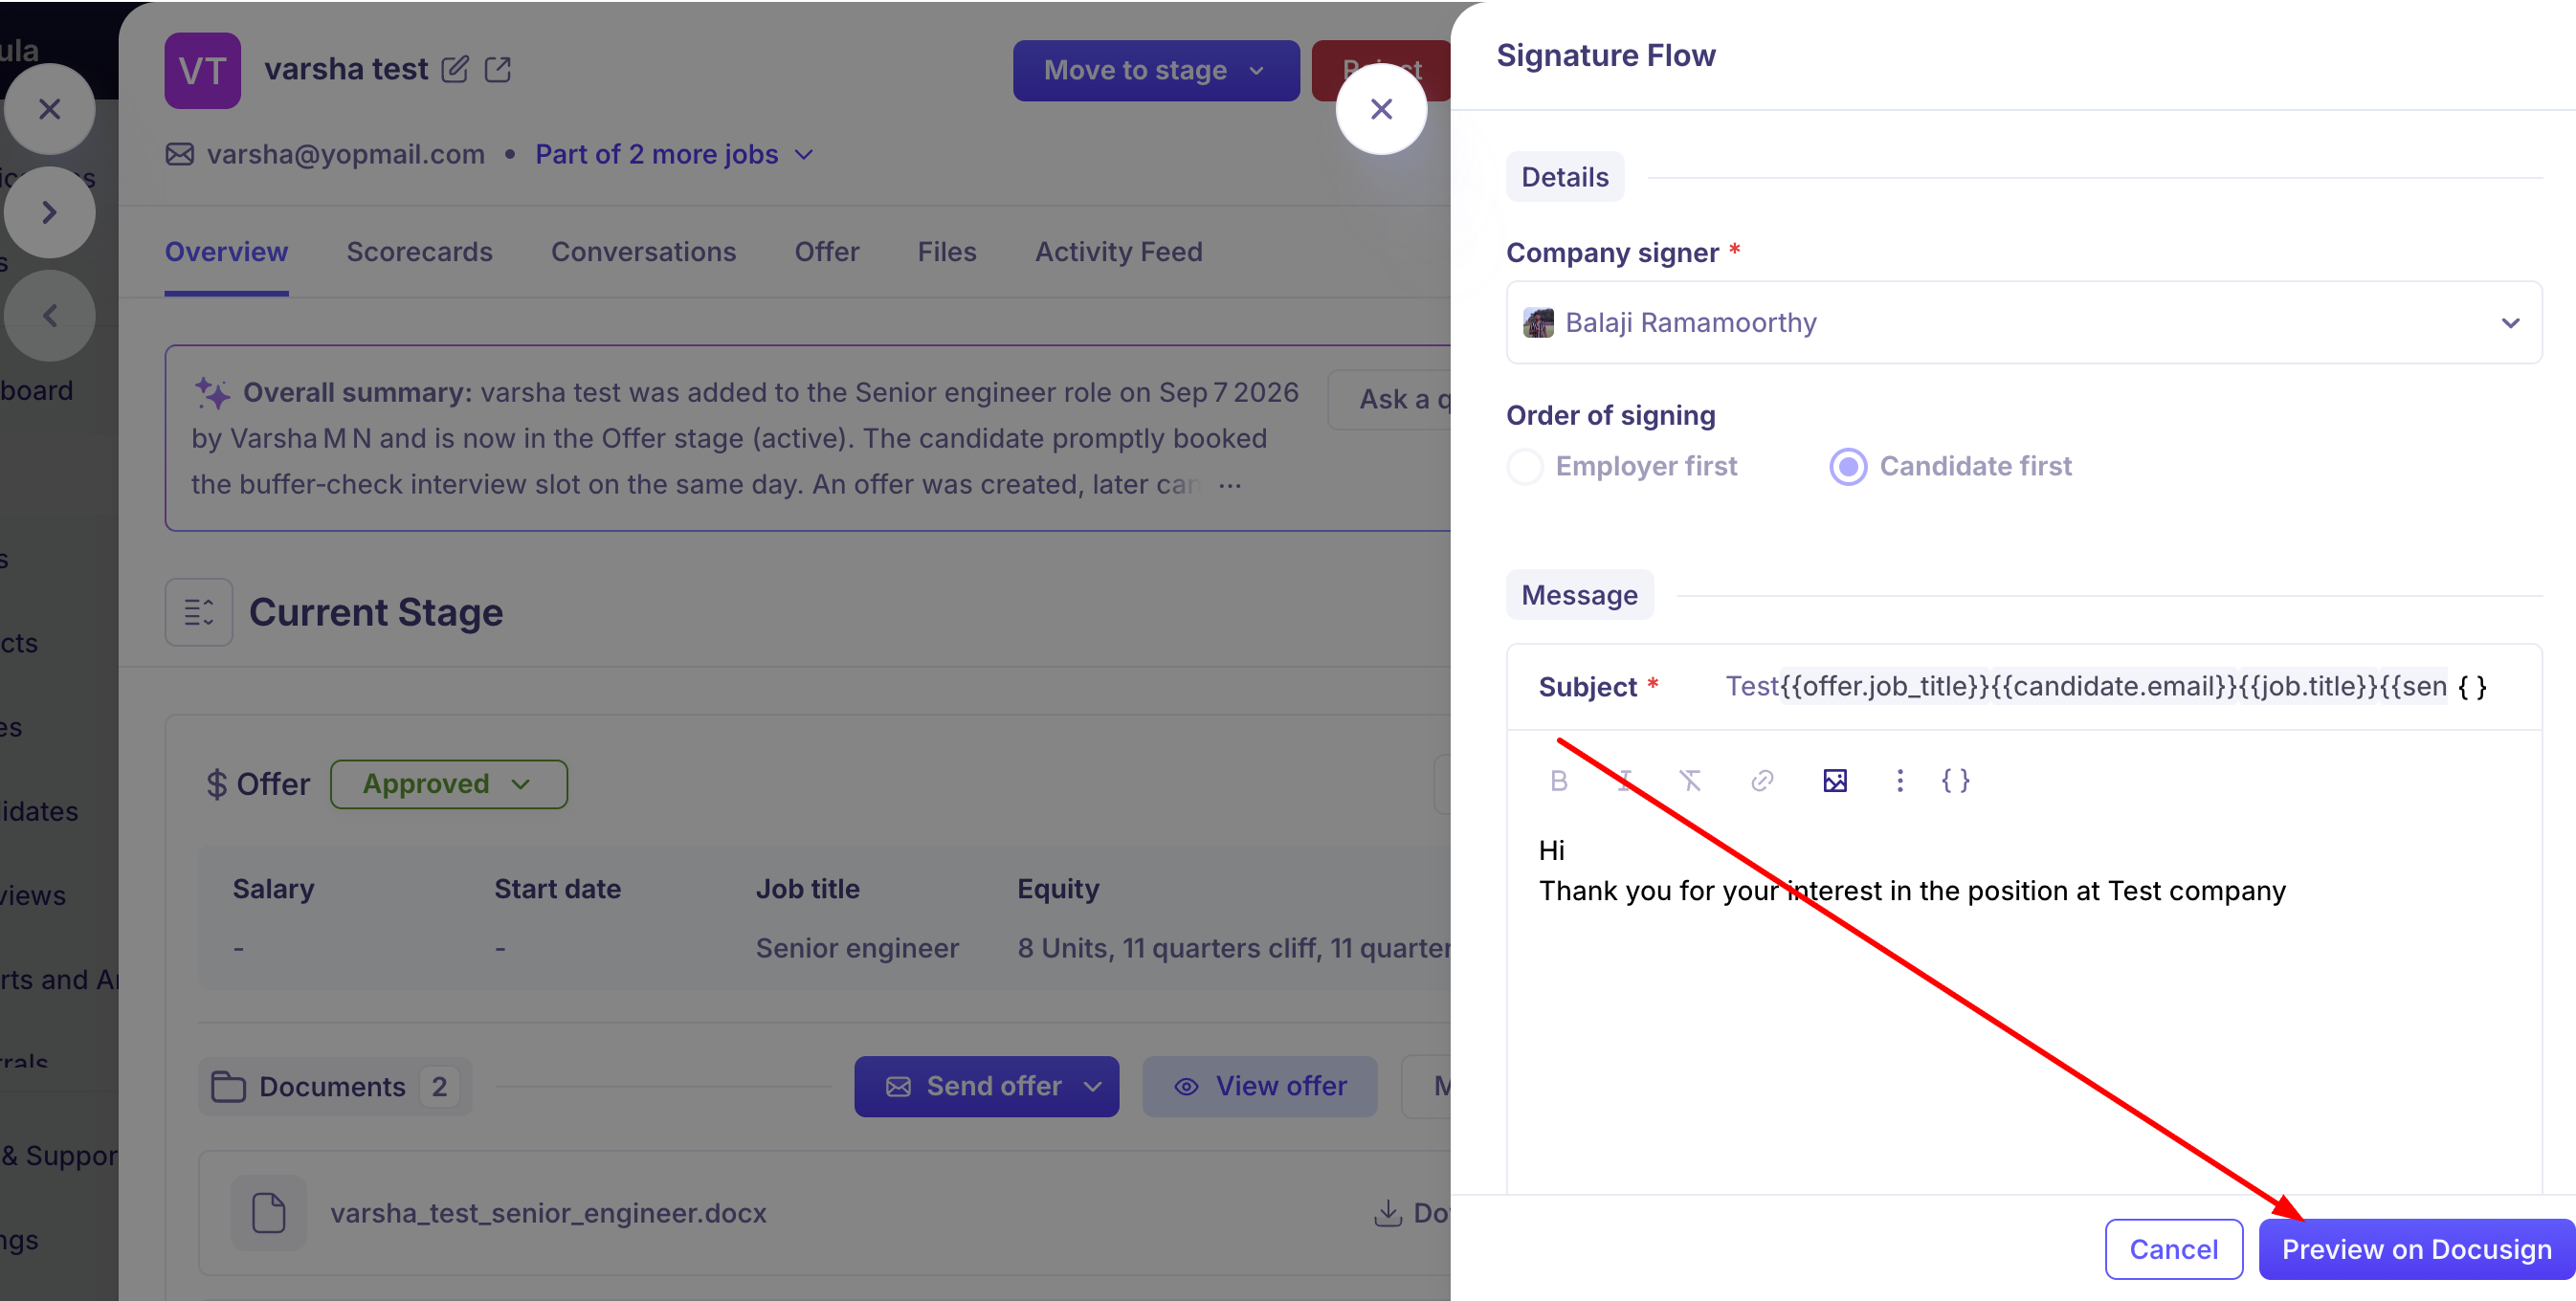
You can send out the offer using integrations like Docusign as well. Before sending via DocuSign, preview exactly what's going out, control who sees what, set reminders and expiry dates, or schedule the send for later.
Click "Preview" to see the complete offer before sending.
In the preview, you can:
-- See exactly what the candidate will receive
-- Control visibility — set which sections/fields are visible to the candidate vs. signatories only
-- Set signature reminders for the candidate (e.g., remind after 2 days if not signed)
-- Set expiry date for the DocuSign envelope (when the signing link becomes invalid)
-- Make quick edits if needed
Once satisfied, click "Send Now" to send immediately via DocuSign, or "Schedule Send" to send at a specific date/time.
The offer is sent to the candidate and you can track signing progress in real-time.
Frequently Asked Questions
1. Can I reorder fields across different sections?
Yes. Drag custom fields across sections. For example, move a compensation field from a generic section to the dedicated Compensation section.
2. Can I attach multiple documents to one template?
Yes. Bundle documents like handbooks, NDAs, and annexures into one template. All files generate together, and tokens carry through across all documents.
3. Can I choose my approval order?
Yes. Choose to approve terms before generating the letter, or generate first then approve. Select whichever fits your workflow.
4. Can I schedule an offer to send later?
Yes. In the preview before DocuSign send, click "Schedule Send" to schedule the offer for a specific date and time.
5. Do tokens work across bundled documents?
Yes. Tokens like {{candidate.name}} and {{salary}} carry through across all bundled documents automatically.
Need Help?
If you have questions about the offer module enhancements or need assistance, reach out to support@kula.ai or use the in-app chat.