How to Configure Custom SSO with Kula
Last updated: September 17, 2026
Kula supports integration with your organization's identity provider (IdP) to enable Single Sign-On (SSO) using SAML 2.0. This ensures a secure and seamless login experience for your team.
Who can do this: Super Admin
Where to find it: Settings → Privacy, Compliance & Security → Security
Prerequisites
Before setting up Custom SSO, ensure the following:
You have access to your Identity Provider's admin console (e.g., Okta, Azure AD, Google Workspace, etc.).
You have the required metadata/configuration details like SSO URL, Entity ID, X.509 Certificate, or Client ID/Secret for OIDC.
Step-by-Step Setup:
Step 1: Navigate to SSO Settings
Log in to your Kula account.
Go to Settings → Privacy, Compliance & Security → Security.
Under Sign-in options, turn on SSO and click Add SSO.
Under Select identity provider, choose Custom.
Step 2: Choose SSO Type
Select SAML 2.0 on your IdP.
Step 3: Input SSO Configuration Details
🛡 For SAML 2.0:
You’ll need to fill in the following fields:
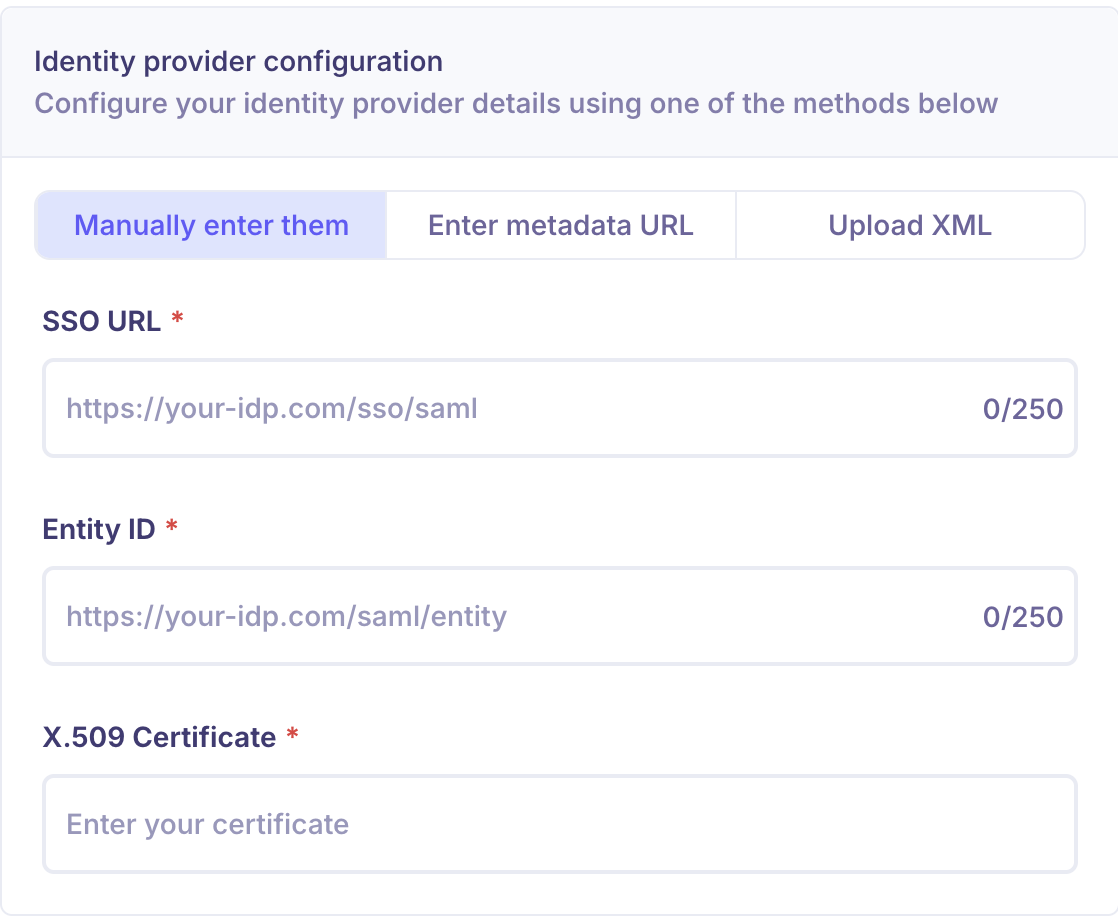
Identity Provider SSO URL
Entity ID / Issuer
X.509 Certificate
Optional: NameID Format, Attributes Mapping (email, first name, last name)
Step 4: Save & Test Connection
Click Save after entering all required fields.
Use the Test Connection button to validate your setup.
Once validated, toggle Enable SSO.
📝 Note: After enabling SSO, only users from your domain will be able to log in via the configured provider.
User Access Control
Admins can enforce SSO for all users.
You can also allow both SSO and password-based login (not recommended for production environments).
Good to know
Kula shows the values your identity provider needs. The Set up SSO step displays Kula's Assertion Consumer Service (ACS) URL and Service Provider (SP) Entity ID — copy them from there.
You can give Kula your identity provider's details three ways: upload the metadata XML, enter the metadata URL, or enter the SSO URL, Entity ID and X.509 certificate by hand.
SCIM is set up in the same place as SSO. After Set up SSO, click Next: Setup SCIM to get the SCIM connector base URL and authorization token, and turn on automatic provisioning.
At least one sign-in option must stay on. Kula won't let you turn off or delete the last one.
Turning off Email & password locks out external users. External collaborators such as agencies sign in with an email and password, so they lose access if you switch it off.
FAQ
Where do I find the SCIM token?
In Kula, open Settings → Privacy, Compliance & Security → Security, edit your custom SSO configuration and go to the SCIM configuration step. The Authorization token is shown there.
Can people still sign in with a password once SSO is on?
Yes, as long as Email & password stays turned on under Sign-in options. Turn it off to make everyone use SSO.
Will our agencies and other external users still be able to sign in?
Only if Email & password stays on. External users sign in with an email and password, not through your identity provider.
Why can't I turn off this sign-in option?
It's the only one still on. Turn on another sign-in option first — Kula always needs at least one.
Can we connect more than one identity provider?
Yes. Each one you add has its own toggle under Sign-in options.
Need help? If you have questions or need assistance, reach out to us at support@kula.ai or use the in-app chat.