Connect Adobe Sign to Kula
Last updated: September 18, 2026
Kula integrates with Adobe Sign to streamline your offer letter and document signing workflows. Once connected, your team can send offer documents for e-signature directly from a candidate's profile, track signing status in real time, and manage the entire offer lifecycle — without switching tools.
Who can do this: Super Admin, Admin
Where to find it: Settings → Organization → Organization integrations → E-signature
Prerequisites
An Adobe Sign Enterprise account (Enterprise plan required for API access)
Super Admin or Admin access in Kula
Ability to create API applications in Adobe Sign (Partner-level)
Step 1: Integration Setup
Generate your Client ID and Client Secret in Adobe Sign:
Log in to your Adobe Sign account.
Navigate to Account > Adobe Sign API > API Applications.
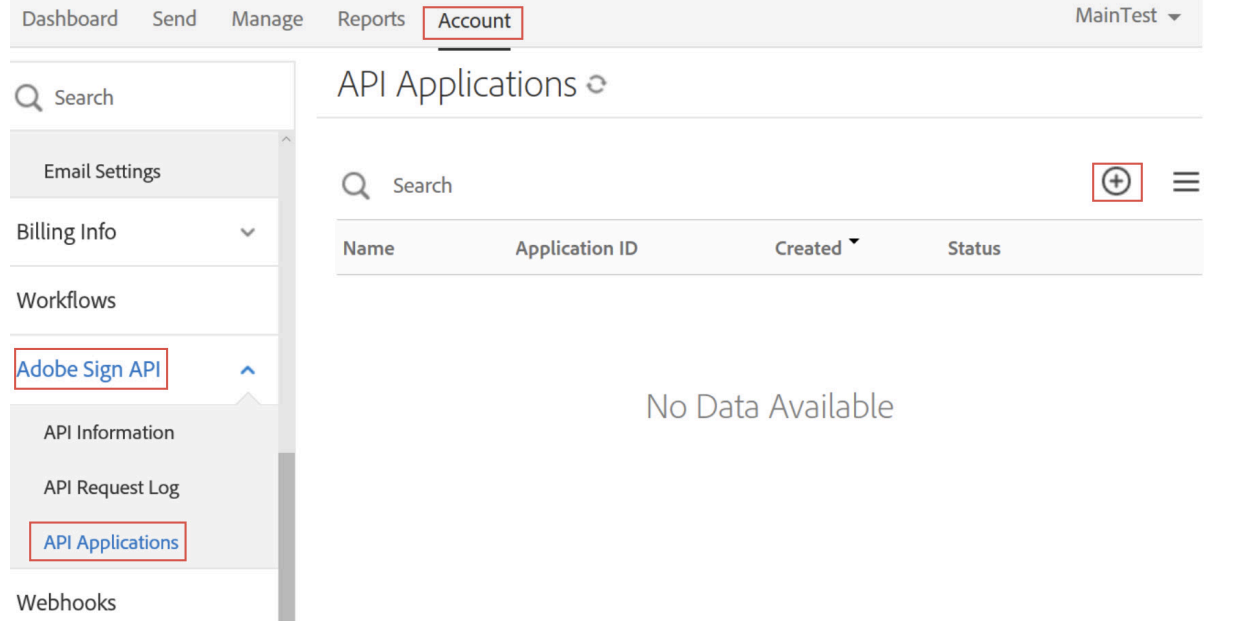
Click the + icon to create a new application. Select Partner as the application type (required to access all Adobe eSign accounts).
Enter a Name and Display Name for the application.
Under Domain, select PARTNER and click Save.
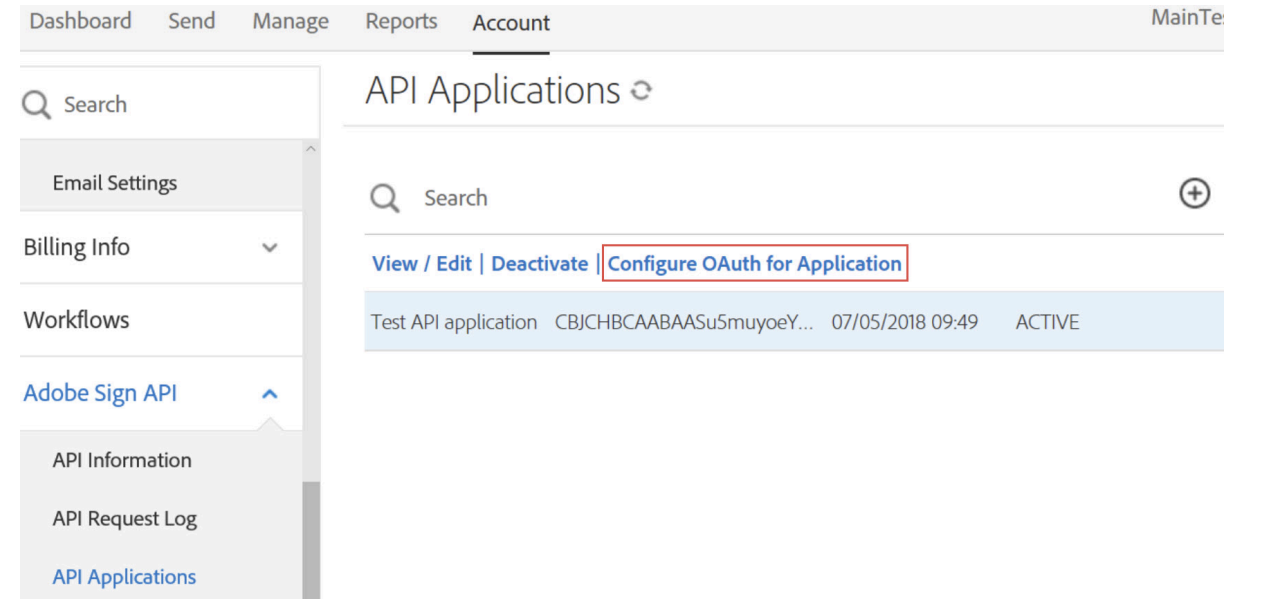
Single-click to highlight the application, then click Configure OAuth for Application.
Enable the following scope permissions:
Scope
Modifier
Purpose
user_loginself
Login access for any user in your account
agreement_readaccount
Read offer documents on behalf of any user
agreement_writeaccount
Manage offer document status
agreement_sendaccount
Send offer documents for signing
webhook_readaccount
View webhook data for status tracking
webhook_writeaccount
Create or edit webhooks for real-time updates
In the Redirect URI field, paste the following URL exactly:
https://auth.kula.ai/api/v1/account_integrations/auth/adobe/callbackClick Save. Your Client ID and Client Secret will now be displayed — copy both values.
Connect Adobe Sign in Kula:
In Kula, go to Settings → Organization → Organization integrations.
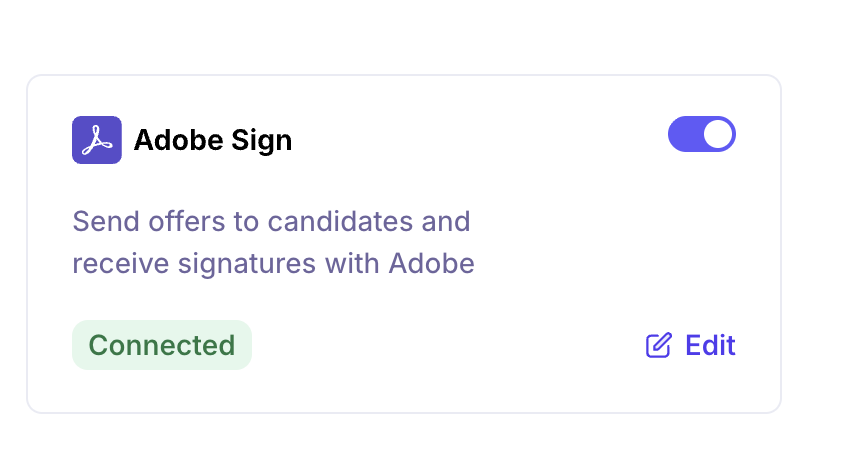
Find the Adobe Sign card under E-signature and turn the toggle on. The Adobe Sign settings panel opens.
Enter your Client ID and Client Secret in the respective fields.
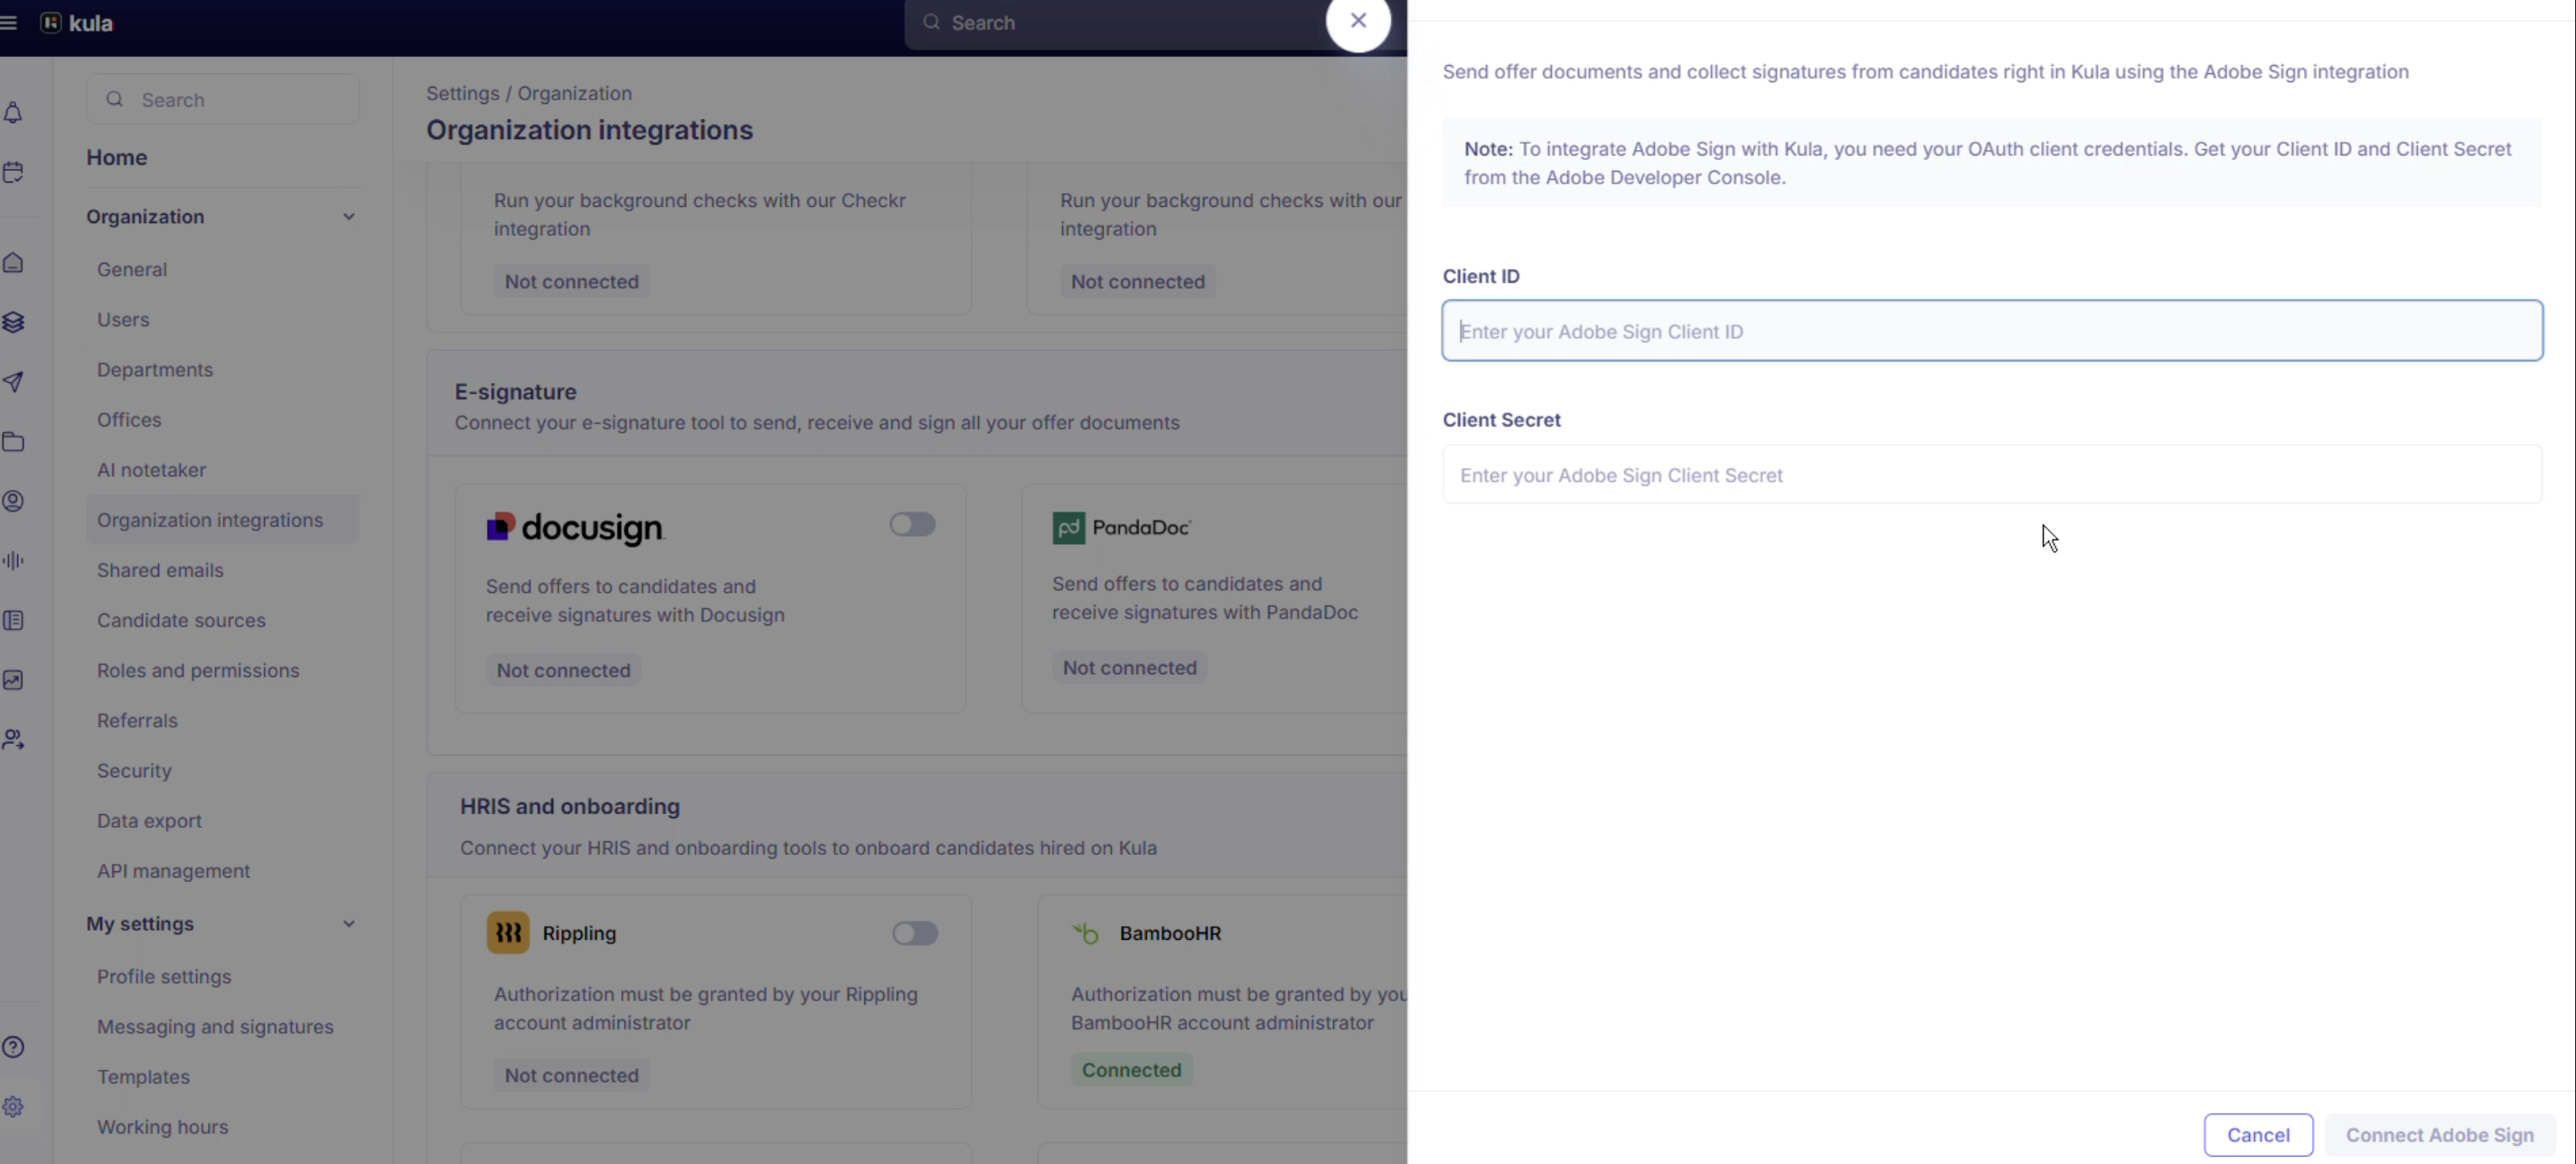
Click Connect Adobe Sign.. You will be redirected to Adobe Sign to confirm the OAuth connection.
Once authorized, you'll be redirected back to Kula and the integration status will show as Connected.
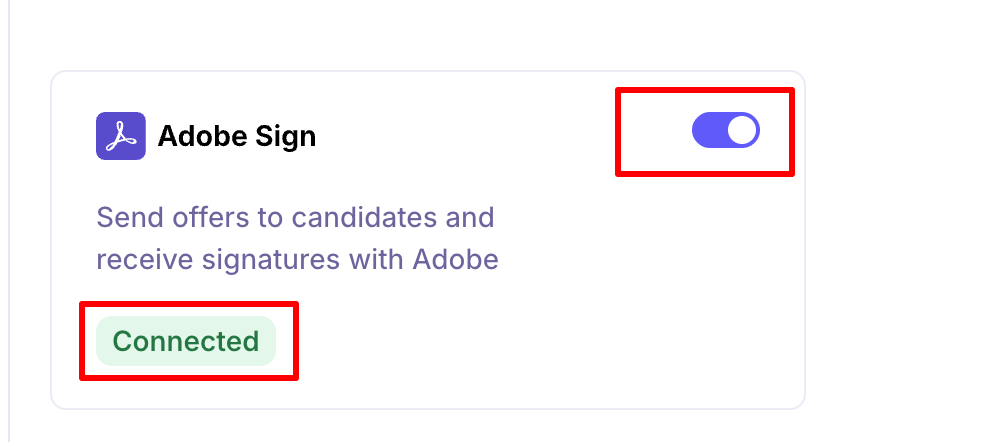
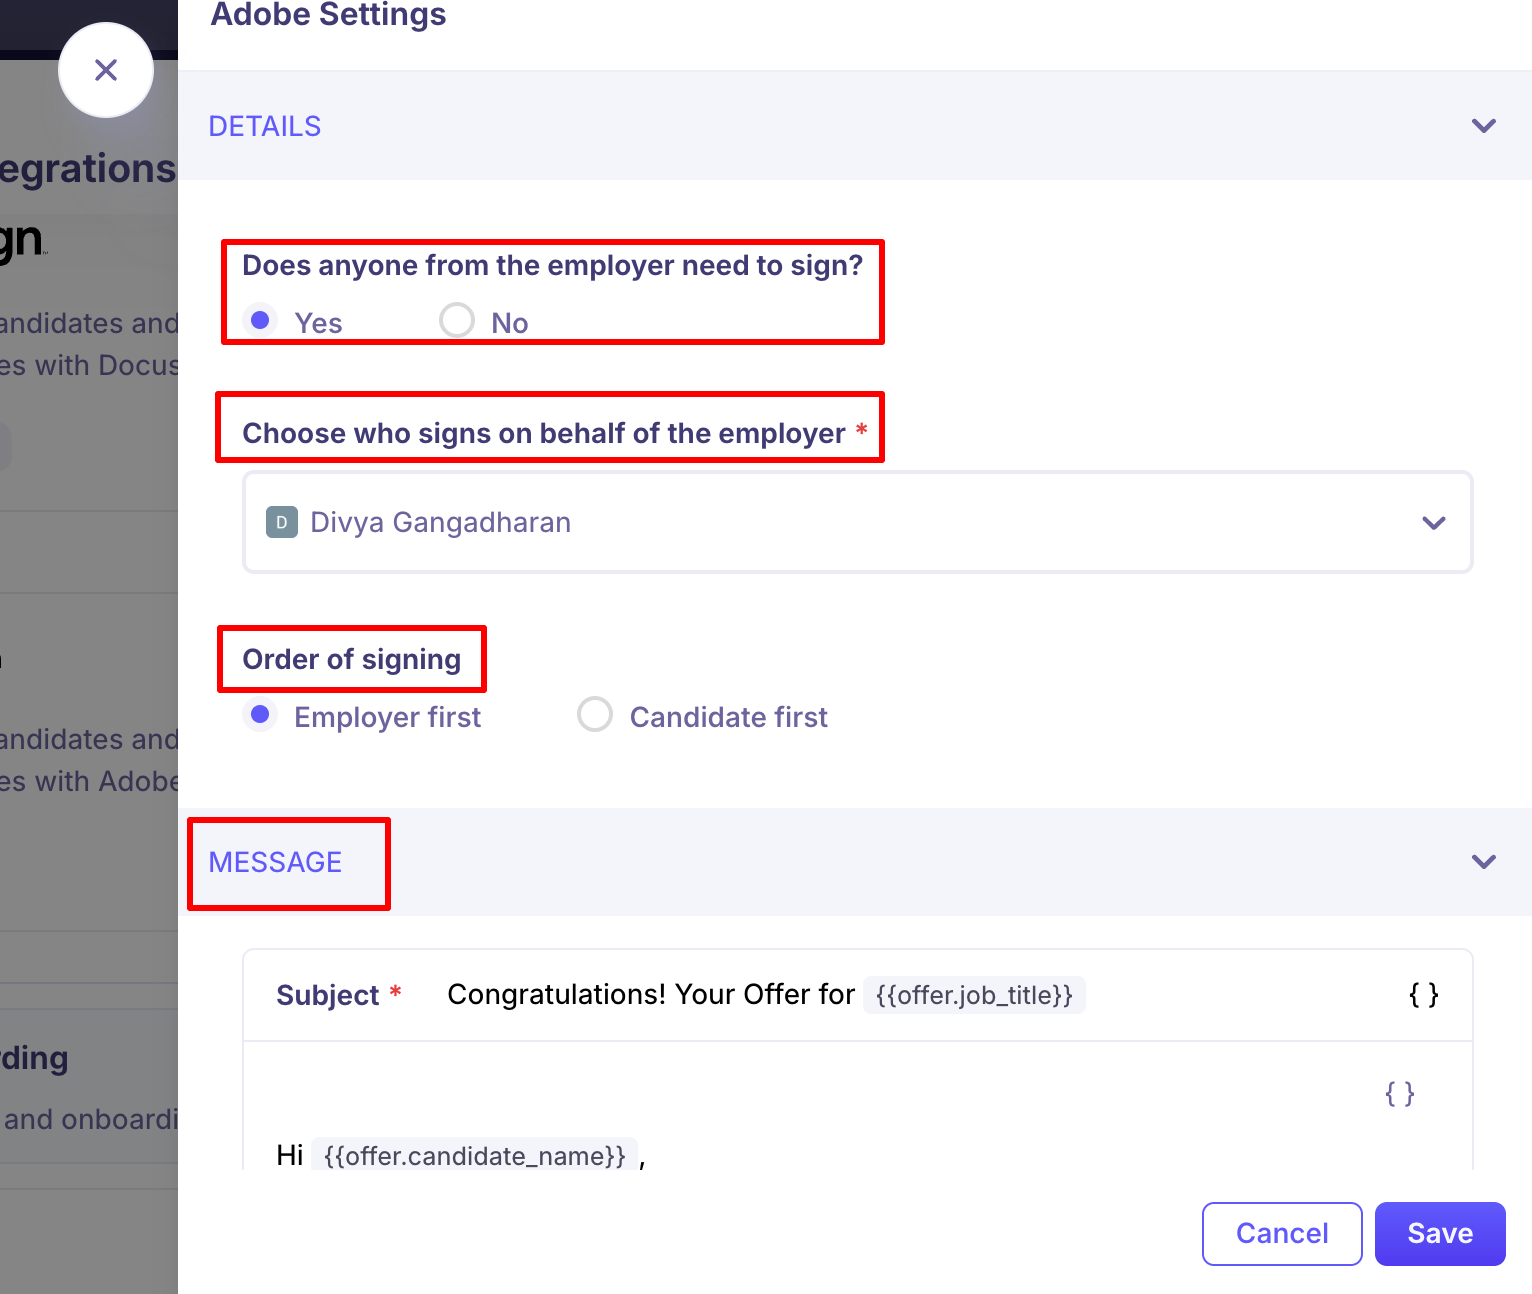
Once the integration is connected, hover over the Adobe Sign card and click Edit to set your signing defaults:
Employer Signature Requirement — "Does anyone from the employer need to sign?"
Select Yes if an user must sign the document.
Select No if only the candidate needs to sign.
If "Yes" is selected, additional signer configuration will be required.
Choose Employer Signer — If "Yes" is selected: "Choose who signs on behalf of the employer"
Select the internal signer from the dropdown (e.g., authorized signatory).
The selected user will receive the Adobe Sign envelope for signing.
Set Order of Signing — Under Order of signing, choose:
Employer first — Internal signer signs before the candidate.
Candidate first — Candidate signs before the employer.
Customize the Email Message:
Edit the subject line and email body, using tokens (e.g.,
{{offer.candidate_name}},{{offer.job_title}},{{org.name}}) to personalize the message.
Click Save to save the settings configured.
Step 2: Using Adobe Sign in Kula
After integration, you can send offer letters and supporting documents for e-signature directly from the candidate's offer stage.
Open Profile: Navigate to Jobs > Candidates and select the candidate.
Once the candidate has passed their interviews, move them to the Offer stage
Create the Offer: Go to the Current Stage section and click Create Offer.
Enter Offer Details: Fill in the offer fields such as Salary, Start Date, Job Title, Equity, and Req ID. These fields are configured under Settings → Offer Fields.
Click Next: Offer Template.
Select Offer Template: Choose the appropriate template from the dropdown list. Templates are managed under Settings → Offer Templates.
Click Next: Approvals.
Send for Approval: In the Approvals section:
Add a note for the approvers (optional).
Review the configured approval flow (set under Settings → Offer Approvals).
Click Send offer for approval.
Once sent, the status will update to Pending approval under the Current Stage section.
Approvers will receive notifications via email, Slack, or in-app to review and approve the offer.
Once the approver completes the review, the status will change to Offer approved
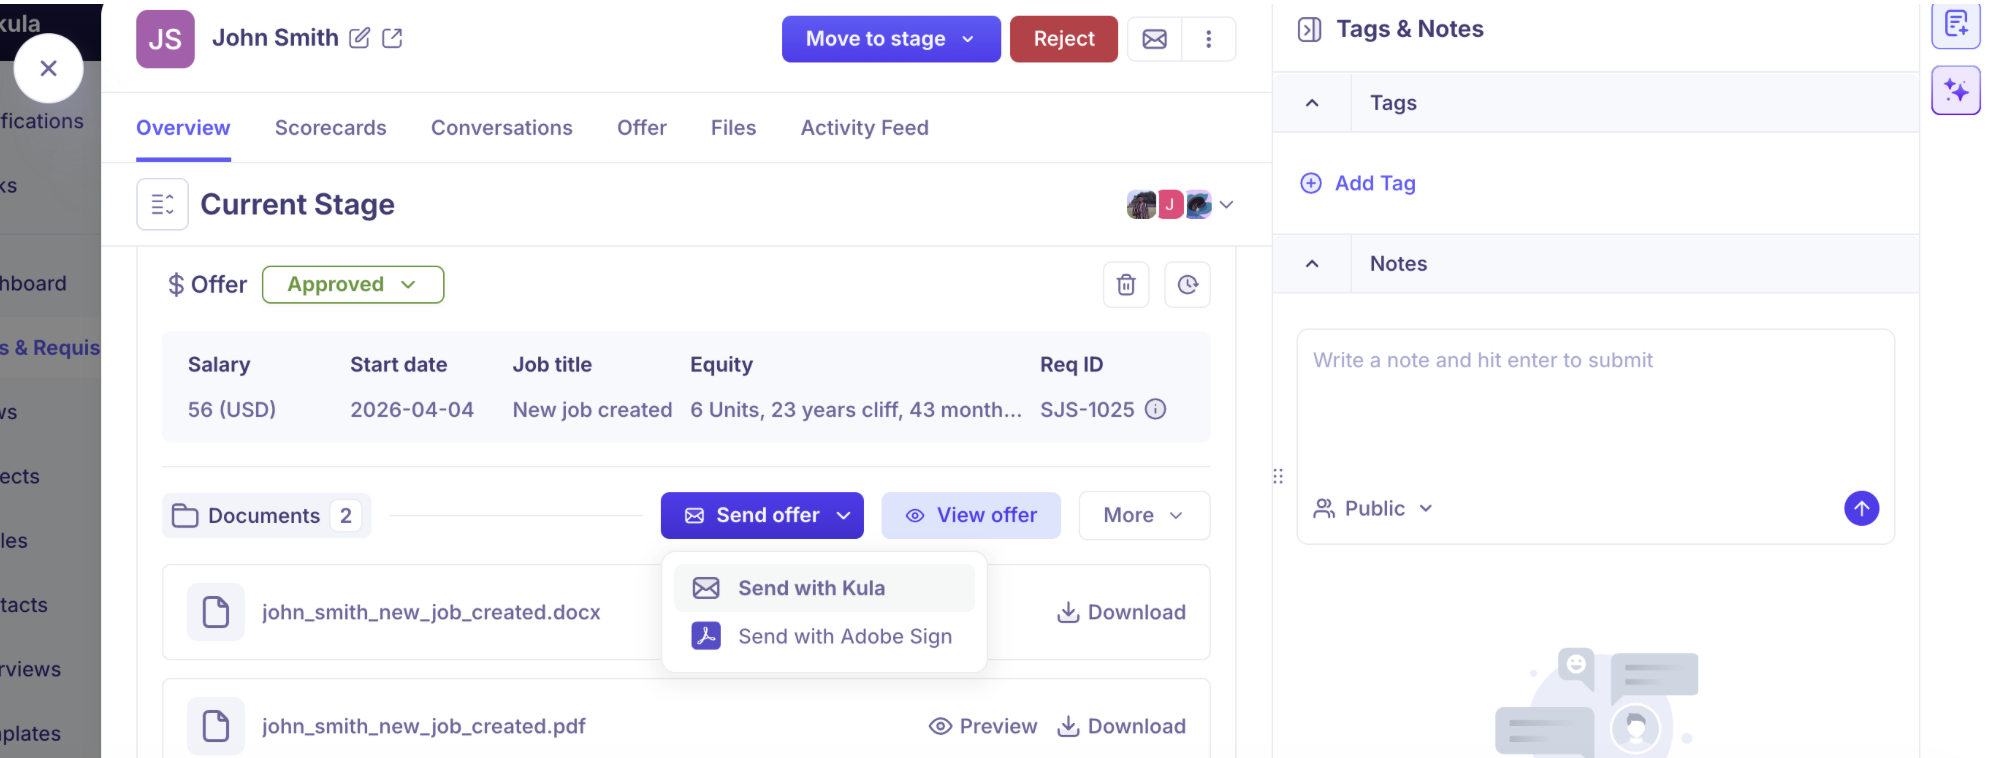
You will now see the options View Offer and Send Offer in the Documents section.
Review and Send via Adobe Sign: Click View Offer to preview the offer details and attached documents.
Click the dropdown next to Send Offer and select Send with Adobe Sign.
In the Signature Flow panel that opens, review the pre-configured settings (company signer, signing order, and email message). Make any adjustments if needed.
Click Send. The offer letter will be dispatched to the candidate via Adobe Sign, and a confirmation message "Offer sent" will appear.
Step 3: Offer Status Tracking
Kula automatically syncs with Adobe Sign to reflect real-time signing progress. The statuses you see will depend on the signing configuration selected during setup.
Pending approval — The offer has been submitted and is awaiting internal approval.
Offer approved — The offer has been approved internally and is ready to be sent
Sending offer with Adobe Sign — The offer has been dispatched and Adobe Sign is processing the signing envelope.
Pending on company signer — Appears when Employer first is selected as the signing order. The designated company signer must sign before the offer is sent to the candidate.
Pending on candidate — The offer is with the candidate awaiting their signature. This status appears:
After the company signer has signed (if Employer first was selected), or
Directly after sending (if no employer signature is required, or Candidate first was selected).
Accepted by candidate — The candidate has completed signing. The fully executed document is stored in the Files tab on the candidate's profile.
You can also view the signature sequence, see who has signed, and send reminders to pending signers directly from Kula.
Additional Documents & Signing Behavior
When creating an offer in Kula, you can upload additional documents along with the primary offer letter. Here's how they are handled in Adobe Sign:
All additional documents uploaded during offer creation will be visible directly within Adobe Sign during the signing process.
If any additional document contains Adobe Sign fields (for example, signature fields), Adobe Sign will automatically prompt signers to complete those fields, just like the primary offer document.
This ensures a consistent signing experience and prevents unsigned supporting documents from being overlooked.
Good to know
You need an Adobe Sign Enterprise plan. API access isn't available on lower plans, so the connection can't be made without it.
The application must be a Partner application. Other application types can't reach every Adobe Sign account, so the connection won't work as expected.
The Redirect URI has to match exactly. Copy it from this article rather than typing it — a missing character is enough for Adobe Sign to reject the connection.
Signing defaults apply to every offer sent with Adobe Sign. You can still adjust the company signer, signing order and message for a single offer in the Signature Flow panel before you send it.
If the candidate is the only signer, signing order doesn't apply. Order of signing is only used when someone from the employer also signs.
The signed offer is saved on the candidate's profile. You'll find it in the Files tab once the candidate has signed.
FAQ
Adobe Sign shows an error when I click Connect Adobe Sign. What should I check?
First check the Redirect URI in your Adobe Sign application matches the one in Step 1 exactly. Then check the application is a Partner application and that all six scopes are enabled with the modifiers shown.
Can we send an offer that only the candidate signs?
Yes. In the Adobe Sign settings, set Does anyone from the employer need to sign? to No.
Can I change who countersigns for one offer without changing the default?
Yes. When you choose Send with Adobe Sign, the Signature Flow panel opens with your defaults filled in. Change the company signer there before you click Send.
Where do I find the signed offer?
On the candidate's profile, in the Files tab. The status changes to Accepted by candidate once they sign.
Do supporting documents get signed too?
Yes, if they contain Adobe Sign fields. Adobe Sign prompts signers to complete those fields as well as the main offer letter.
Need Help?
If you have questions or need assistance with setup, feel free to reach out to us at support@kula.ai or use the in-app chat for assistance.