Create your first job
Last updated: June 29, 2026
The Jobs section is where you create and manage all open roles at your company. Each job has four configuration sections: Job information, Hiring team, Interview plan, and Job posting. You work through these sections before saving a draft or launching the job.
You can create a job from a blank canvas or clone an existing job. Either way, the configuration options are the same. You can save your progress as a draft at any point and come back to it before you're ready to launch.
Prerequisites
You need one of the following roles to create a job:
Super Admin
Admin
Recruiter
Step 1: Create the job
To get started:
Click Jobs in the left navigation.
Click Create Job.
Enter the Internal job name. This is the name your team sees inside Kula.
If the role should be hidden from general visibility, check Is confidential.
Click Create.
Kula creates the job and opens it in Draft status. From here, work through the four configuration tabs.

Step 2: Configure job information
The Job information tab covers role details, compensation, and the job description.
Basic information
Fill in the fields that apply to your role:
Requisition — associate the requisition (applicable if the Requisition Management feature is enabled)
Department — select the department this role belongs to
Workplace — select the workplace type
Office — select the office location
Work type — defaults to Full Time; change if needed
Job description
Job description is mandatory. Choose one of the following methods:
Ask AI — Kula uses your job fit criteria to generate a description. Enter a one-line prompt and review the output.
Add manually — type or paste the description directly.
Copy from another job — select an existing job to pull its description.
AI scoring
After adding a description, you can configure AI scoring to rank candidates automatically. AI scoring uses your ideal candidate criteria or the job description to score applicants as they come in. You can set this up now or return to it later.

Here's our guide on how to set up AI scoring.
Step 3: Configure the hiring team
The Hiring team tab is where you assign people to the job and define what they can do. Each role has different permissions.
Recruiters
Recruiters have the broadest access. They can:
Edit job information, the hiring team, the interview plan, and the job posting
Schedule interviews, create offers, and move candidates through stages
Hiring managers
Hiring managers can manage candidates but cannot change the job configuration. They can:
Schedule interviews and create offers
Move candidates through stages
Coordinators
Coordinators handle scheduling and pipeline movement only. They can:
Schedule interviews and move candidates through stages
Note: Coordinators cannot create or view offers.
External recruiters (agency)
External recruiters work only with candidates they submit. They can:
Add candidates to the job
Schedule interviews and move their candidates through stages
Note: External recruiters cannot create or view offers and cannot see candidates added by others.
Step 4: Configure the interview plan
The Interview plan tab defines the hiring workflow — the stages a candidate moves through from prospect to hired.
Each plan is structured around five milestones:
Prospect
Application
Interview
Offer
Hired
Within each milestone, you create stages. Within each stage, you can add the following activities:
Email — send an automated email to the candidate
Interview — schedule an interview
Assessment — assign an assessment
Review — add a review step
Survey — send a survey
Note: You can also select a template when setting up the interview plan. Templates created in Global Settings can auto-apply based on Department, Office, and Work Type.
Step 5: Configure the job posting
The Job posting tab controls how the job appears to candidates and what the application experience looks like.
Basic info
Enter the Job post title. This is what candidates see on your career page and any job boards where you list the role. It can differ from the internal job name.
Job post visibility
Select a visibility option in Job post visibility. The following options are available:
External job boards and Kula career page — lists the job publicly on external boards and your Kula career page
Internal job board — makes the job visible only to your employees
Unlisted — the job is not available for candidates to apply

If you select Internal job board, choose one of the following options for employee participation:
Allow employees to apply — employees can submit their own application
Allow employees to refer — employees can refer candidates
Allow both — employees can apply and refer
Application form
Select the form candidates complete when applying. Application form templates can be created in Global Settings and applied here. You can also configure the form directly in this tab.

Application submission email
Select the email template sent to candidates after they submit the application form. This confirms receipt and sets expectations for next steps. Toggle Send an email after candidates submit the application form on, then choose a template.
EEOC questions
EEOC questions are controlled from Settings and appear in the application form by default. They collect demographic data required for federal contractors with affirmative action obligations to report to the government. The question language cannot be edited.
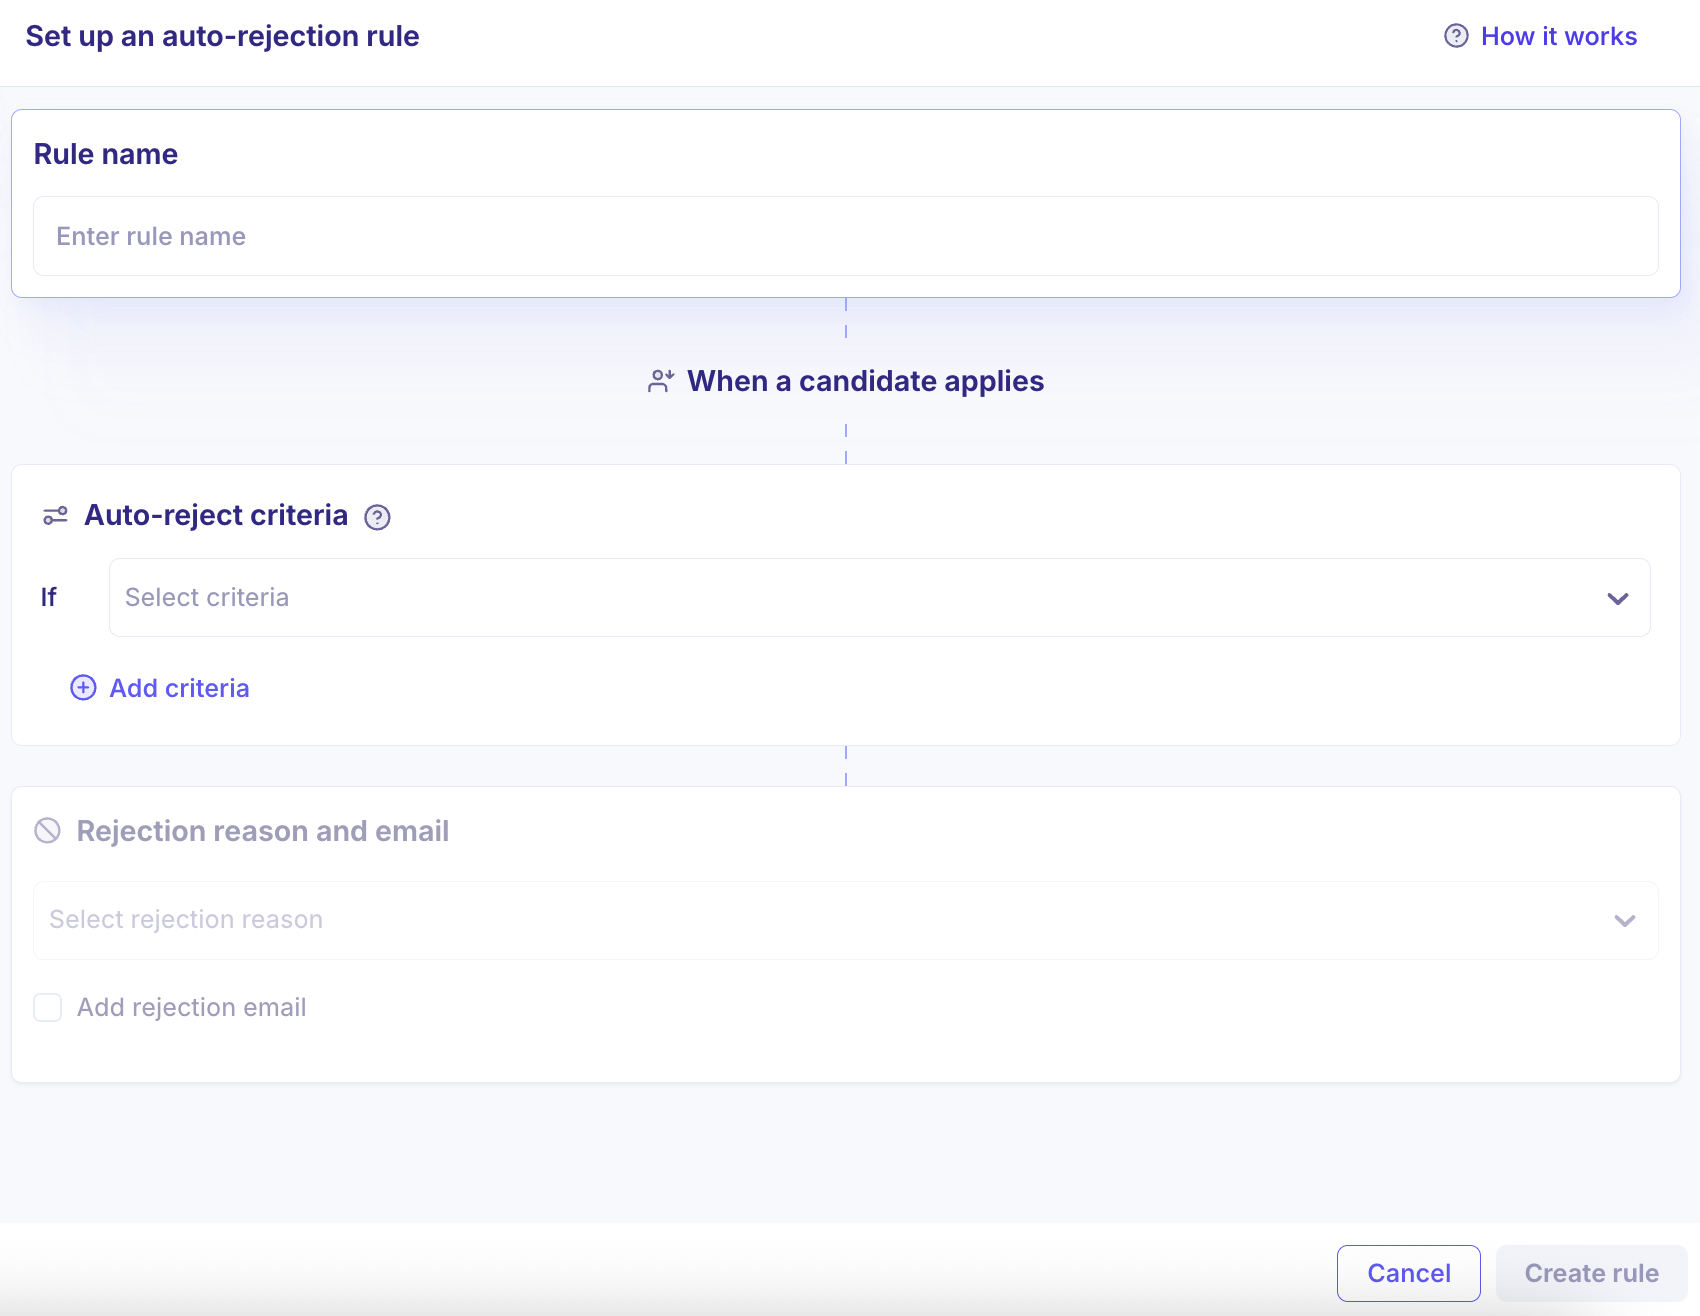
Auto-rejection rules
Use Auto-rejection rules to automatically reject candidates based on how they answer specific fields in the application form. Set up knockout questions for any of the following field types:
Yes/No
Number
Date
Single Choice
Multi Choice
Step 6: Save or launch the job
When you're done configuring the job, choose one of the following:
Save — keeps the job in Draft status. Nothing is published and no candidates can apply.
Launch job — publishes the job. If job approval is enabled, the job goes live only after the approver confirms. You can launch immediately or schedule a launch date.

Note: You can return to any configuration tab and make changes after launching the job.
Need Help?
If you have questions about inviting team members or assigning roles, reach out to support@kula.ai or use the in-app chat for help.