Creating a project and adding candidates
Last updated: September 17, 2026
Create a project to gather a shortlist of candidates in one place. This article covers the two-step create form and the four ways to get candidates into a project once it exists.
Who can do this: Super Admin, Admin, Recruiter
Where to find it: Projects → New Project
How to create the project
The form has two steps: Basic Info and Project Team.
Go to Projects and click New Project.
Enter a Project name. This is the only required field, and it is limited to 60 characters.
Add a Description if you want one. It is limited to 255 characters and appears under the name in the projects list.
Pick a Talent pool to link the project to, if you use talent pools. This is optional.
Click Next: Project team.
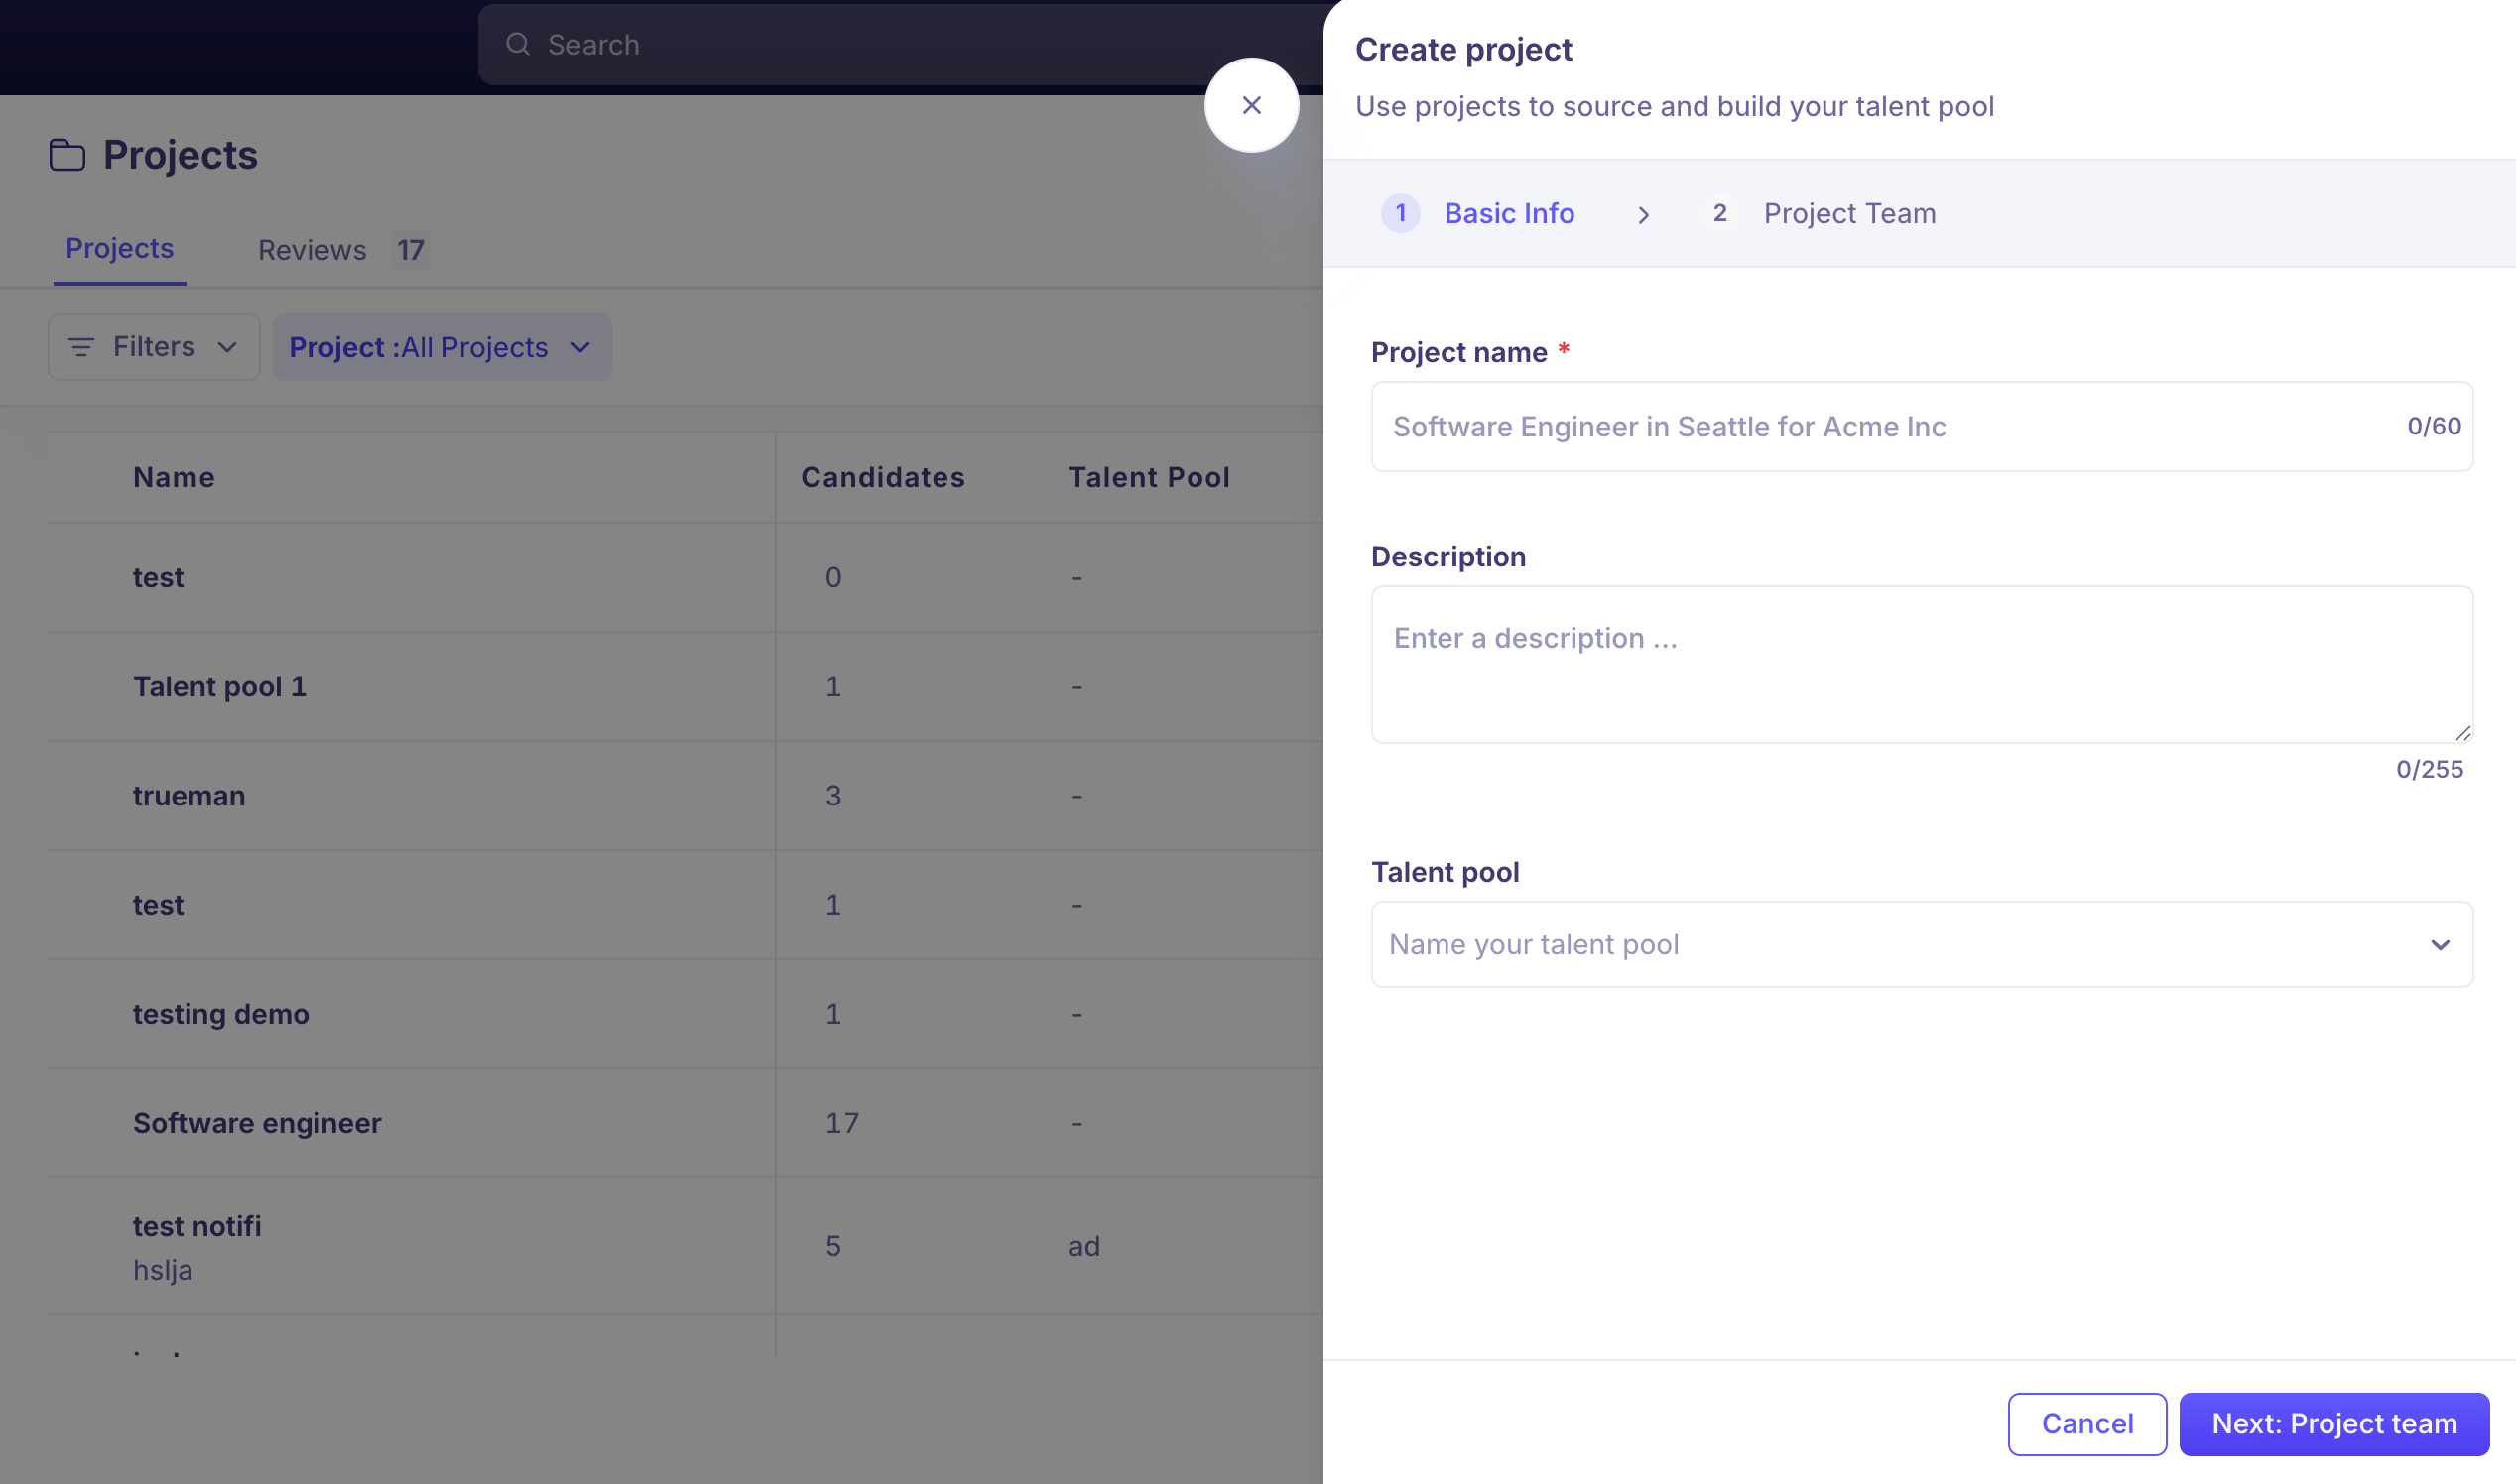
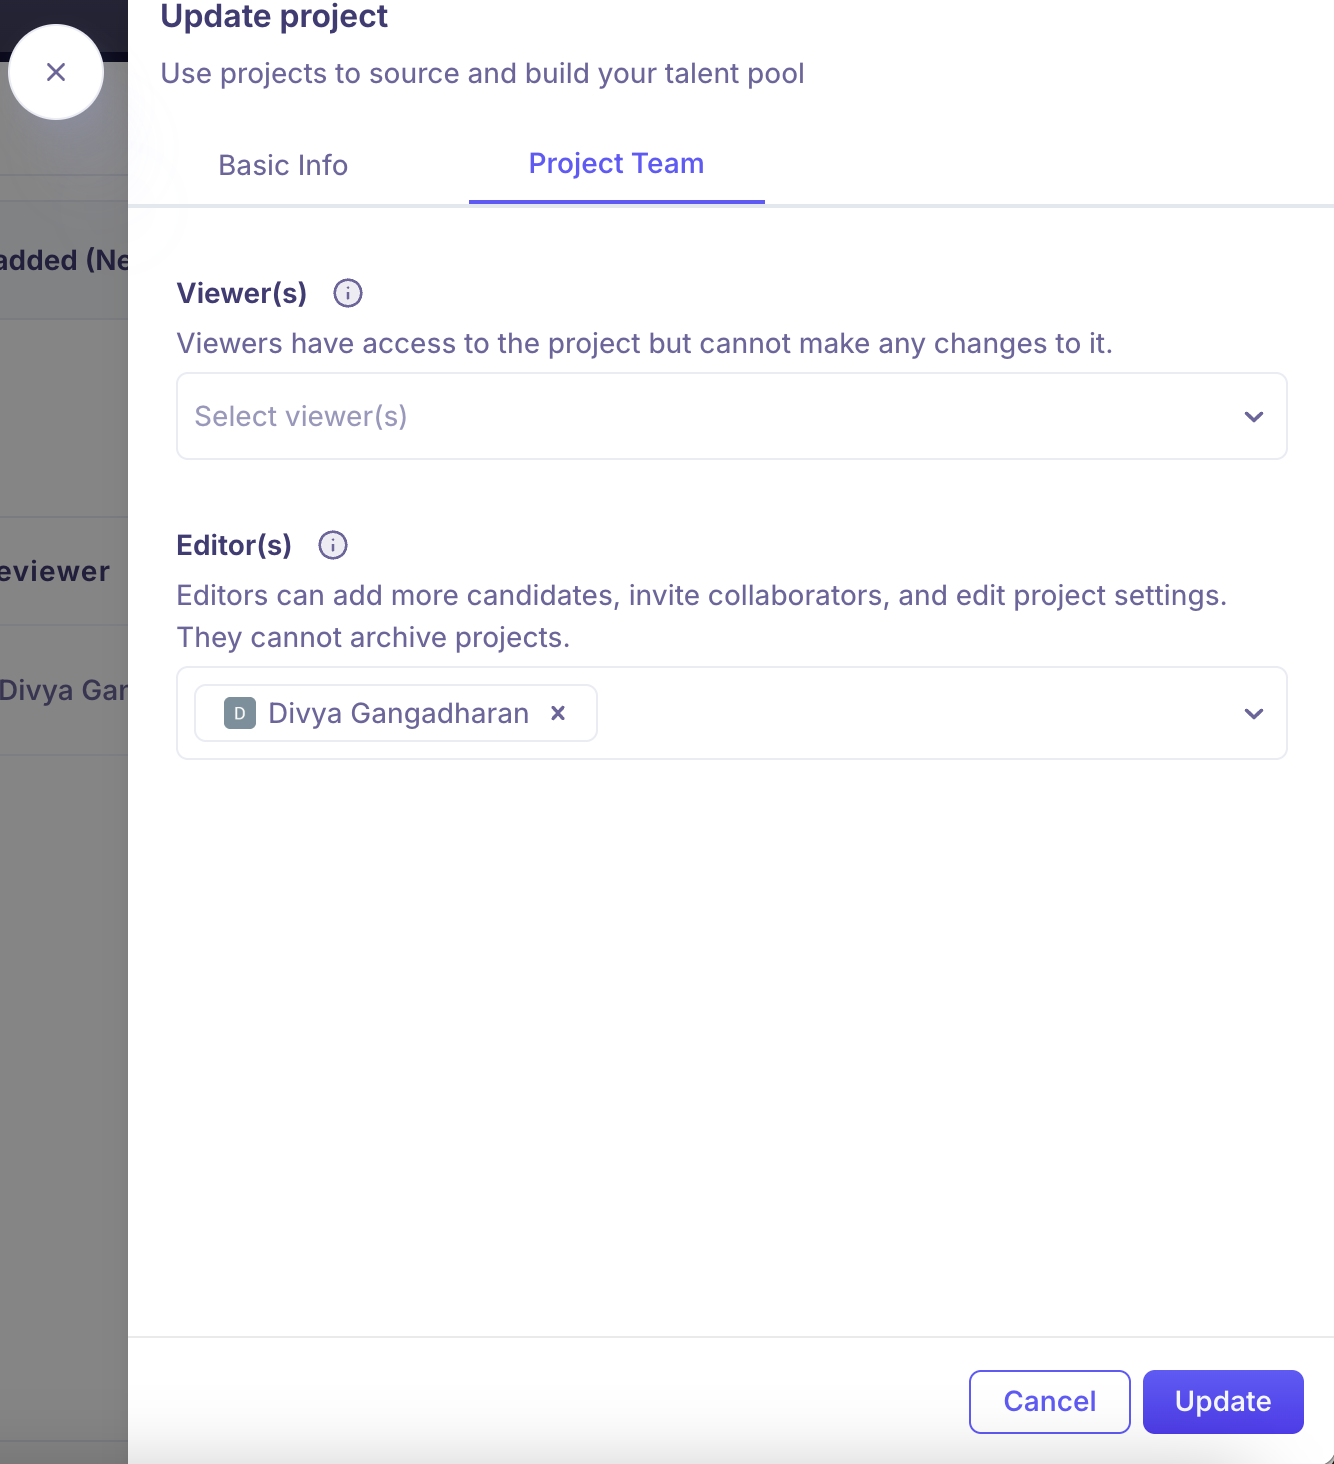
Your project is created at this point, not at the end. Clicking Next: Project team saves it and shows a "Project created successfully" message. Step 2 only adds people to a project that already exists.
On step 2 you can add viewers and editors, or skip it and share later. Both are covered in Sharing a project and sending candidates for review.
Click Save to finish.
Your new project appears at the top of the list.
Four ways to add candidates
Open the project and click Add candidate. The dropdown beside it offers four routes.
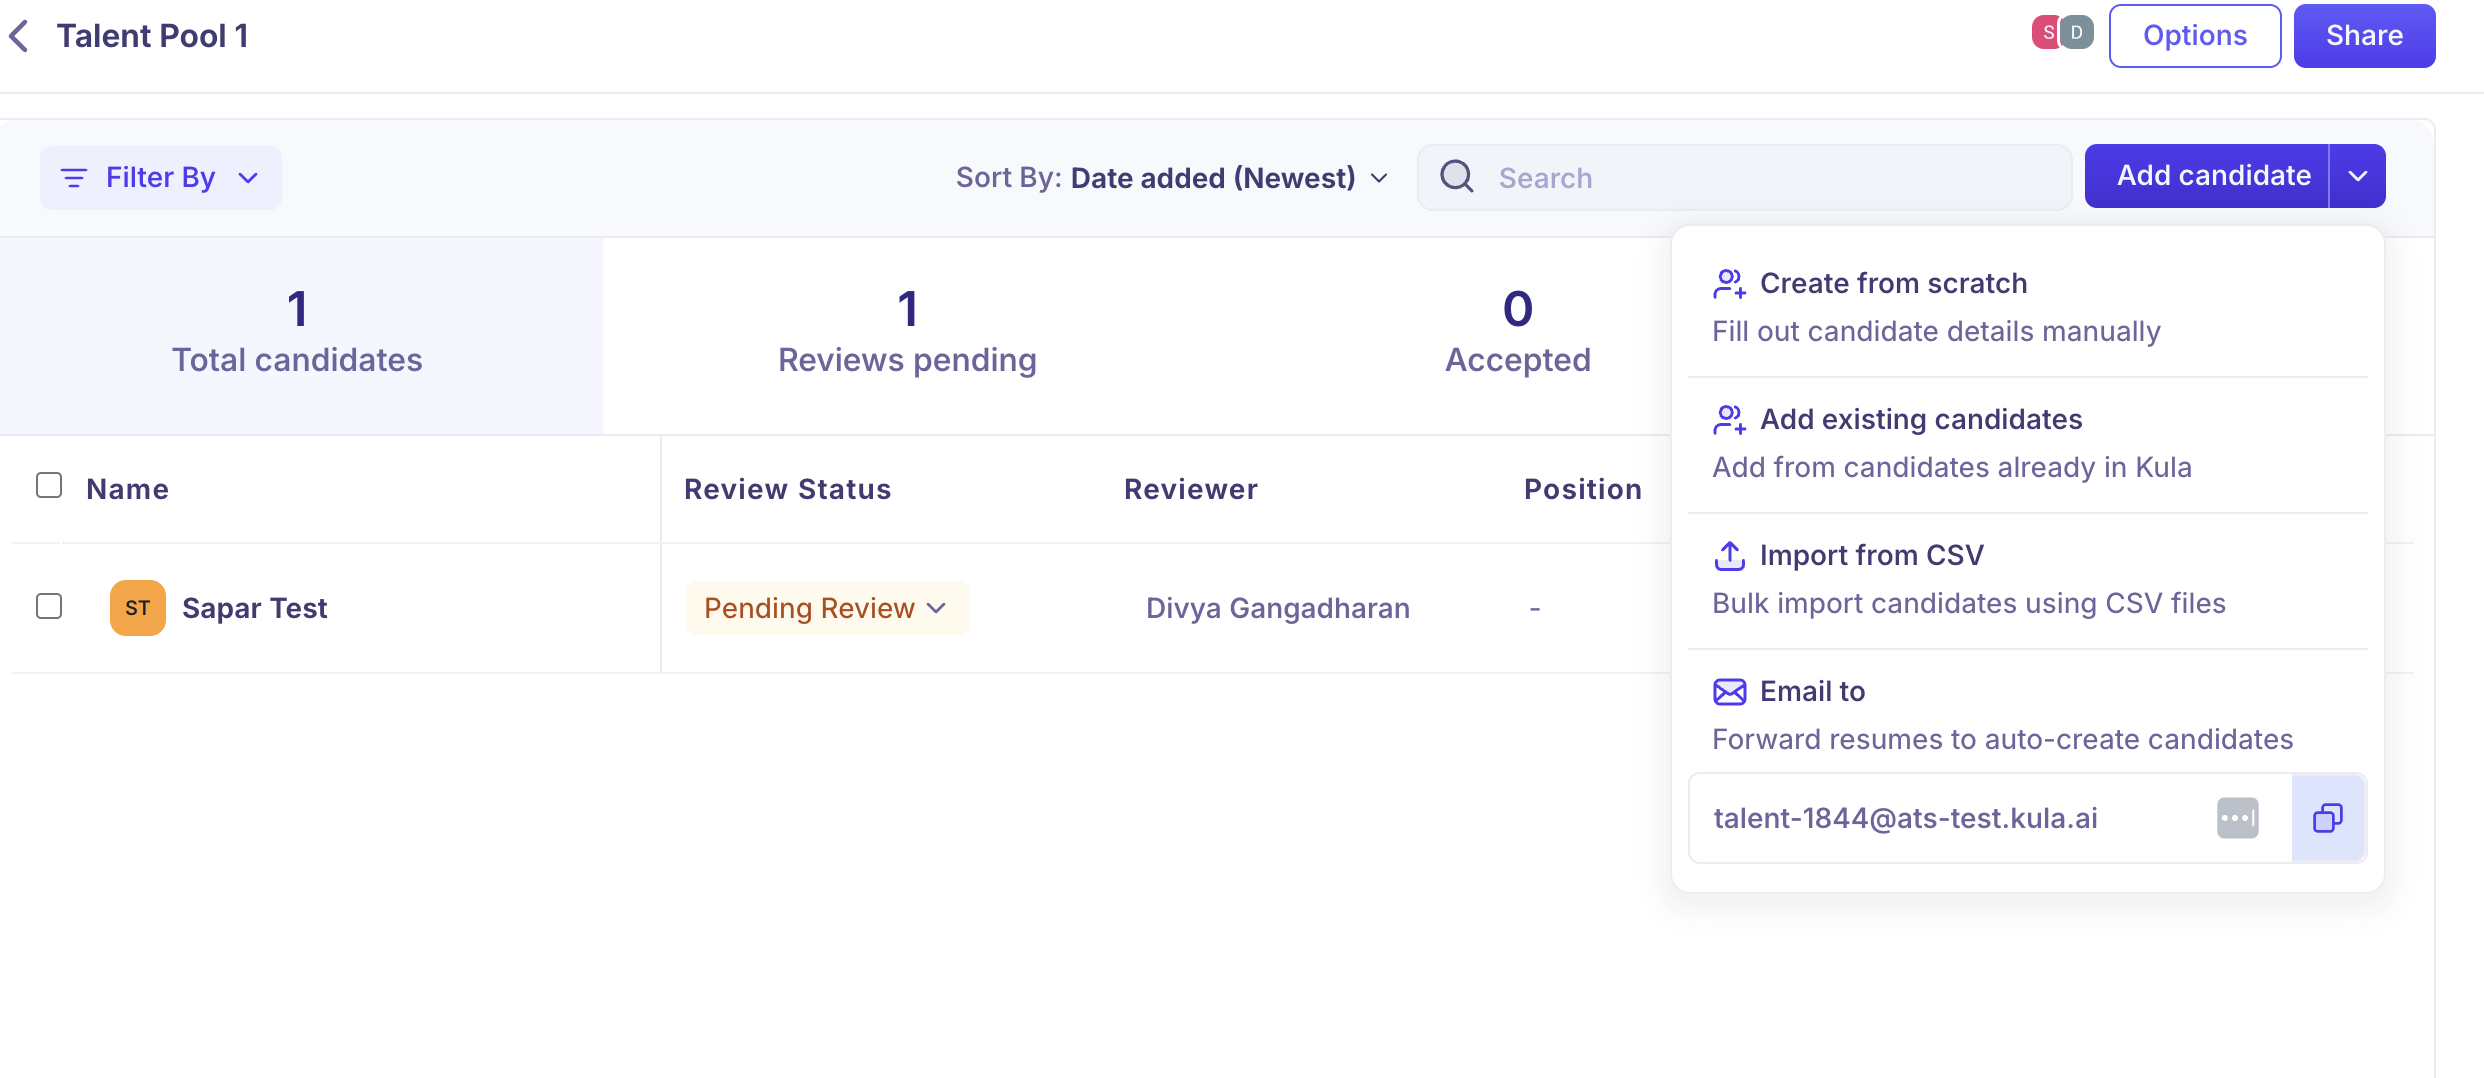
Option | What it does |
|---|---|
Create from scratch | Fill out one candidate's details manually. |
Add existing candidates | Pick people who already exist in Kula. |
Import from CSV | Bulk import candidates from a CSV file. |
Email to | Forward CVs to the project's own email address and Kula creates the candidates for you. |
The Email to address is unique to each project and looks like talent-1979@your-domain.kula.ai. Use the copy button beside it rather than retyping it.
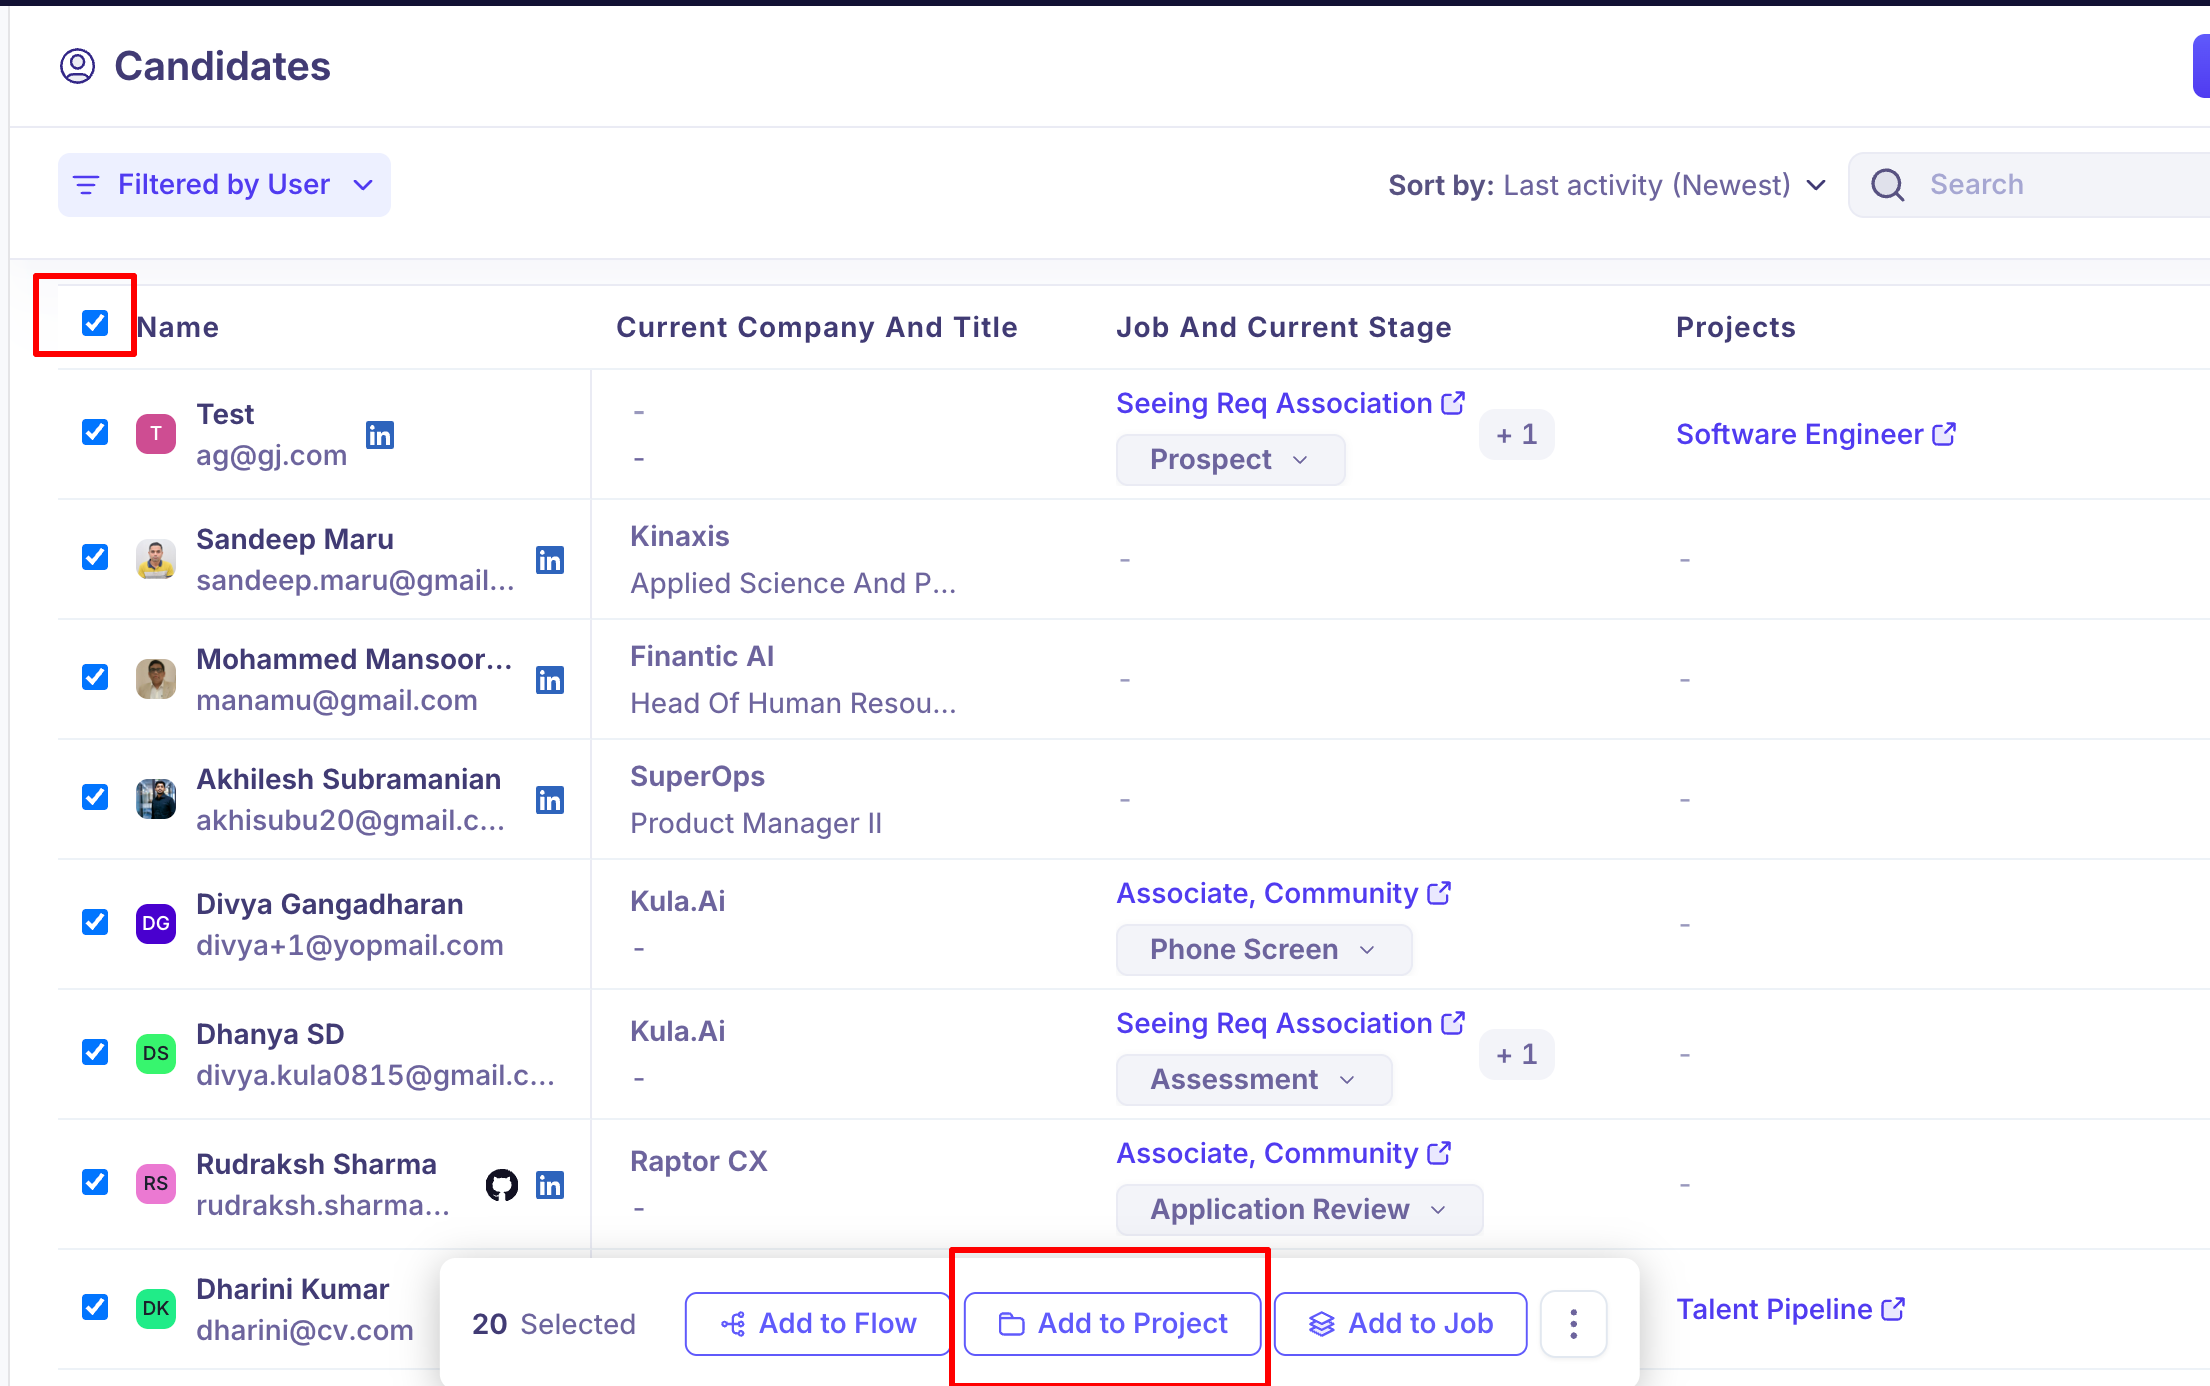
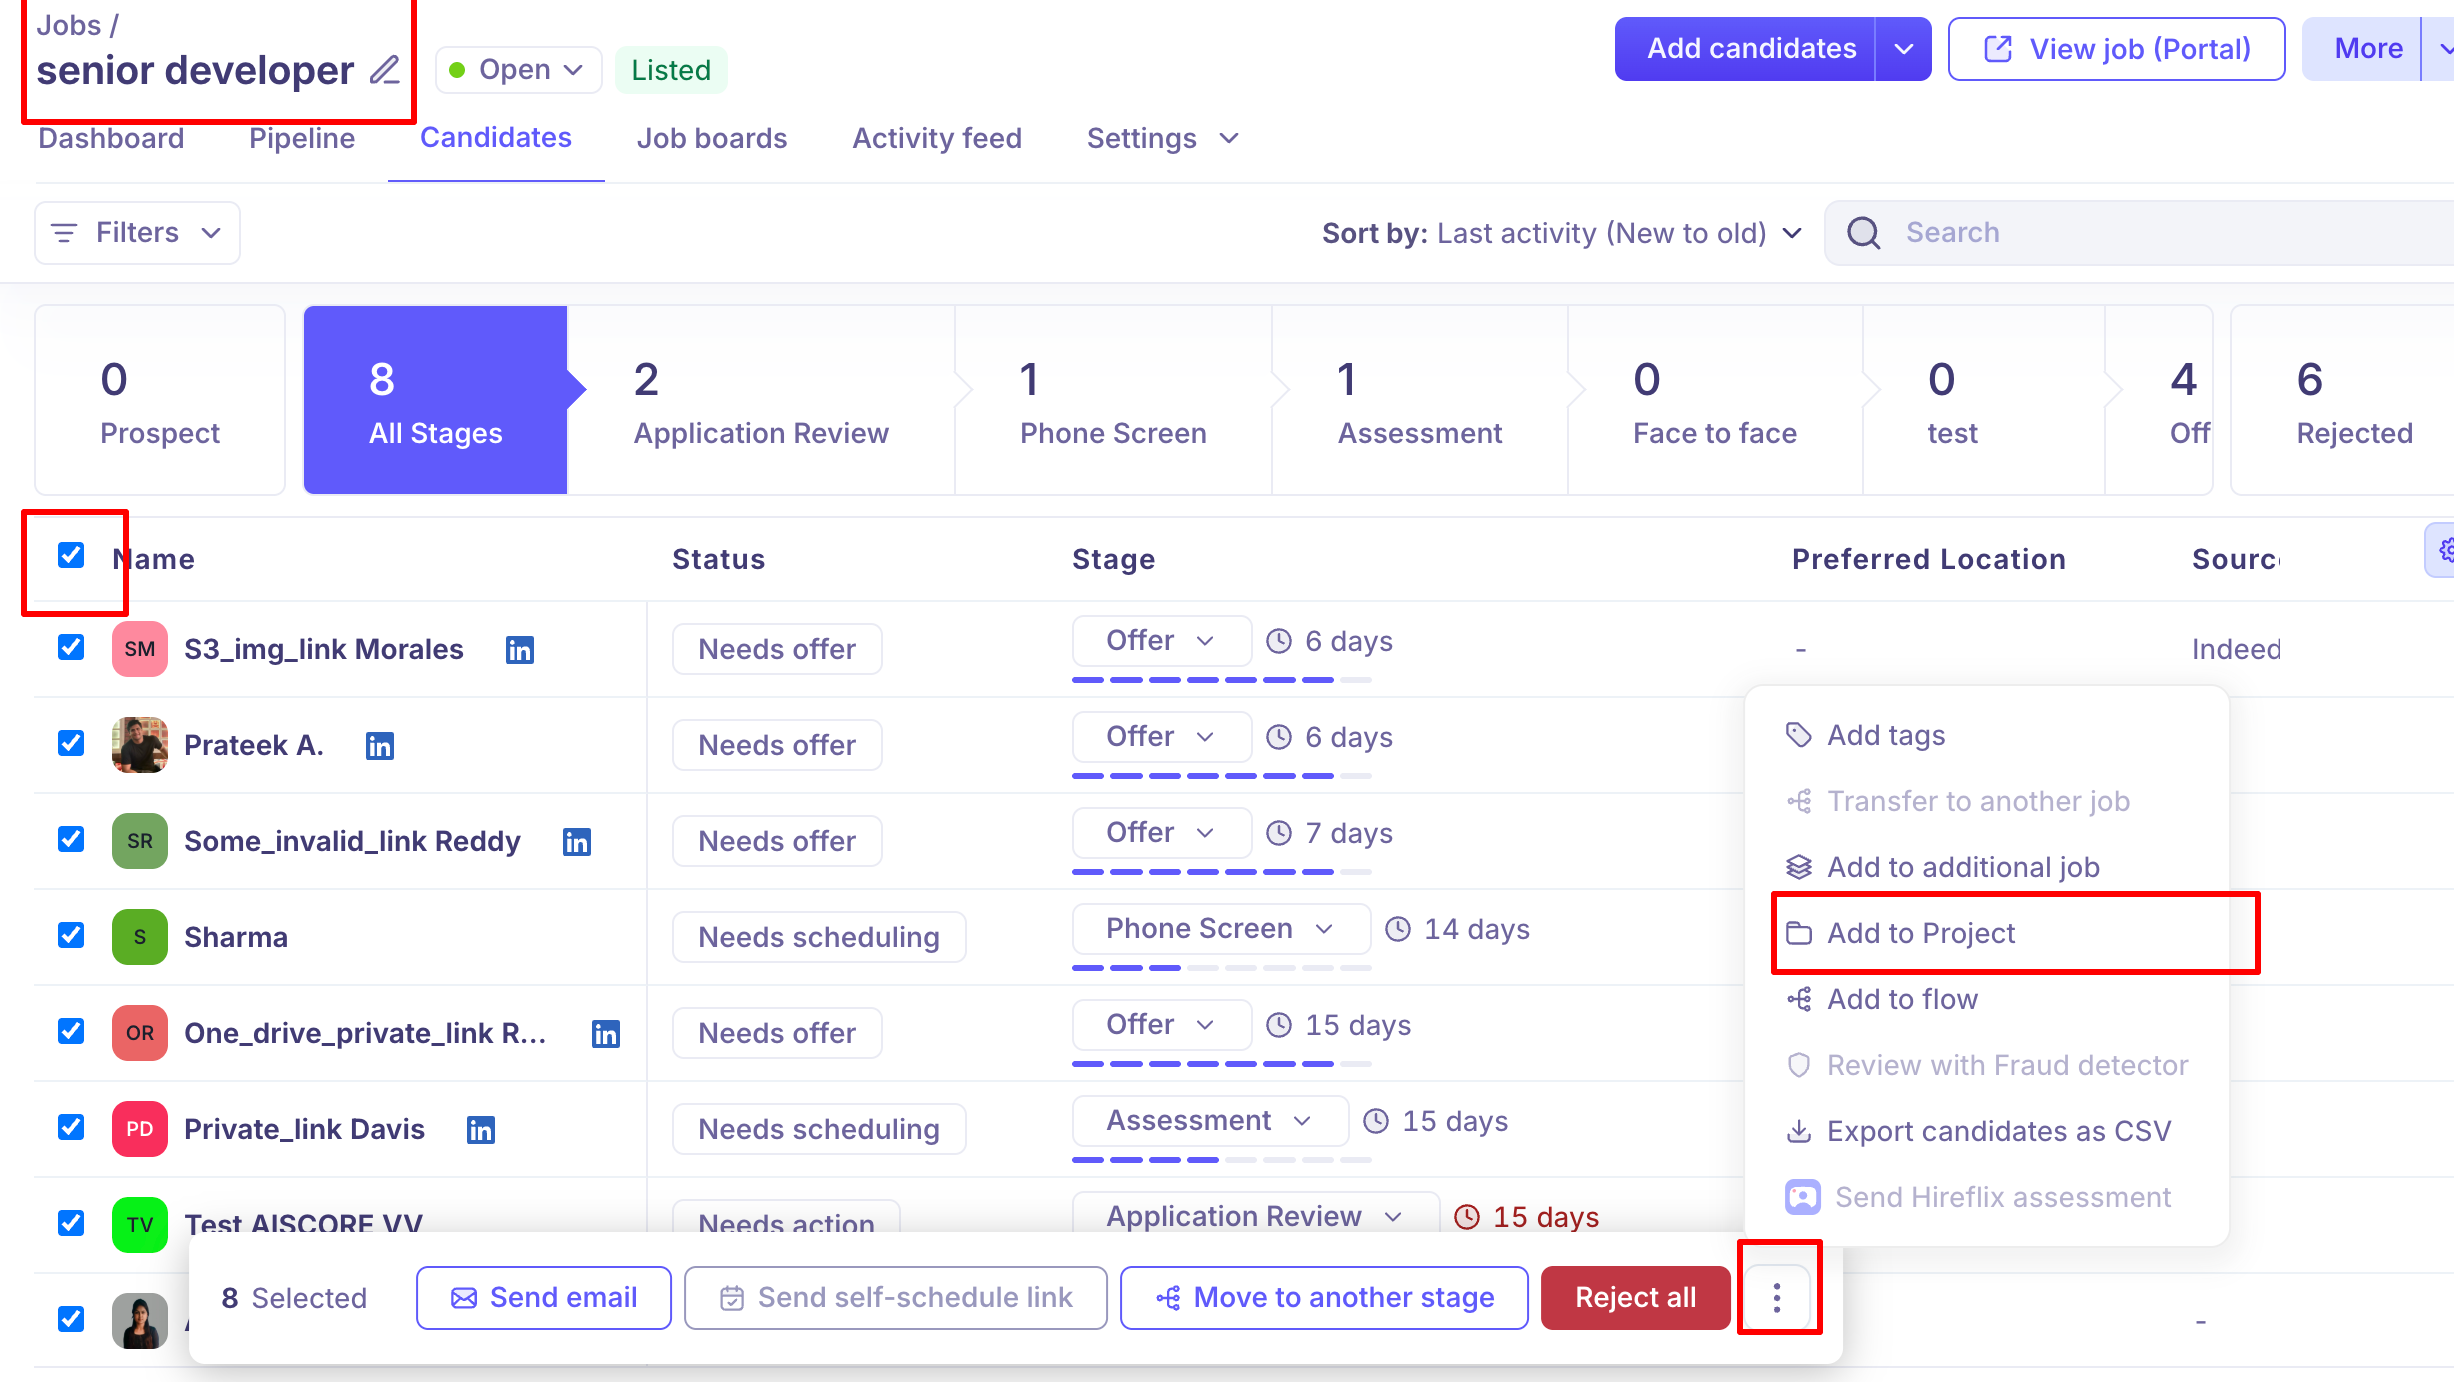
You can also add candidates from elsewhere in Kula — from a job's Candidates tab, from the Candidates list, or from a contact's profile — by choosing Add to Project.
Working through a long candidate list
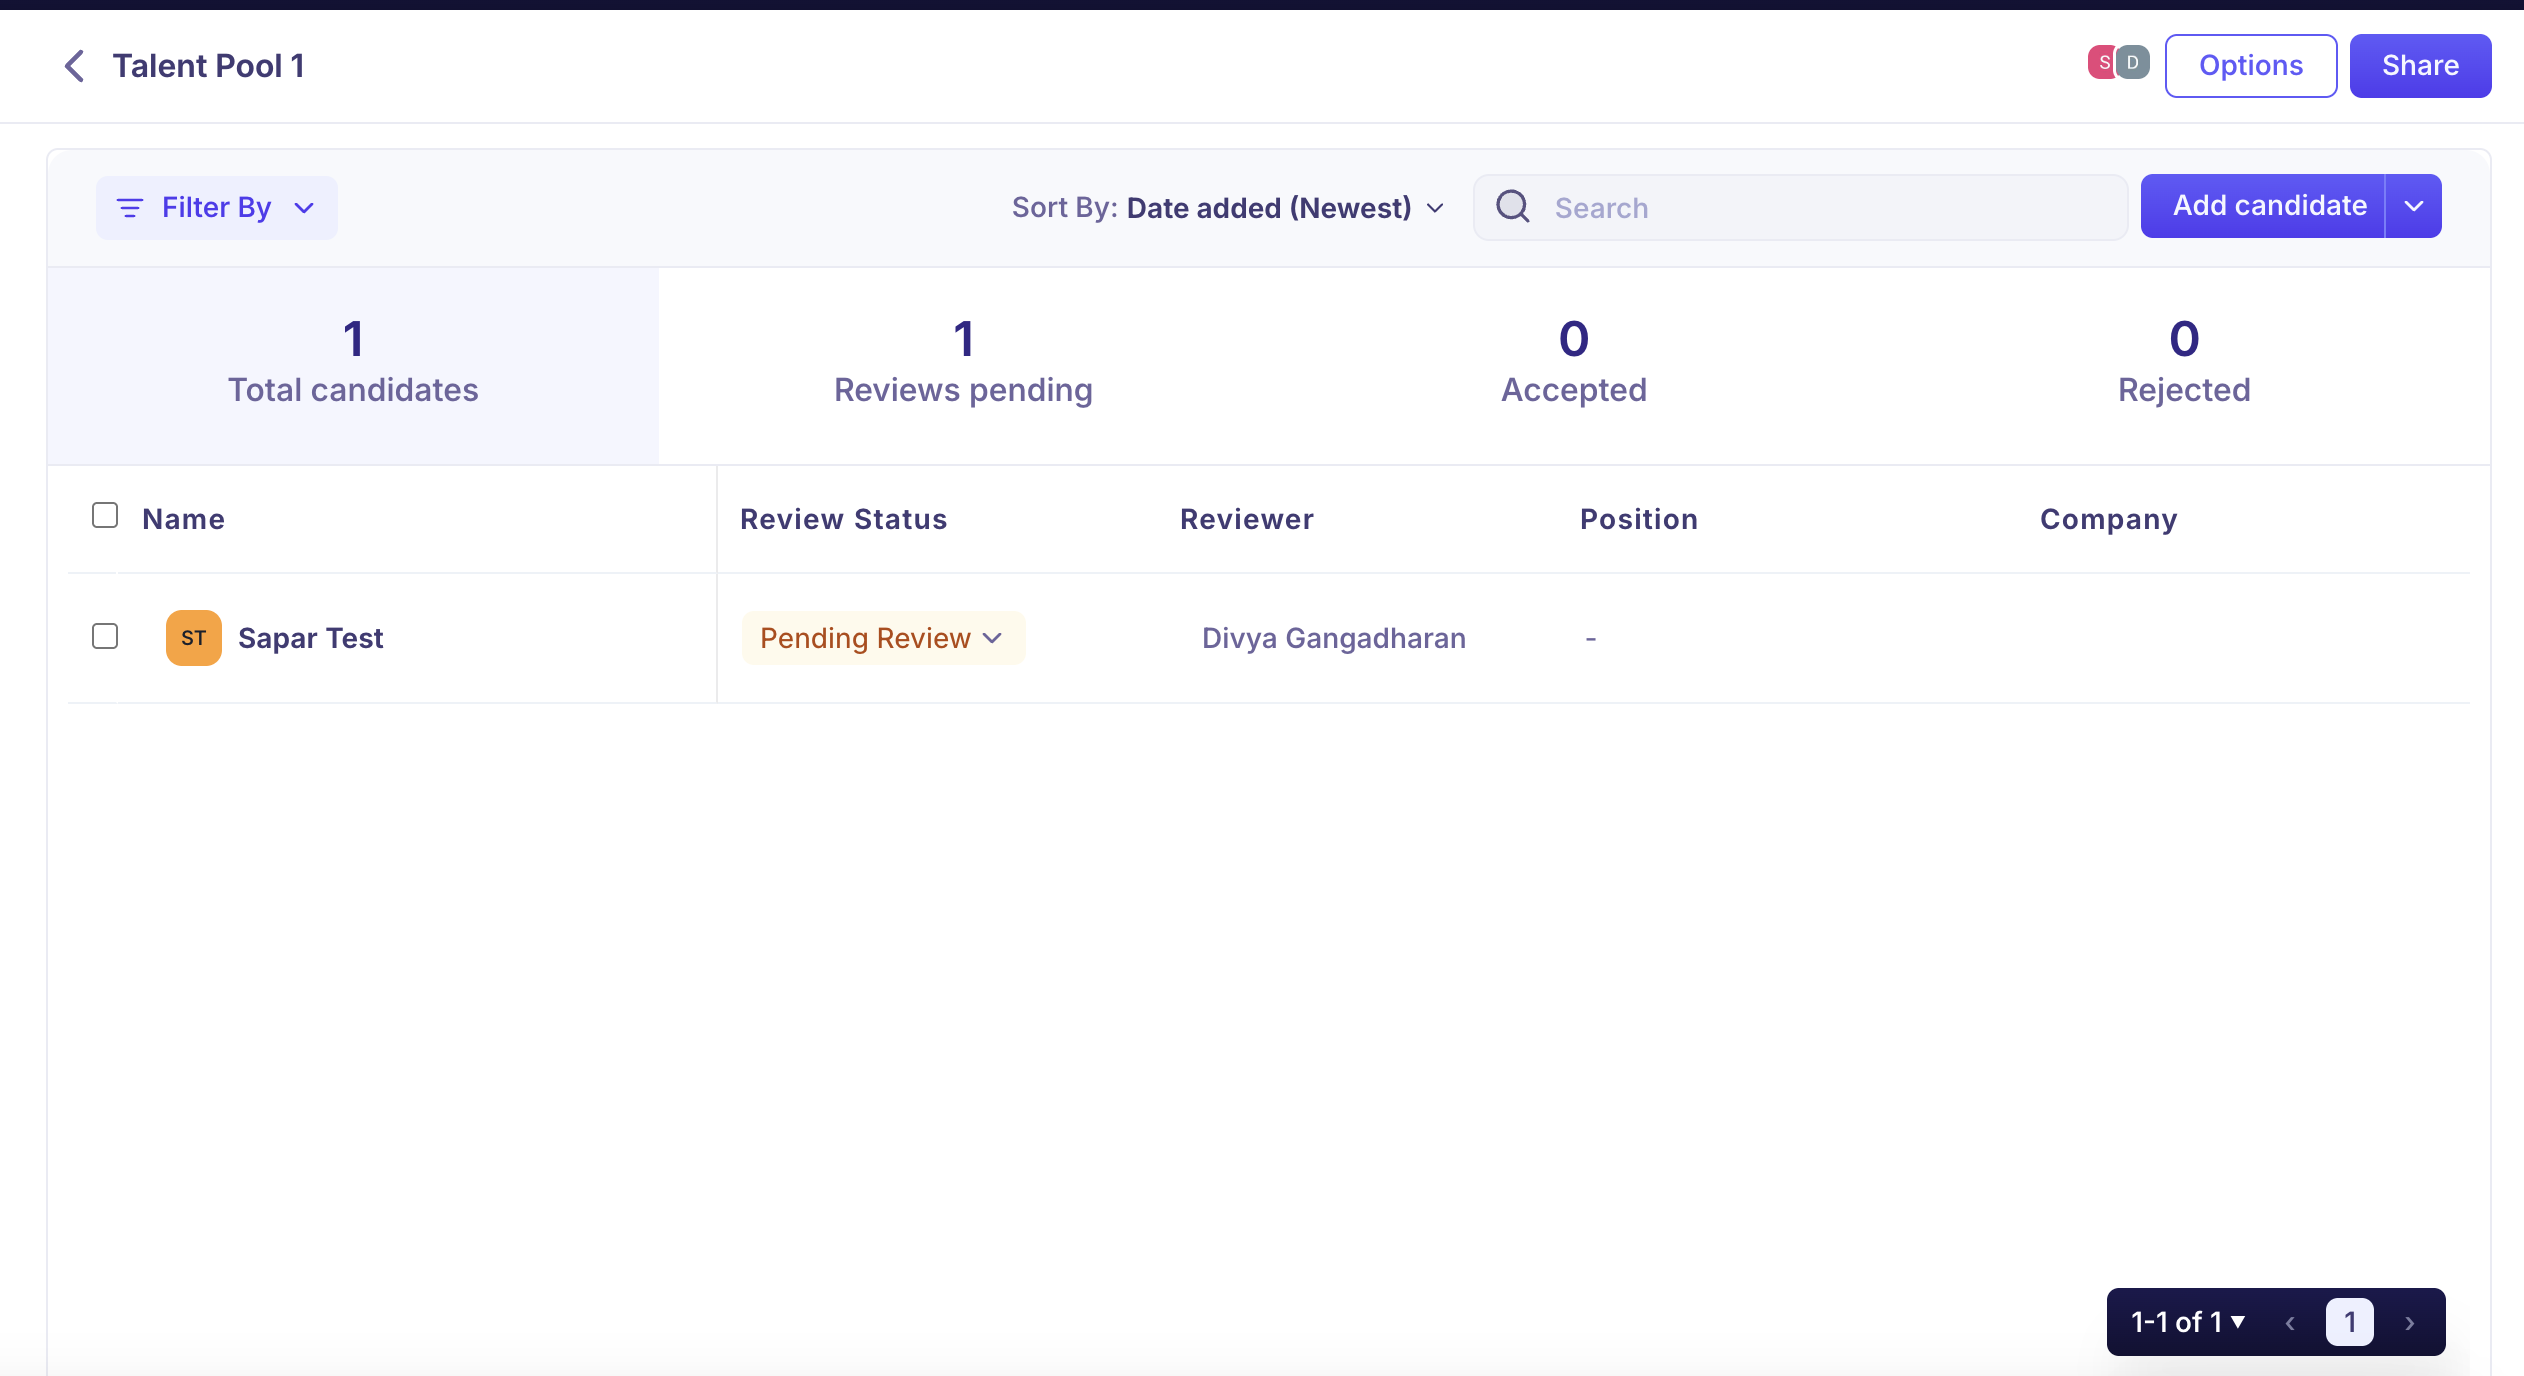
Once a project has candidates, the table shows Total candidates, Reviews pending, Accepted and Rejected across the top. Click any of these to filter the list to just those candidates.
At the bottom of the list you can set the page size to 20, 50 or 100. Tick the header checkbox to select a whole page, then use the action bar that appears to send candidates for review, add them to a flow or a job, or remove them.
Good to know
Cancelling on step 2 does not delete the project. Because the project is saved when you click Next: Project team, closing the form afterwards leaves the project in place with no one shared on it. Delete it by archiving it if you did not mean to create it.
A project name can be at most 60 characters and a description at most 255.
Archiving is the only way to remove a project, and it cannot be undone. You must type
ARCHIVEto confirm, and everyone loses access.Candidates cannot be exported from a project. There is no CSV export and projects are not part of the organisation data export.
Removing a candidate from a project is permanent and asks you to type
REMOVEto confirm. It does not delete the candidate from Kula — only from this project.
FAQ
I closed the form on step 2. Was my project created?
Yes. The project is saved when you click Next: Project team, so it stays in the list with no one shared on it. If you didn't mean to create it, archive it.
How do I add a lot of candidates at once?
Open the project, click Add candidate and choose Import from CSV. You can also forward CVs to the project's own address with Email to, and Kula creates the candidates for you.
Where do I find the project's email address?
Open the project, click Add candidate and choose Email to. Use the copy button beside the address rather than retyping it.
Can I add someone who's already on a job?
Yes. From the job's Candidates tab, the Candidates list or the contact's profile, choose Add to Project.
If I remove a candidate from a project, are they deleted from Kula?
No. They're only removed from that project. You'll be asked to type REMOVE to confirm.
Need help? If you have questions or need assistance, reach out to us at or use the in-app chat.