Schedule Candidate Rejection Email
Last updated: February 24, 2025
As a recruiter, it’s essential to keep applicants informed about their application status, including providing timely updates when a candidate is no longer being considered for a role.
While a quick update on an applicant's status is appreciated, it’s equally important to consider the timing of communication. Scheduling a rejection email allows recruiters and hiring managers to notify applicants respectfully and promptly.
Steps to Schedule a Candidate Rejection Email
Go to the Jobs page, then navigate to the Pipeline or Candidates section.
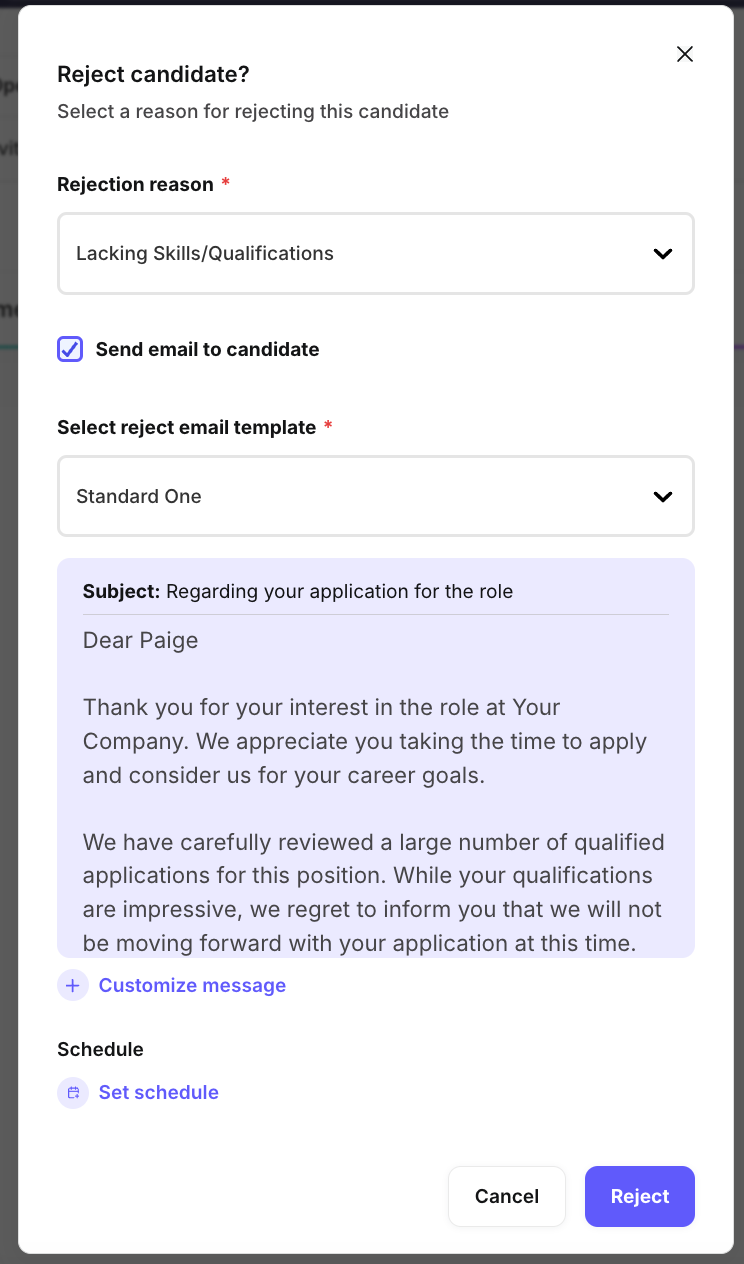
Click the Reject icon next to the candidate you wish to reject.
Provide the reason for the rejection.
Check the Send email box.
Select the email template you want to use and customize it if necessary.
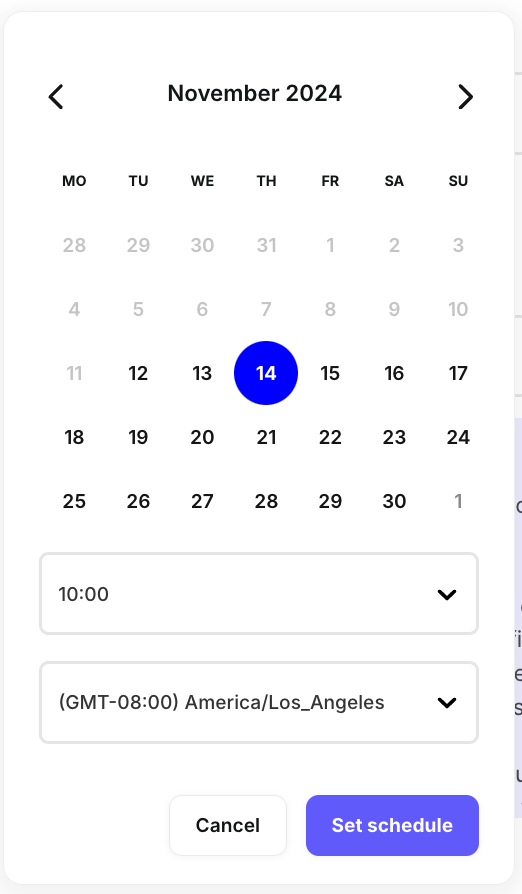
Click the Set schedule link to choose a date, time, and time zone.
Once ready, click the Reject button.
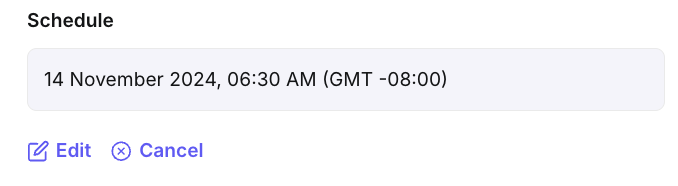
After scheduling, you can edit or cancel the email by selecting the Edit or Cancel icon.
You can cancel the rejection email by going to the candidate's profile and clicking the Cancel scheduled email link.

Once the email is scheduled, the candidate’s status will be marked as Rejected.