How to Connect Keka to Kula
Last updated: October 9, 2026
Keka is an HRIS. Once connected, recruiters can add a hired candidate to Keka as an employee straight from Kula, without re-entering their details. Like Kula's other direct HRIS integrations, this only pushes data one way — from Kula into Keka.
Who can do this: Admin, Super Admin can connect Keka. Adding a hired candidate to Keka is available to whoever already has access to that candidate's application — it isn't separately role-gated beyond that.
Where to find it: Settings → Organization → Organization integrations → HRIS and onboarding → Keka.
Connecting Keka
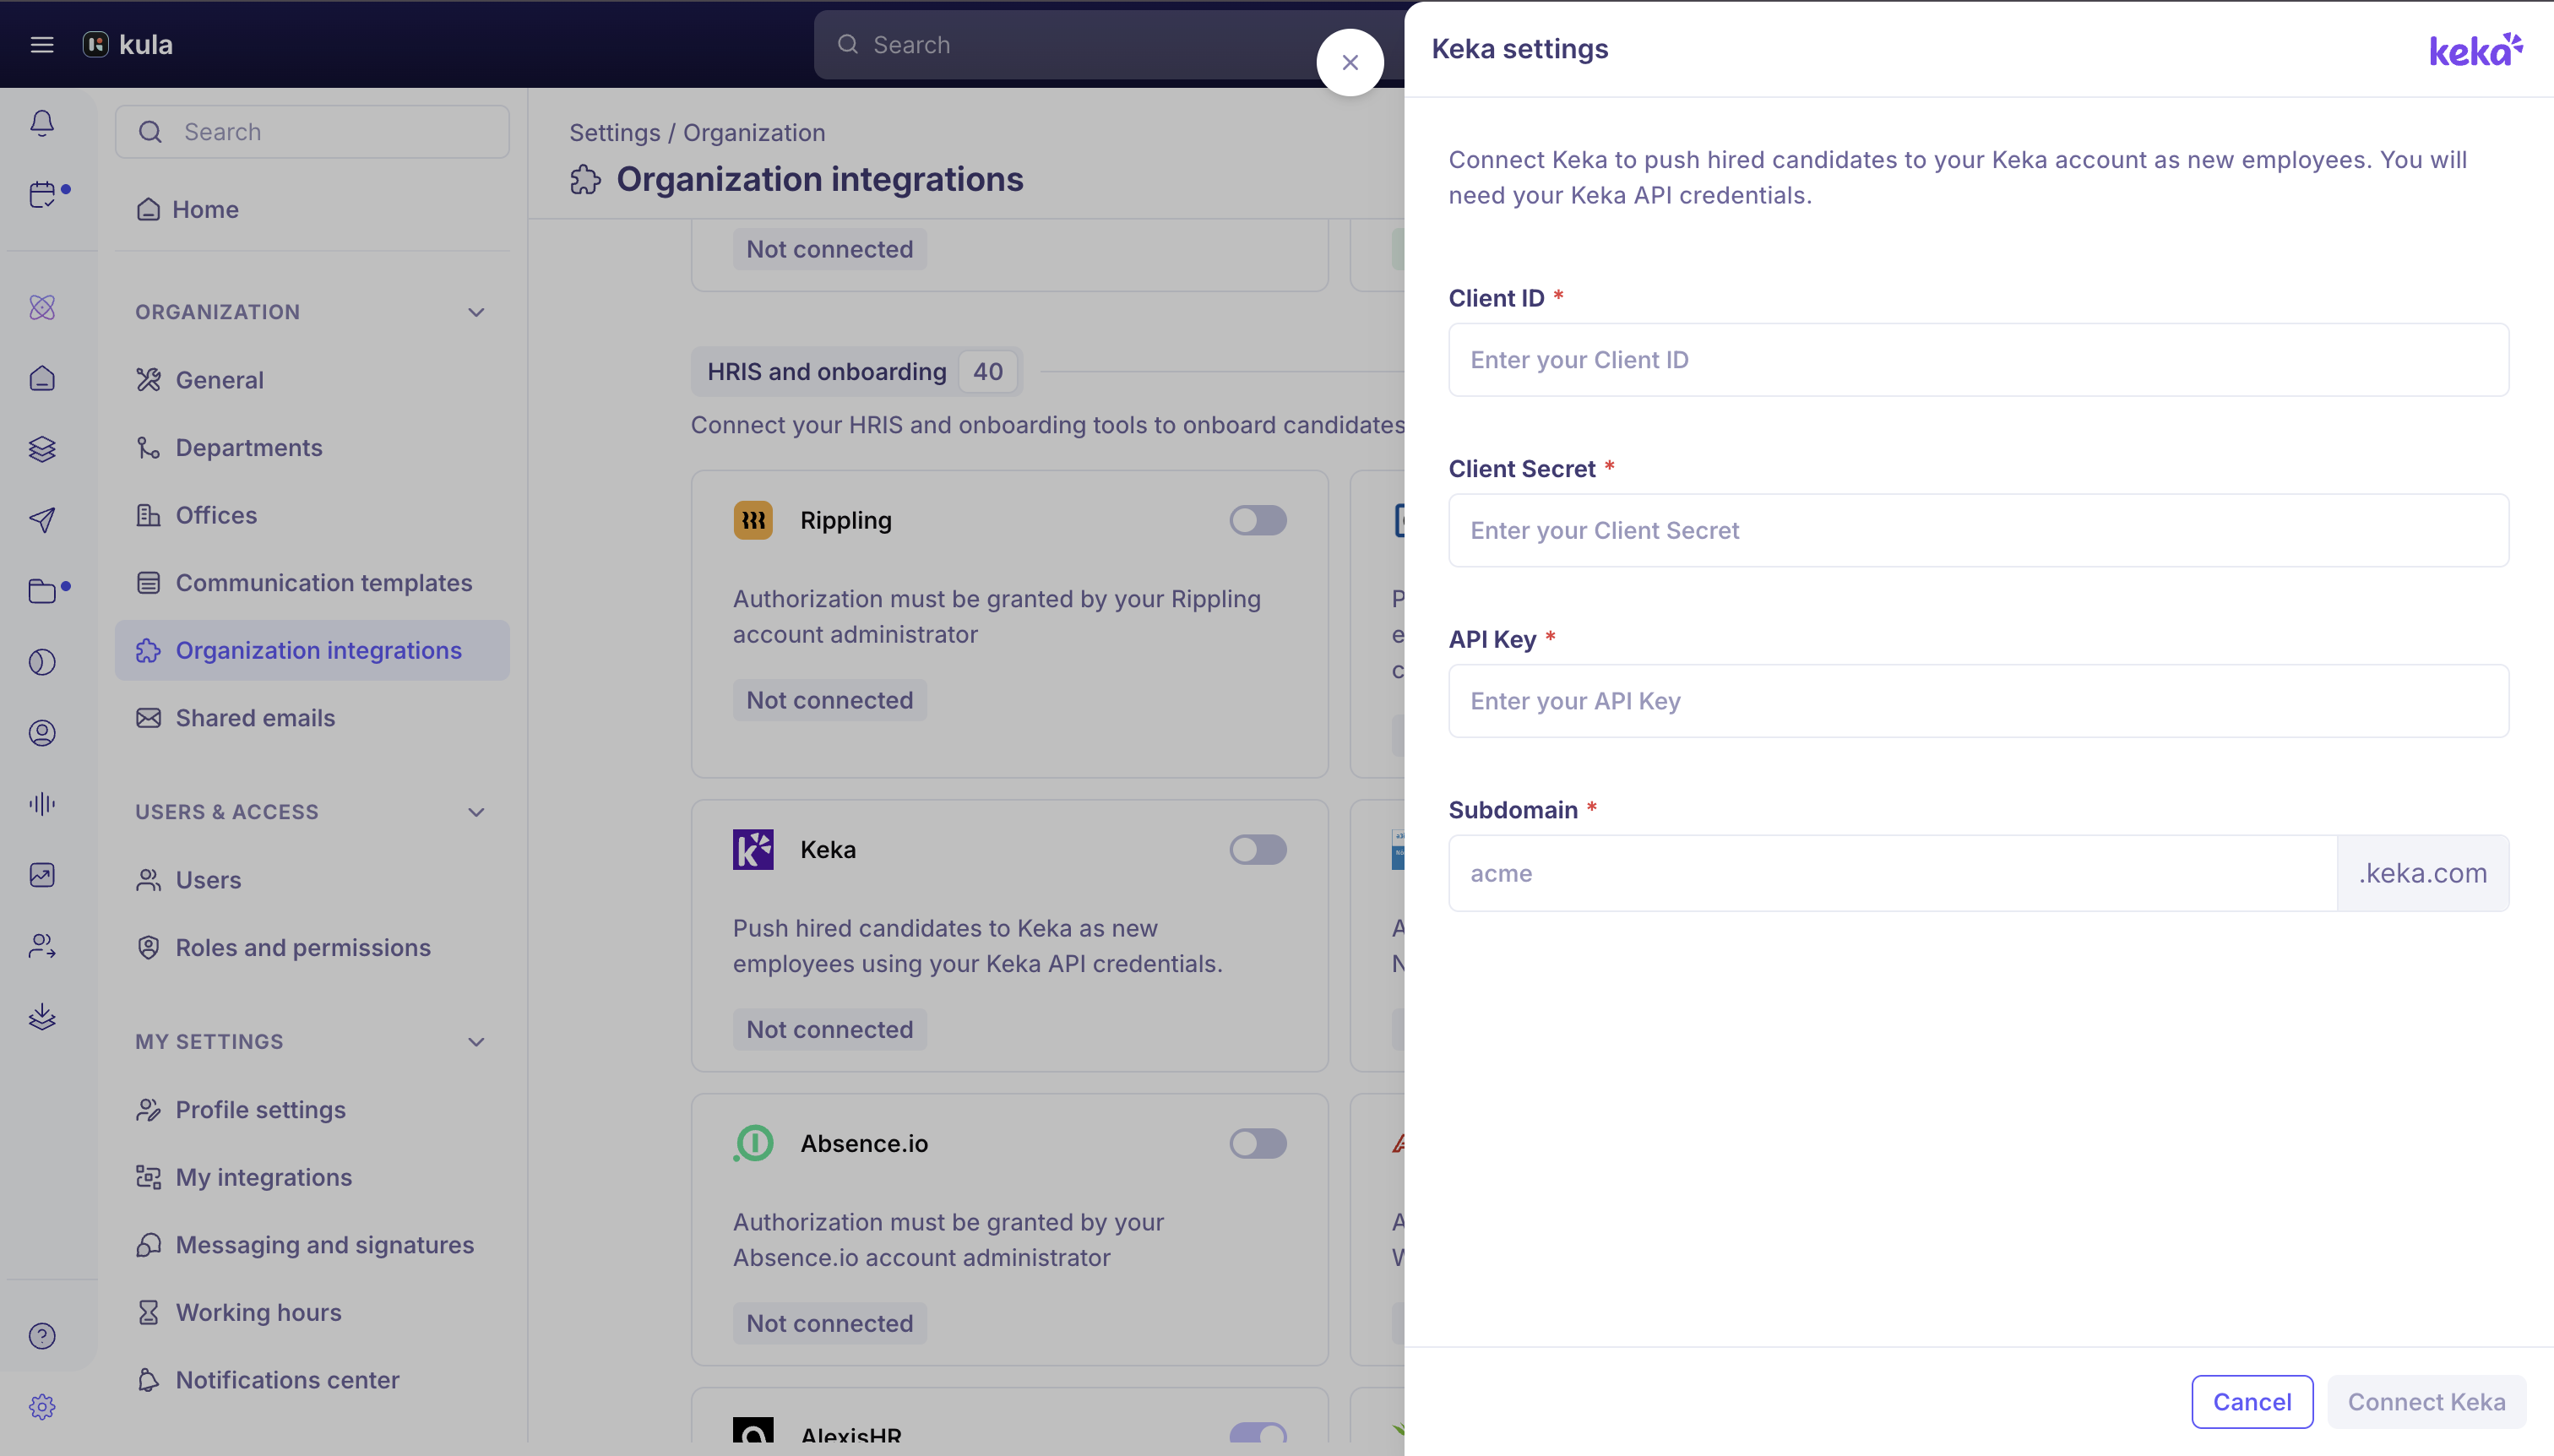
Go to Settings → Organization → Organization integrations.
Under HRIS and onboarding, find the Keka card and start connecting it.
Enter your Client ID, Client Secret, API Key, and your Keka Subdomain — just the subdomain itself (for example, "acme"), not a full URL like "acme.keka.com".
Kula checks your credentials and subdomain with Keka before saving the connection.
Adding a hired candidate to Keka
Once a candidate reaches the Hired stage:
Open the application and choose Add to HRIS → Keka.
Review the employee form — Kula pre-fills whatever it can from the candidate's profile and offer details.
Submit the form.
The employee is created in Keka, and the push is recorded in the candidate's activity feed. A candidate can only be pushed to Keka once per application.
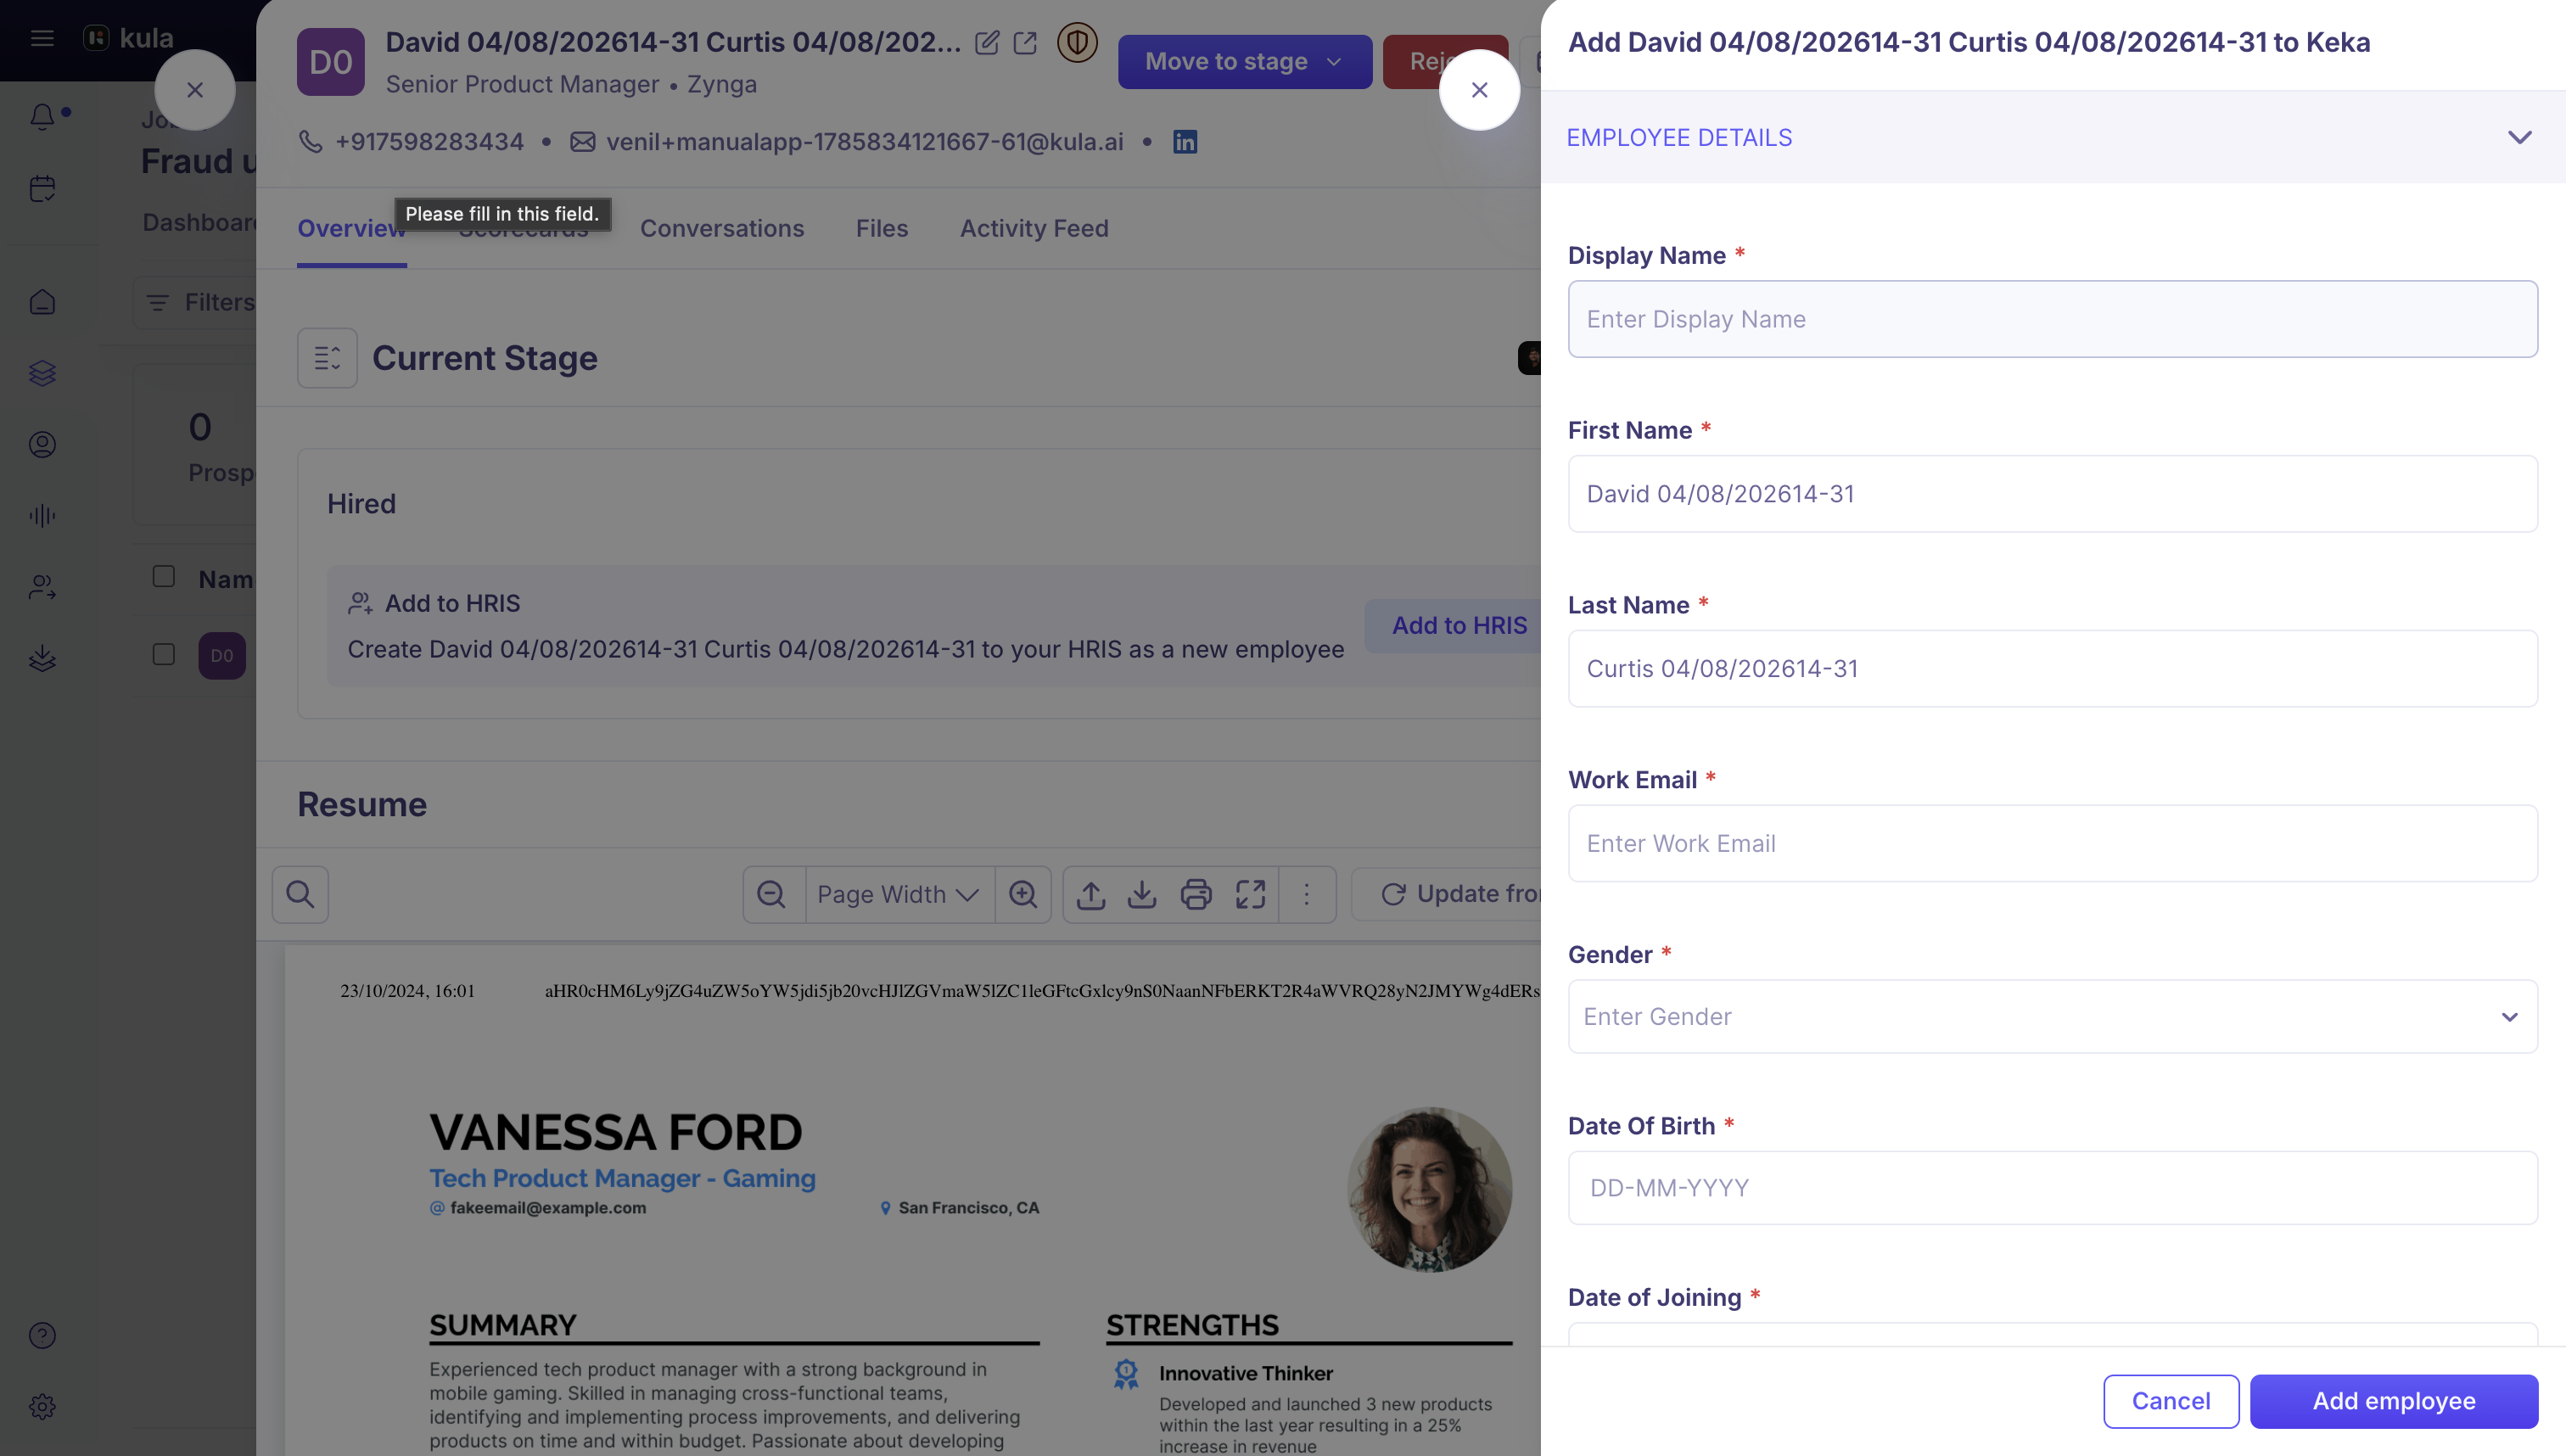
The employee form
Kula sends Keka these fields: Display name, First name, Last name, Work email, Gender, Date of birth, Date of joining, Department, Business unit, Job title, and Location. All are mandatory except Business unit.
Live Keka lists: Department, Location, Job title, Business unit, and Gender are dropdowns filled from your own Keka account, so recruiters pick real Keka values instead of typing them in.
Mapped to Kula by default: First name, Last name, and Date of joining (from the offer's start date) are pre-filled automatically. You can map other fields to a Kula Job, Candidate, Offer, or Requisition field the same way.
Clear errors from Keka: if Keka rejects the employee — for example, a work email that's already in use — Kula shows Keka's own reason next to the field it relates to, rather than just a generic failure.
Good to know
Your Keka API key needs the "Employee And Org Information" scope. Without it, the connection won't go through.
Only these eleven fields are sent to Keka. Everything else — phone numbers, reporting manager, custom fields — is completed directly in Keka after the employee is created.
Work email is never pre-filled. Since it's the employee's new company address, the recruiter always enters it themselves.
Keka assigns the employee number and applies your default leave plan, shift, weekly off, and other policies — Kula doesn't set any of that.
For a mapped dropdown field, the Kula value must match the Keka option name exactly for it to be pre-selected — a mismatch means the field won't pre-fill, even though it's mapped.
A candidate can only be pushed to Keka once per application. Trying again shows "This candidate has already been added to the HRIS."
Keka's own dropdown lists refresh once a day. A department or job title you just added in Keka may take up to 24 hours to show up in Kula's dropdowns.
If a dropdown's options fail to load from Keka, that field falls back to a plain text box so you can still enter a value.
Need help?
If you have questions or need assistance, reach out to us at support@kula.ai or use the in-app chat.