How to connect Darwinbox to Kula
Last updated: October 9, 2026
Darwinbox is an HRIS. Once connected, Kula pushes hired candidates into Darwinbox as a pending employee with one click — the data flows one way, from Kula to Darwinbox, so there's minimal manual re-entry for your team during onboarding.
Who can do this: Admin, Super Admin can connect Darwinbox and build the employee form. Pushing a hired candidate to Darwinbox is available to whoever already has access to that candidate's application — it isn't separately role-gated beyond that.
Where to find it: Settings → Organization → Organization integrations → HRIS and onboarding → Darwinbox.
Connecting Darwinbox
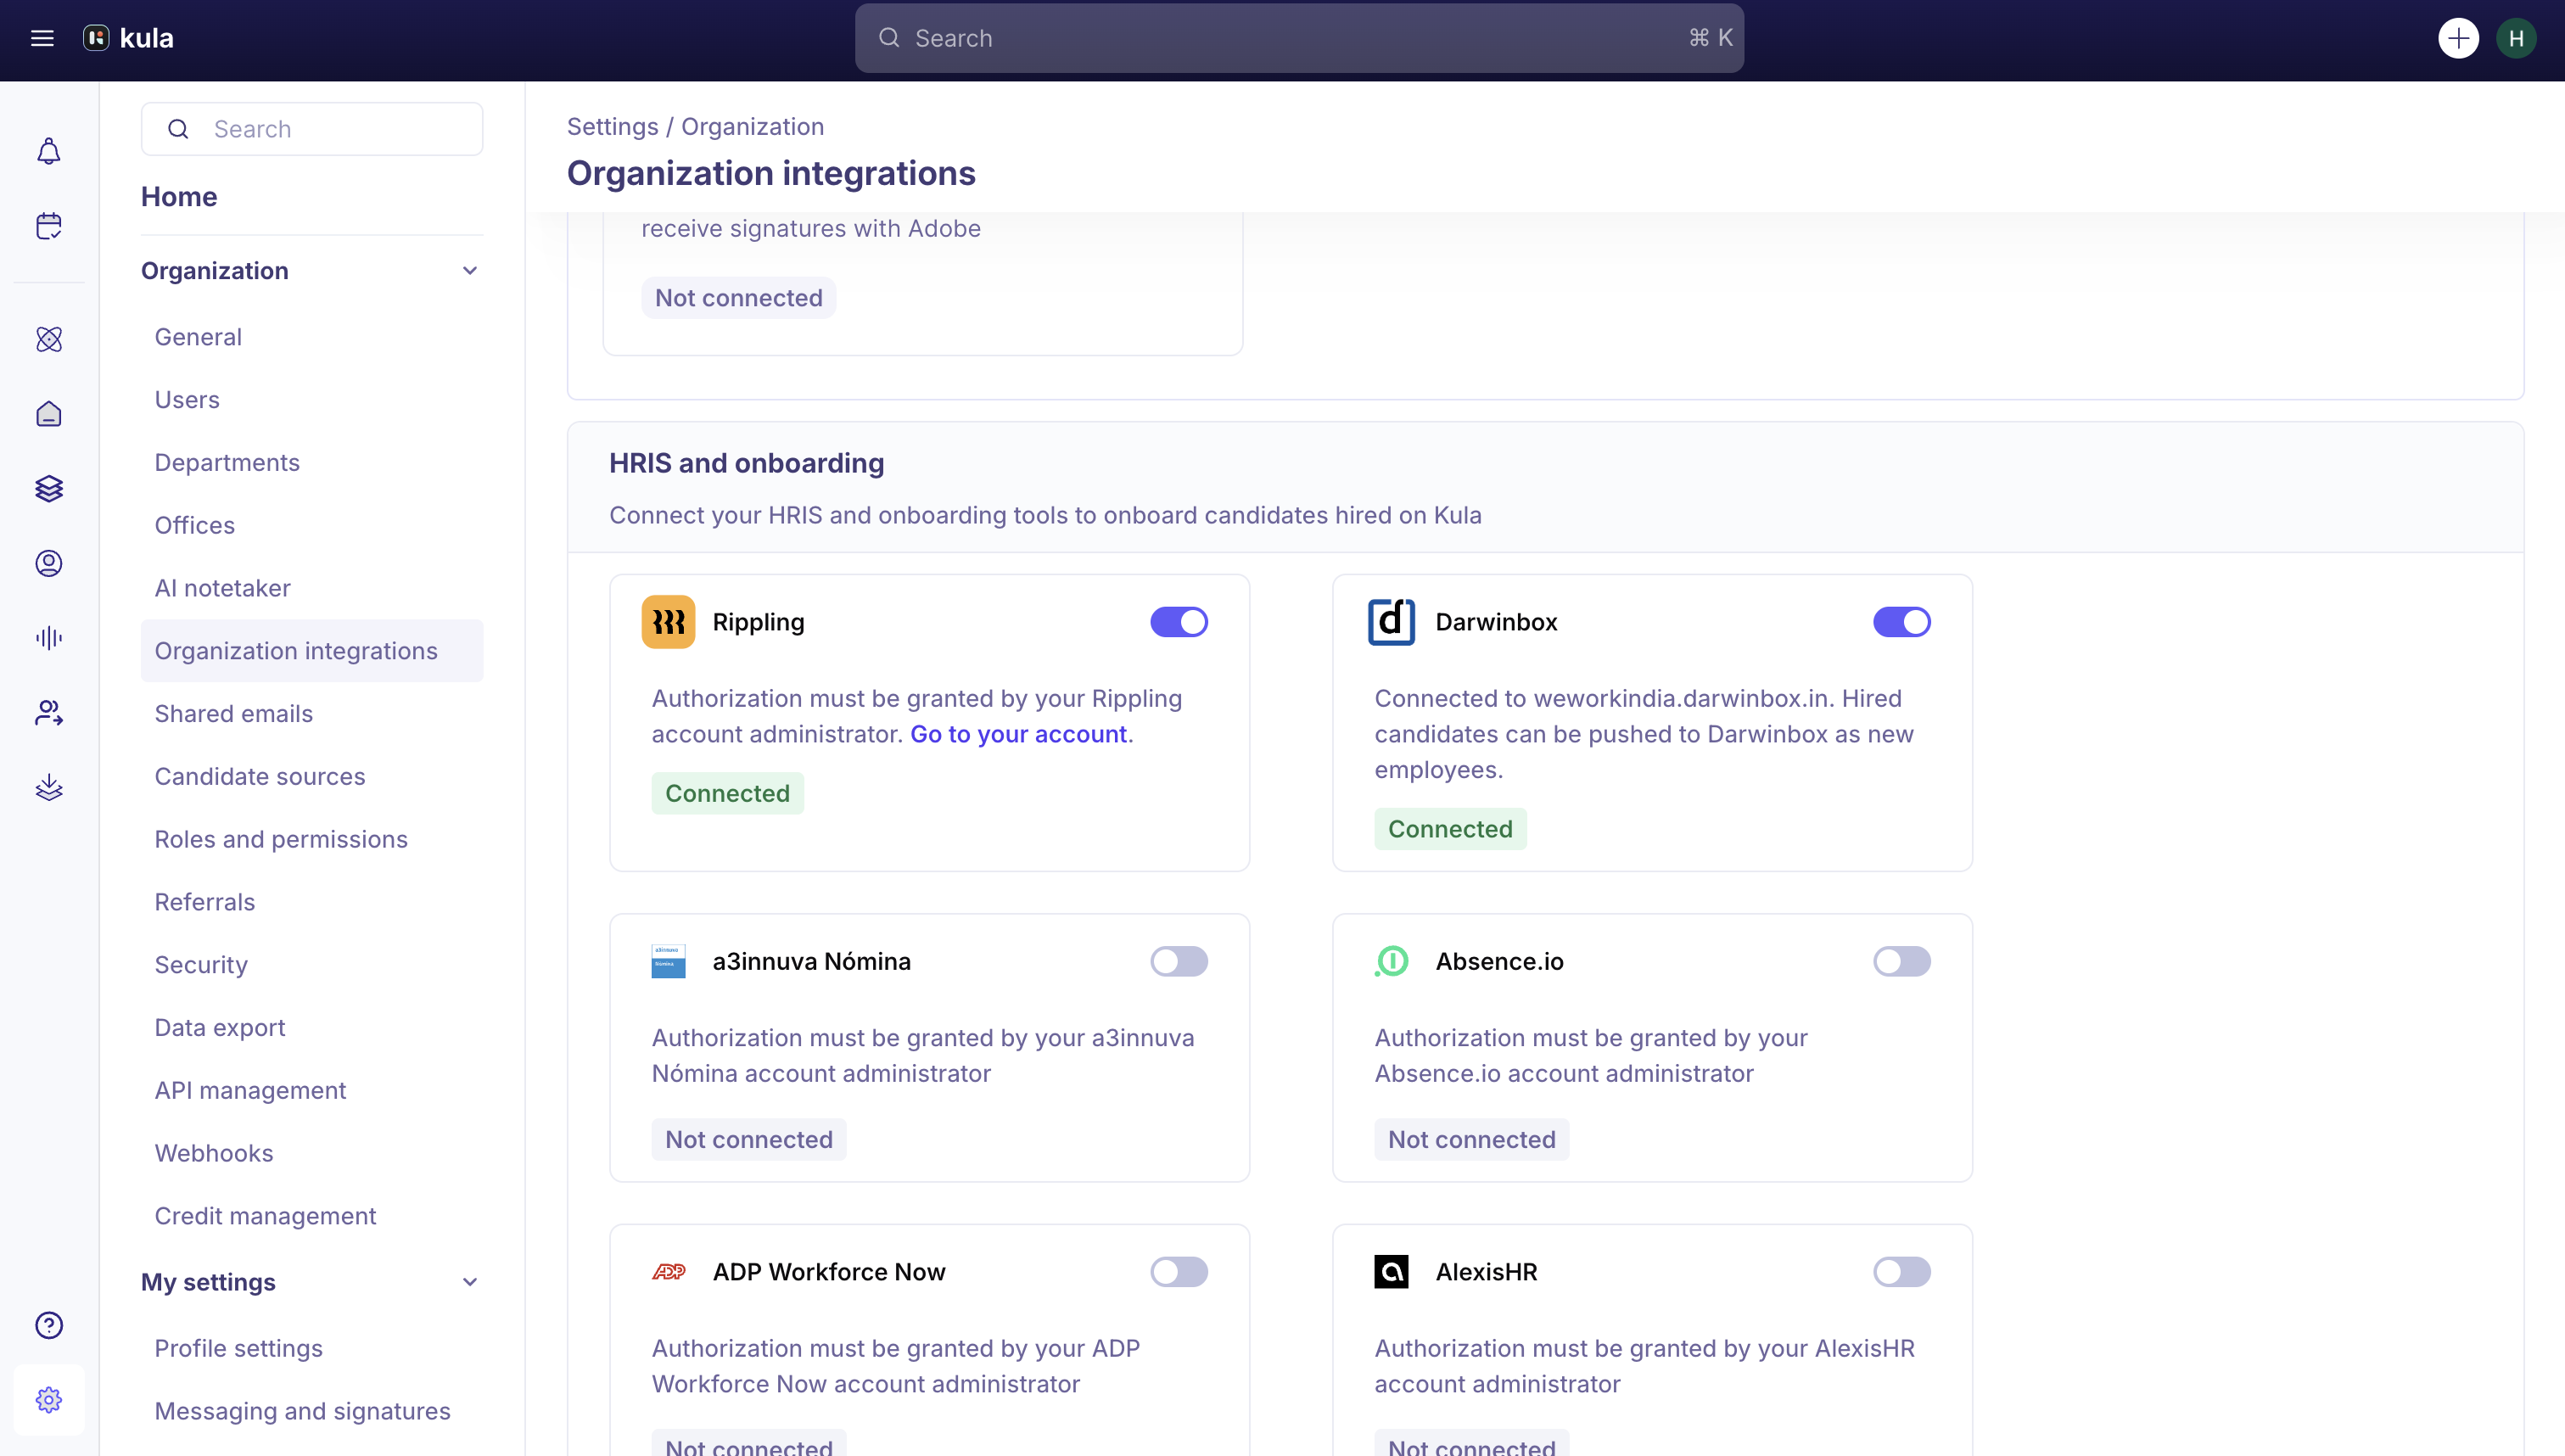
Go to Settings → Organization → Organization integrations.
Under HRIS and onboarding, find the Darwinbox card and start connecting it.
Enter your Darwinbox API credentials: Client ID, Client Secret, and Subdomain (just the subdomain — Kula appends .darwinbox.in for you).
Save to complete the connection.
Building your employee form
Unlike a fixed, pre-built form, the Darwinbox employee form is one you build yourself, so it matches your own Darwinbox setup.
After connecting, go to Create employee form.
Start from the default fields — First name, Middle name, Last name, Email — and click Add field to add your own.
Pick a field type from eight options: Short text, Long text, Single select, Multi select, Yes/No, Date, Number, and URL. Each one carries the key Darwinbox's own "Add pending employee" API expects.
Optionally map a field to a Kula Job, Candidate, Offer, or Requisition field, so it fills in automatically when you push a candidate. Kula only offers Kula fields of a matching type.
For a Single select field, you can either type its options yourself or pull them live from Darwinbox — Designations, Office locations, or Job levels. (Multi select fields always use typed options; they can't pull a live Darwinbox list.)
Set a default value for any field if you want one, and remove it later with Remove default. Turn on Prevent edits to lock a field so it's always sent to Darwinbox exactly as set.
Set each field's visibility — Mandatory, Optional, or Hide — add a placeholder, and drag fields into the order you want.
Custom fields can be edited or deleted at any time after you create them.
Pushing a hired candidate to Darwinbox
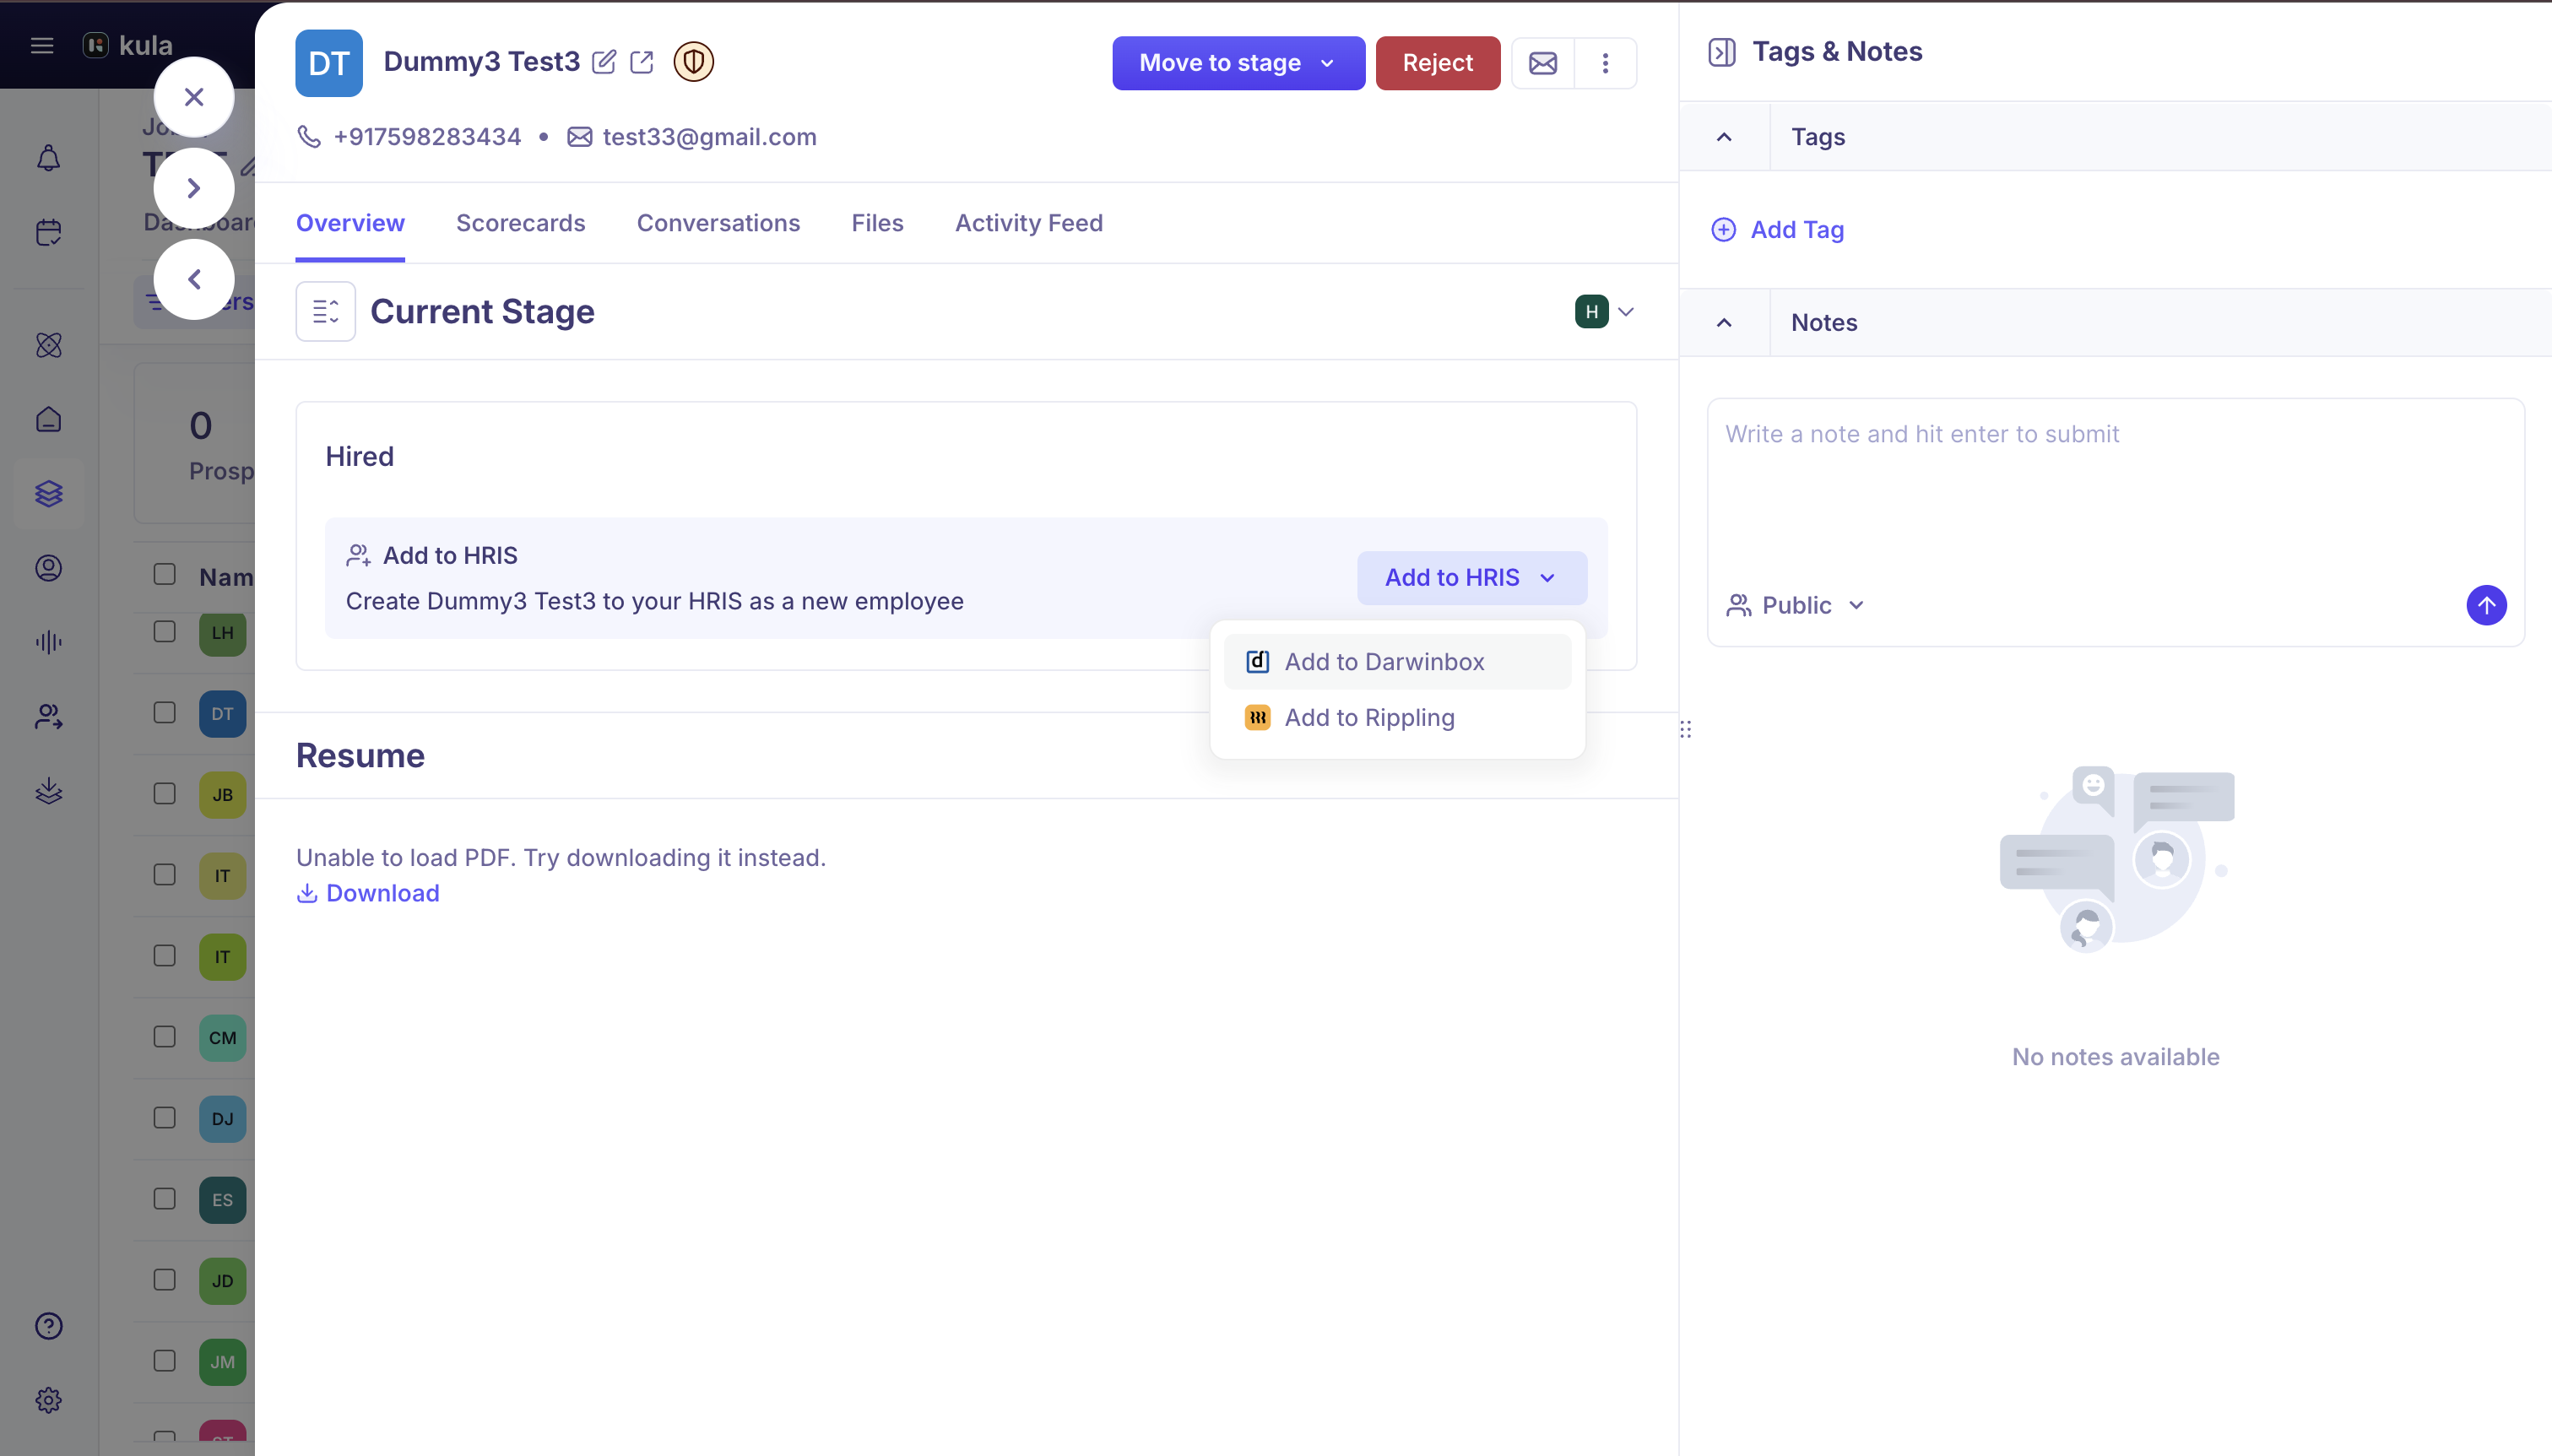
Once a candidate reaches the Hired stage, you can push them to Darwinbox from that application:
Open the application and find the HRIS push action, listed by provider.
Select Darwinbox. Kula fetches your employee form live and pre-fills it from the candidate's profile and offer details wherever a field is mapped.
Review or complete the remaining fields.
Click Add employee to send them to Darwinbox as a pending employee, ready for onboarding.
The push is logged in the candidate's activity timeline, and a candidate can only be pushed to a given integration once — once it's done, that option is disabled on their application.
Good to know
Kula only pushes data to Darwinbox — it doesn't read it back, aside from the three live lists (Designations, Office locations, Job levels) used to populate single-select dropdowns while you're building the form.
A field's key must be unique. Kula flags a duplicate key immediately when you try to save it.
A field's type can't be changed after you create it, and the default fields (First name, Middle name, Last name, Email) can't be deleted — only your own custom fields can be edited or removed later.
For select fields, Kula doesn't check that your mapped Kula field's options match Darwinbox's own options — that's on you to keep in sync, or the push can send a value Darwinbox doesn't recognize.
Only Single select fields can pull a live Darwinbox list. Multi select fields always use options you type in yourself.
If your account connected Darwinbox before the form builder existed, your form may still be on the old fixed layout until a one-time migration runs on Kula's side — if a customer in that position can't yet build or edit their form, that's the likely cause.
Need help?
If you have questions or need assistance, reach out to us at support@kula.ai or use the in-app chat.