Managing rejection reasons
Last updated: September 24, 2026
Rejection reasons are the list recruiters pick from when they reject a candidate — they drive your rejection reporting. This article covers creating, organising, and turning reasons on or off.
Who can do this: Anyone with the Manage rejection reasons permission, which Super Admin and Admin have by default.
Where to find it: Settings → Candidates & Applications → Rejection reasons.
Create a rejection reason
Go to Settings → Candidates & Applications → Rejection reasons.
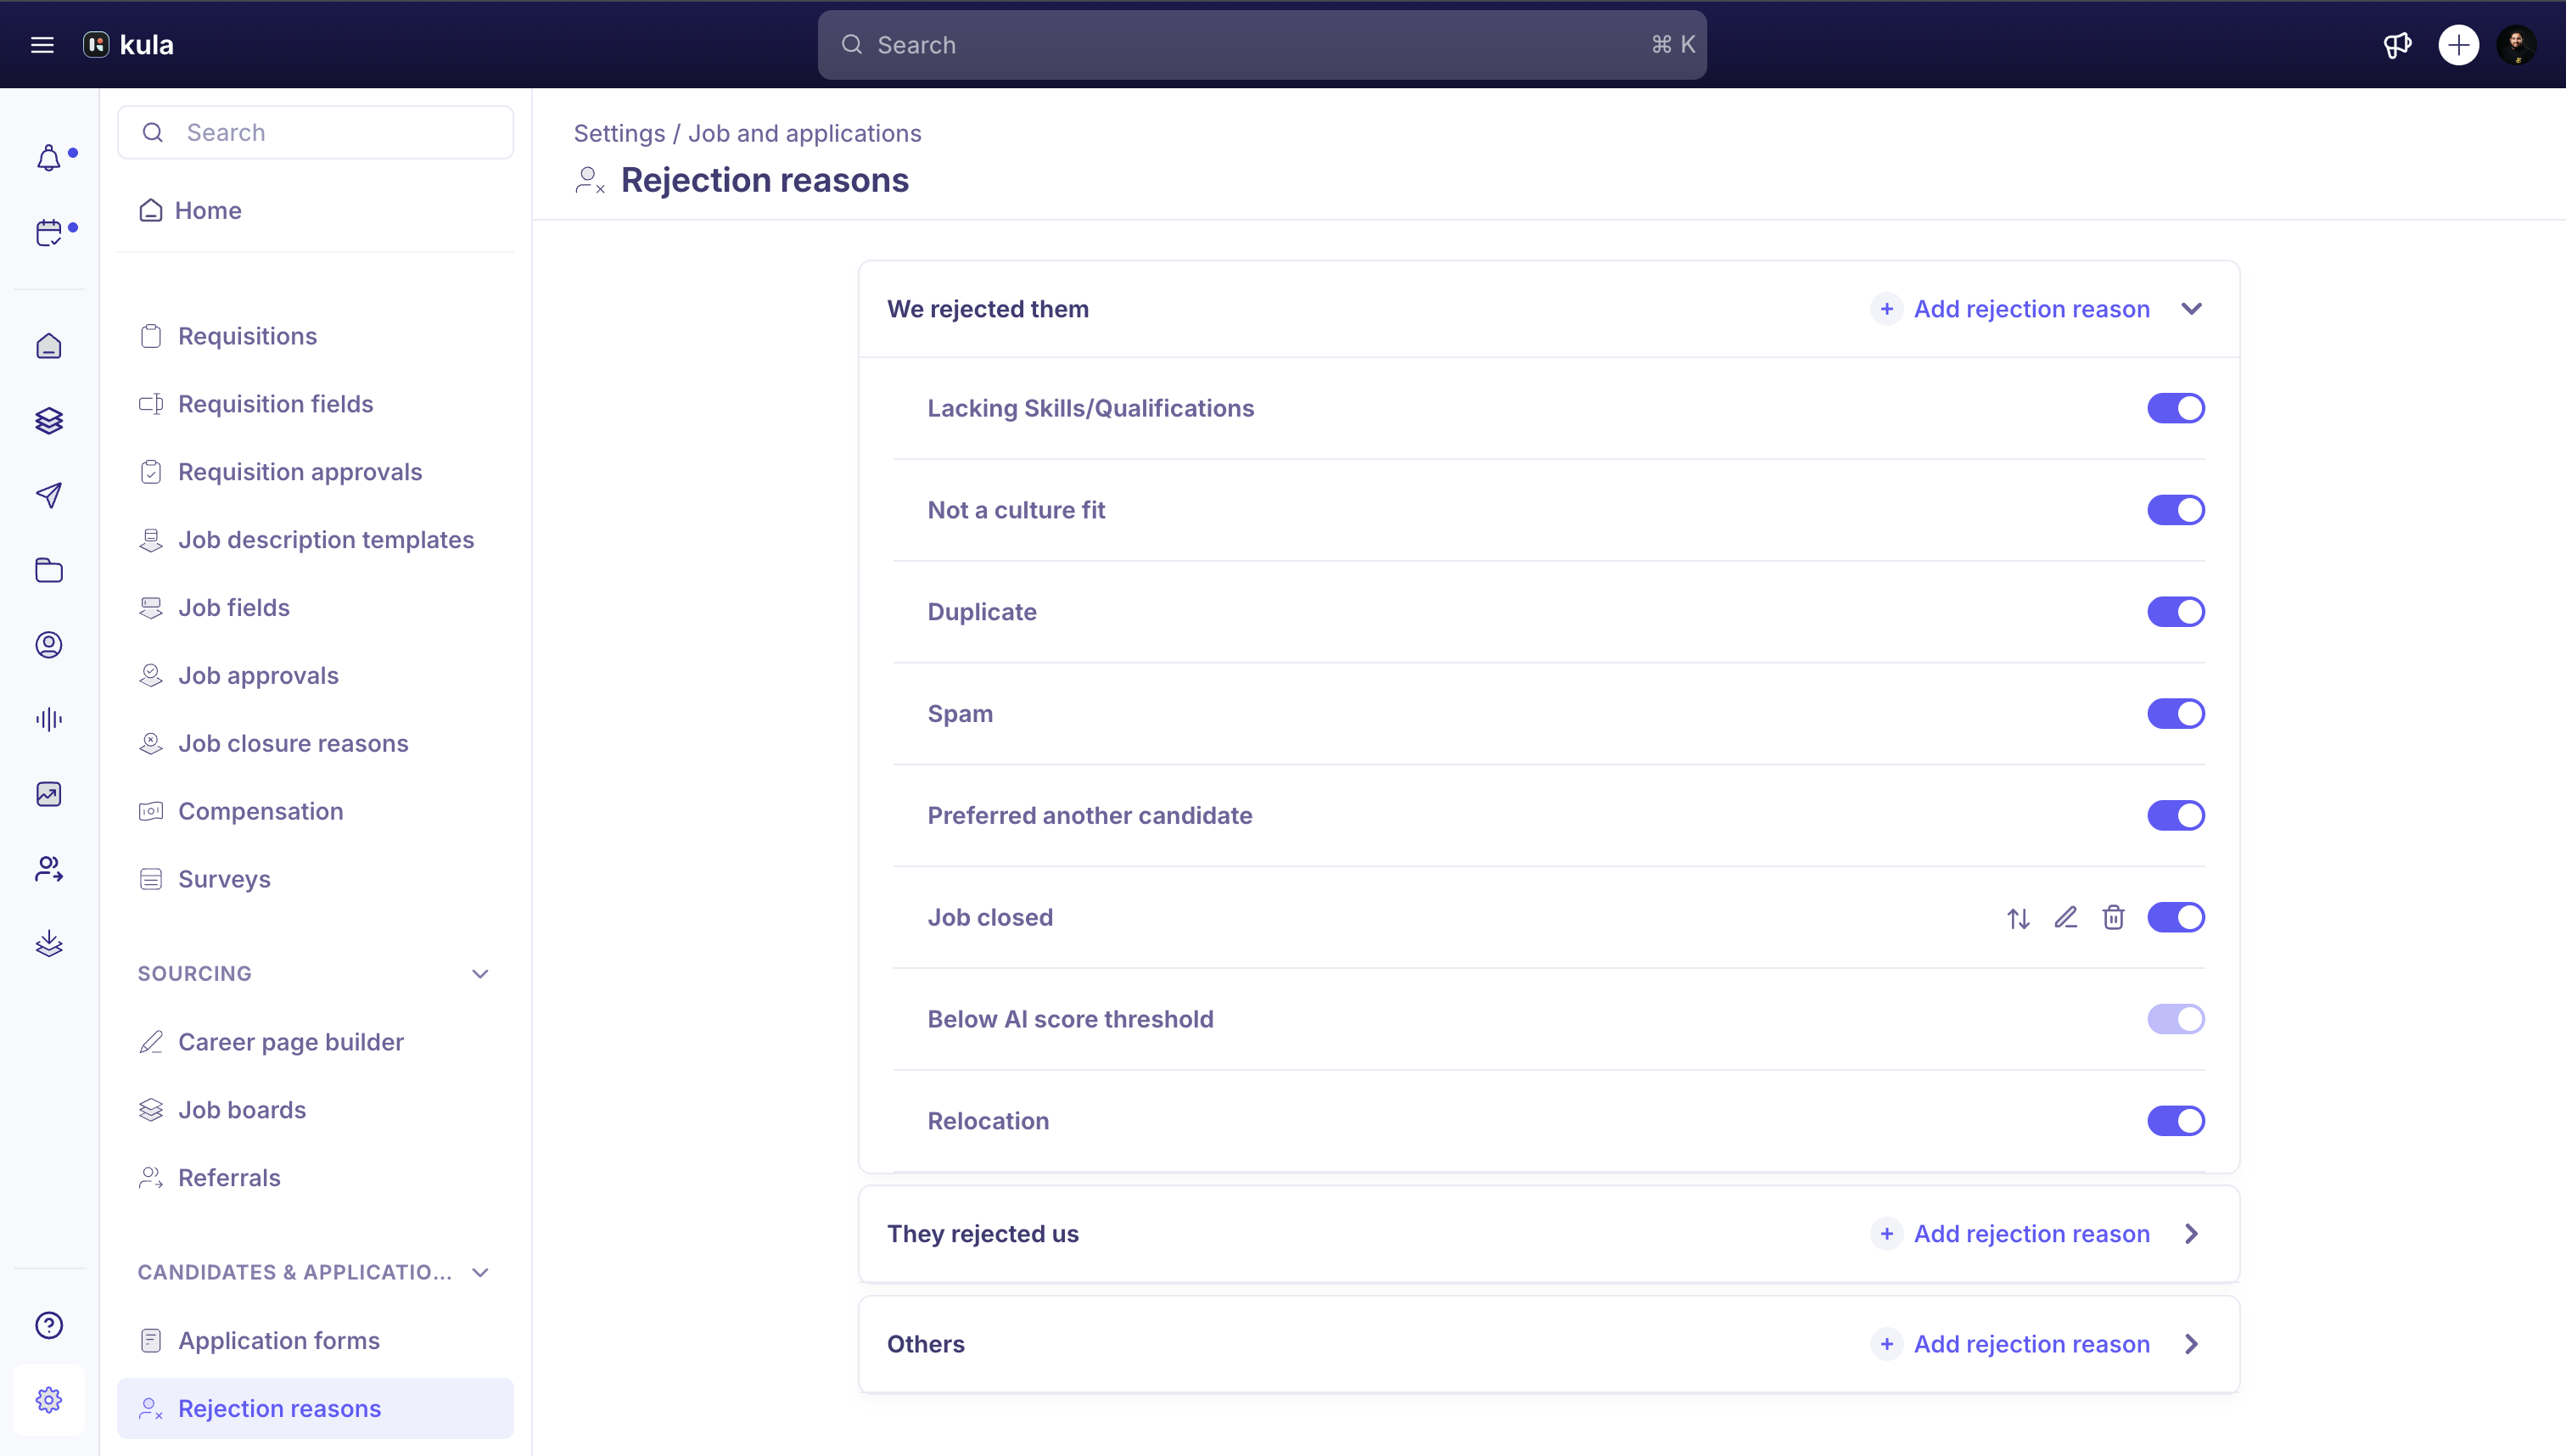
Find the category the reason belongs in — We rejected them, They rejected us or Others — and click Add rejection reason on that category.
Enter the Reason (up to 255 characters).
Click Add.
How reasons are grouped
Every reason sits in one of three fixed categories: We rejected them, They rejected us and Others. You can't add, rename or delete categories, but you can move a reason your team created to a different category:
Hover over the reason and click the move icon.
Choose the Destination category.
Click Move.
Turn a reason off instead of deleting it
You can either disable a reason or delete it outright. Disabling removes it from the picker recruiters see going forward without deleting the reason record itself — the safer choice if the reason has already been used on past rejections you want to keep intact. Use the switch at the end of the reason's row. Deleting is permanent: you confirm by typing DELETE
Good to know
"Below AI score threshold" is a system default on every account. It's there even if Auto-reject is turned off on all your jobs. Kula applies it only when AI scoring rejects a candidate automatically — it never appears in the list recruiters pick from. Its switch is locked, and you can't edit, move or delete it.
Each reason can have its own rejection email template attached, so the right templated message gets suggested automatically based on the reason picked.
Rejection Reason is included in data exports, alongside Candidate Source and Job Closure Reason.
FAQ
Can I turn off the Below AI score threshold reason?
No. It's a system default, so its switch is locked. It doesn't get in your recruiters' way: it never appears in the list they pick from when they reject a candidate. Kula uses it only when AI scoring rejects a candidate automatically, so if you don't use Auto-reject, it's never applied.
Need help?
If you have questions or need assistance, reach out to us at support@kula.ai or use the in-app chat.