Setting up Requisitions
Last updated: September 25, 2026
A requisition is the approved request to hire: the headcount and budget behind a role, signed off before the job opens. This article helps you decide whether to use requisitions, then covers turning them on, choosing how requisition IDs look, and deciding when a requisition is required. For how requisitions work day to day, see What is a requisition?
Who can do this: Super Admins and Admins
Where to find it: Settings → Jobs & Requisitions → Requisitions
Should you turn them on?
Requisitions add a sign-off step before a job can open. That's useful for some teams and extra work for others. Decide by how hiring is approved today.
Turn requisitions on if… | You may not need them if… |
|---|---|
Headcount must be signed off (by finance or leadership) before recruiting starts | Whoever owns hiring can decide to hire and open a job |
You track approved headcount against filled to protect a budget or plan | You don't separate approved headcount from the job posting |
You use formal requisition IDs in your process | You don't need requisition numbers |
You hire several people for one approved role and need to track remaining seats | You open one job per hire |
You want requisition reporting: opened, filled and time to fill by department or type | Job and offer reporting tells you what you need |
You need an audit trail of who approved each role | Sign-off is a conversation, not a workflow |
In between? You can turn requisitions on without requiring them on every job. Use them for the roles that need sign-off, open the rest as normal jobs, and tighten later.
What turning them on changes
A Requisitions area appears under Jobs & Requisitions.
You can require a requisition when a job is created, or leave it optional.
Every offer and hire must be linked to a requisition. An accepted offer or a hire marks the requisition Filled, so approved and filled headcount stay accurate. See How a requisition is filled.
You set up requisition fields (role, department, office, work type, salary, dates and custom fields) and, if you want sign-off, a requisition approval workflow. Approval rules can differ by department, office, work type or requisition type.
If a requisition is approved for more than one hire, Kula shows the remaining hires on the job.
The Manage all requisitions permission stays with Admins and Super Admins by default.
Turn on requisitions
Go to Settings → Jobs & Requisitions → Requisitions.
Switch on Enable requisitions for jobs, offers & hires. The change saves straight away.
Use the two buttons under the switch to finish setting up: Requisition fields for what people fill in when they create a requisition, and Requisition approvals for who has to sign off. See Requisition custom fields and Requisition approval workflows.
Choose how requisition IDs look
Every requisition gets an ID made of a prefix and a number, like KULA-1. The Preview box shows what the next ID will look like as you type.
In Requisition ID prefix, enter up to 20 characters. Use capital letters, and - _ / . if you need them. The prefix must start with a letter. Kula removes spaces and changes letters to capitals for you.
In Requisition ID starting number, enter the number to start counting from (up to 8 digits).
Click Save.
Decide when a requisition is required
Setting | What it does |
|---|---|
Mandatory to create jobs | When on, every new job must be linked to a requisition. When off, requisitions are optional for jobs, so you can use them only for roles that need sign-off. |
Mandatory for making offers or hiring candidates | Always on and can't be switched off. While requisitions are enabled, every offer and hire must be linked to a requisition, which is how Kula marks it Filled when an offer is accepted. |
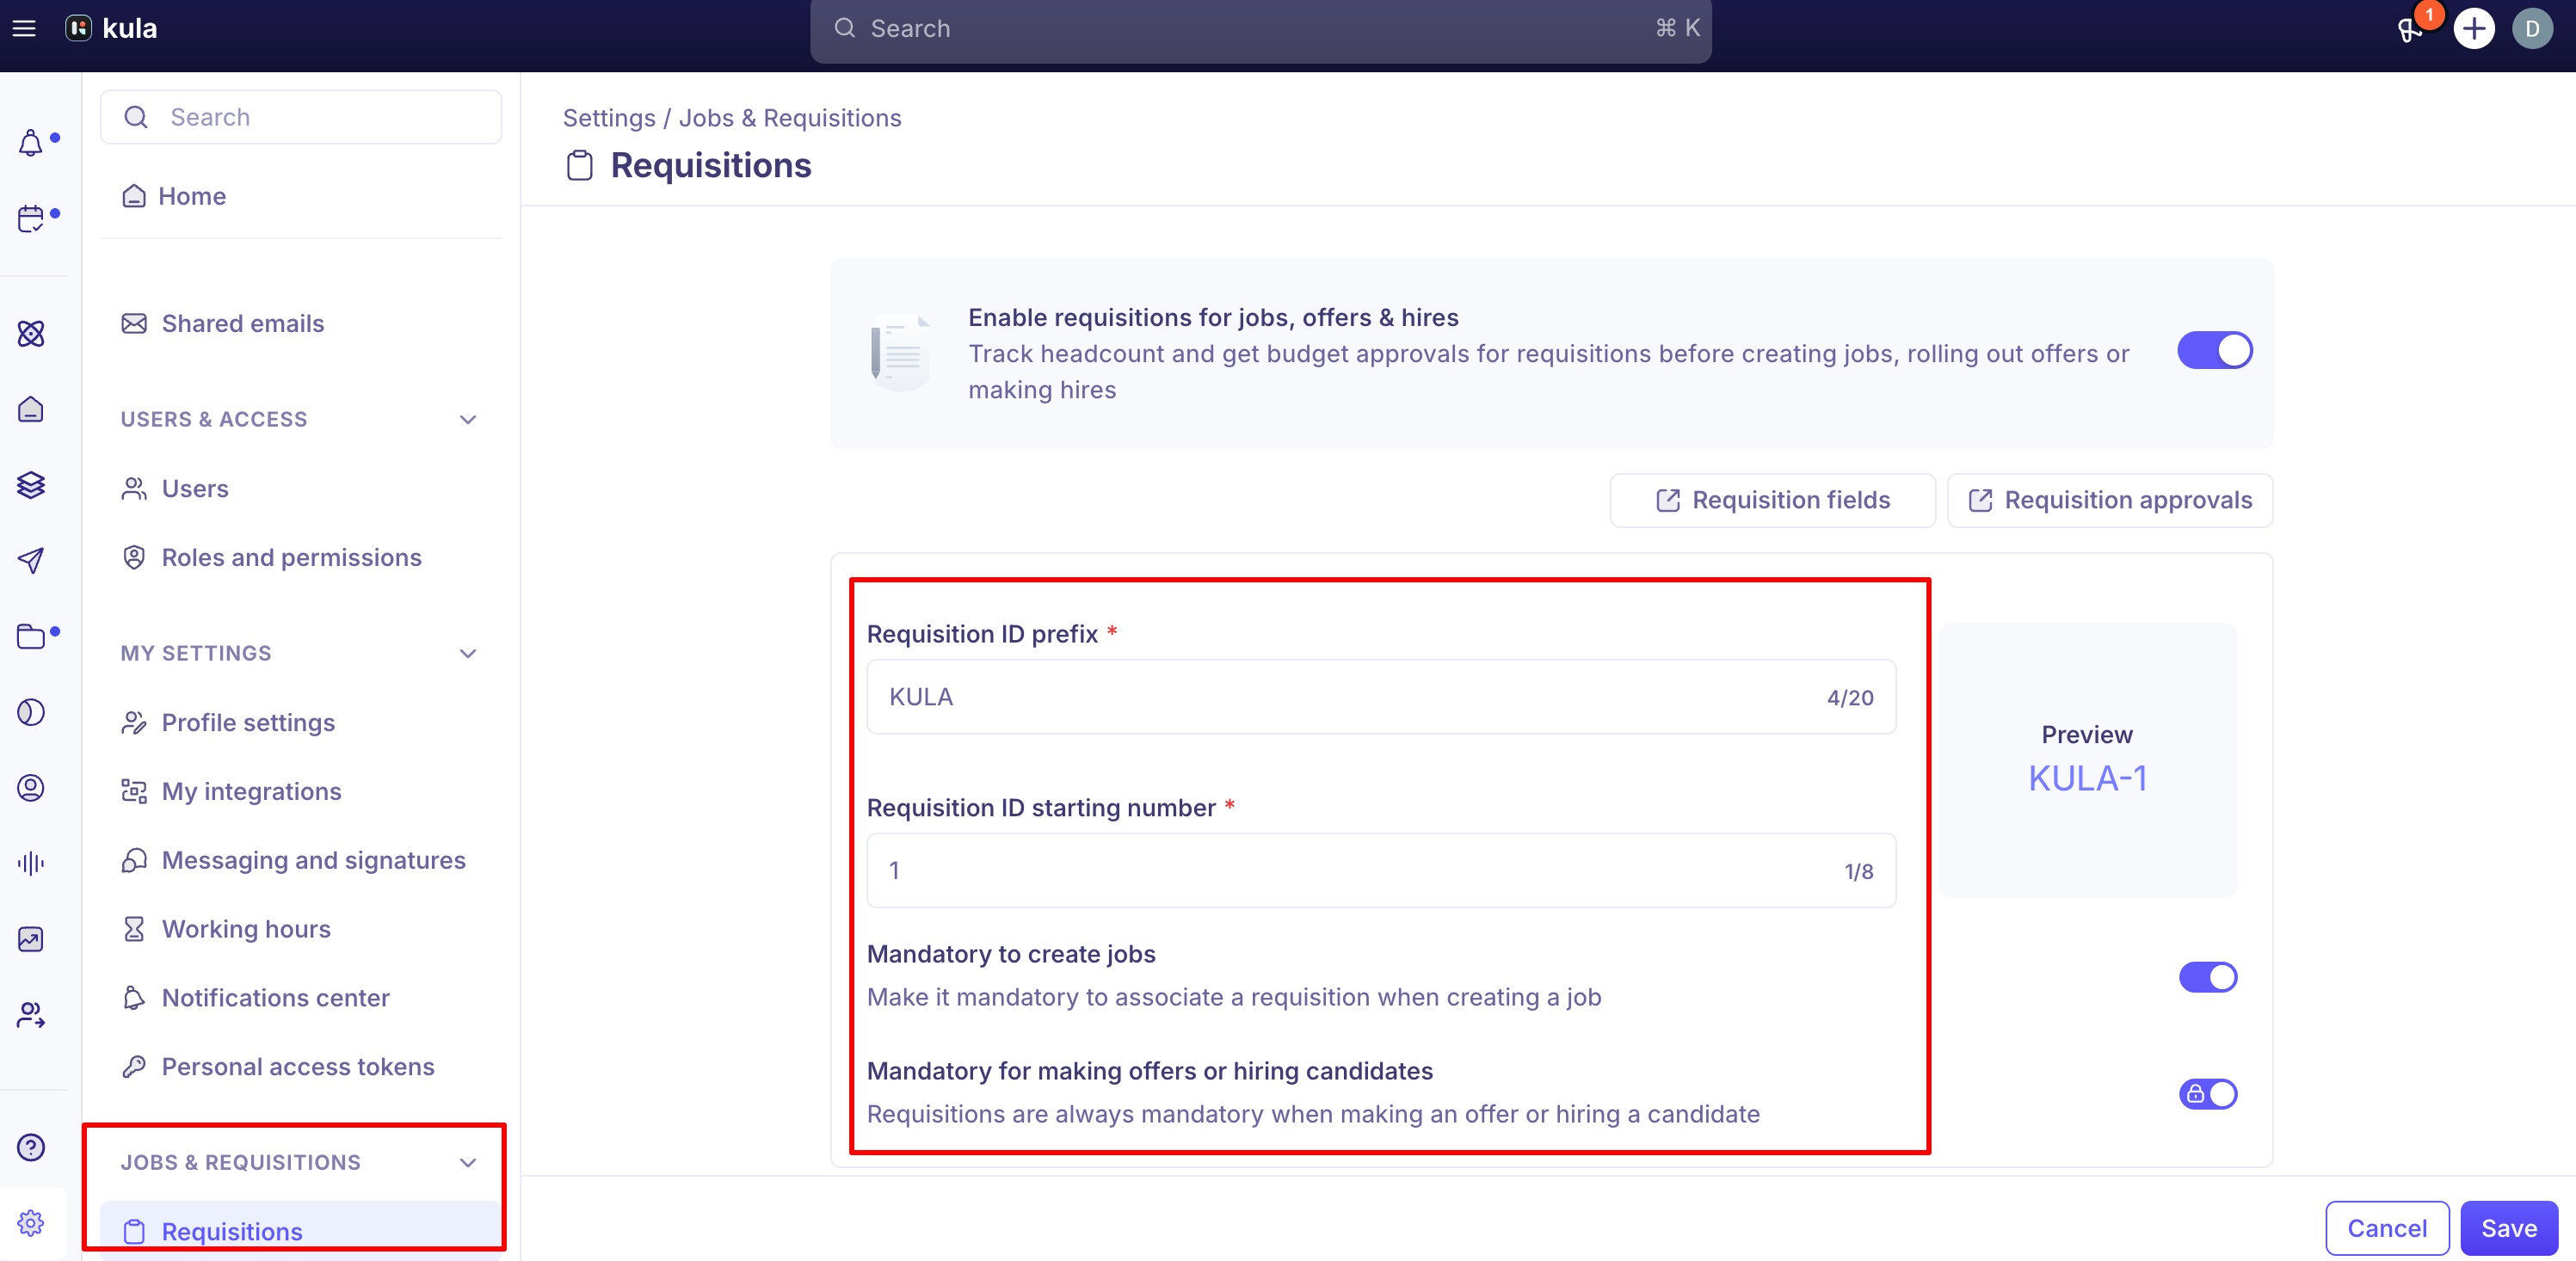
After changing Mandatory to create jobs, click Save.
Turn requisitions off
Switch off Enable requisitions for jobs, offers & hires and confirm. While requisitions are off, jobs and offers can't be linked to requisitions and no new requisitions can be created. You can turn them back on at any time.
Good to know
Changing the prefix doesn't rename existing requisitions. They keep their IDs. New requisitions use the new prefix.
The starting number is a minimum, not a reset. Kula carries on from the highest number already used with the current prefix. Setting it lower has no effect.
A requisition for several hires shares one number. Kula adds a suffix for each hire, such as KULA-12-1.
Existing jobs aren't linked automatically. To link a job created before you turned requisitions on, open its Job information and use Switch to new requisitions.
Confidential requisitions are visible only to people with permission.
Requisitions, jobs and offers share one approval system, so approvers find everything in one place.
FAQ
Do we have to use a requisition for every job? Only if you switch on Mandatory to create jobs.
Can we make an offer without a requisition? Not while requisitions are enabled.
Can one requisition cover several hires? Yes. Kula shows the remaining hires on the job.
Do we have to mark a requisition as filled? No. It's filled automatically when the offer is accepted or the candidate is hired.
Can I change the prefix later? Yes. Existing requisitions keep their IDs.
Why didn't my new starting number take effect? Kula never goes below a number already used with the current prefix. Choose a higher number.
Can we turn requisitions off again? Yes, at any time.
Need help?
If you have questions or need assistance, reach out to us at support@kula.ai or use the in-app chat.