Creating a new job
Last updated: September 26, 2026
The Jobs section is where you create and manage every open role at your company. Setting up a job means working through four configuration areas — Job information, Hiring team, Interview plan, and Job posting — before saving it as a draft or launching it live.
Who can do this: Super Admin, Admin, or Recruiter.
Where to find it: Jobs (left navigation) → Create Job.
Step 1: Create the job
Click Jobs in the left navigation, then Create job.
Enter the Internal job name. This is the name your team sees inside Kula; candidates see the job post title you set in step 5.
Tick Is confidential if only the hiring team and admins should see the job.
Click Create. The job opens as a Draft.
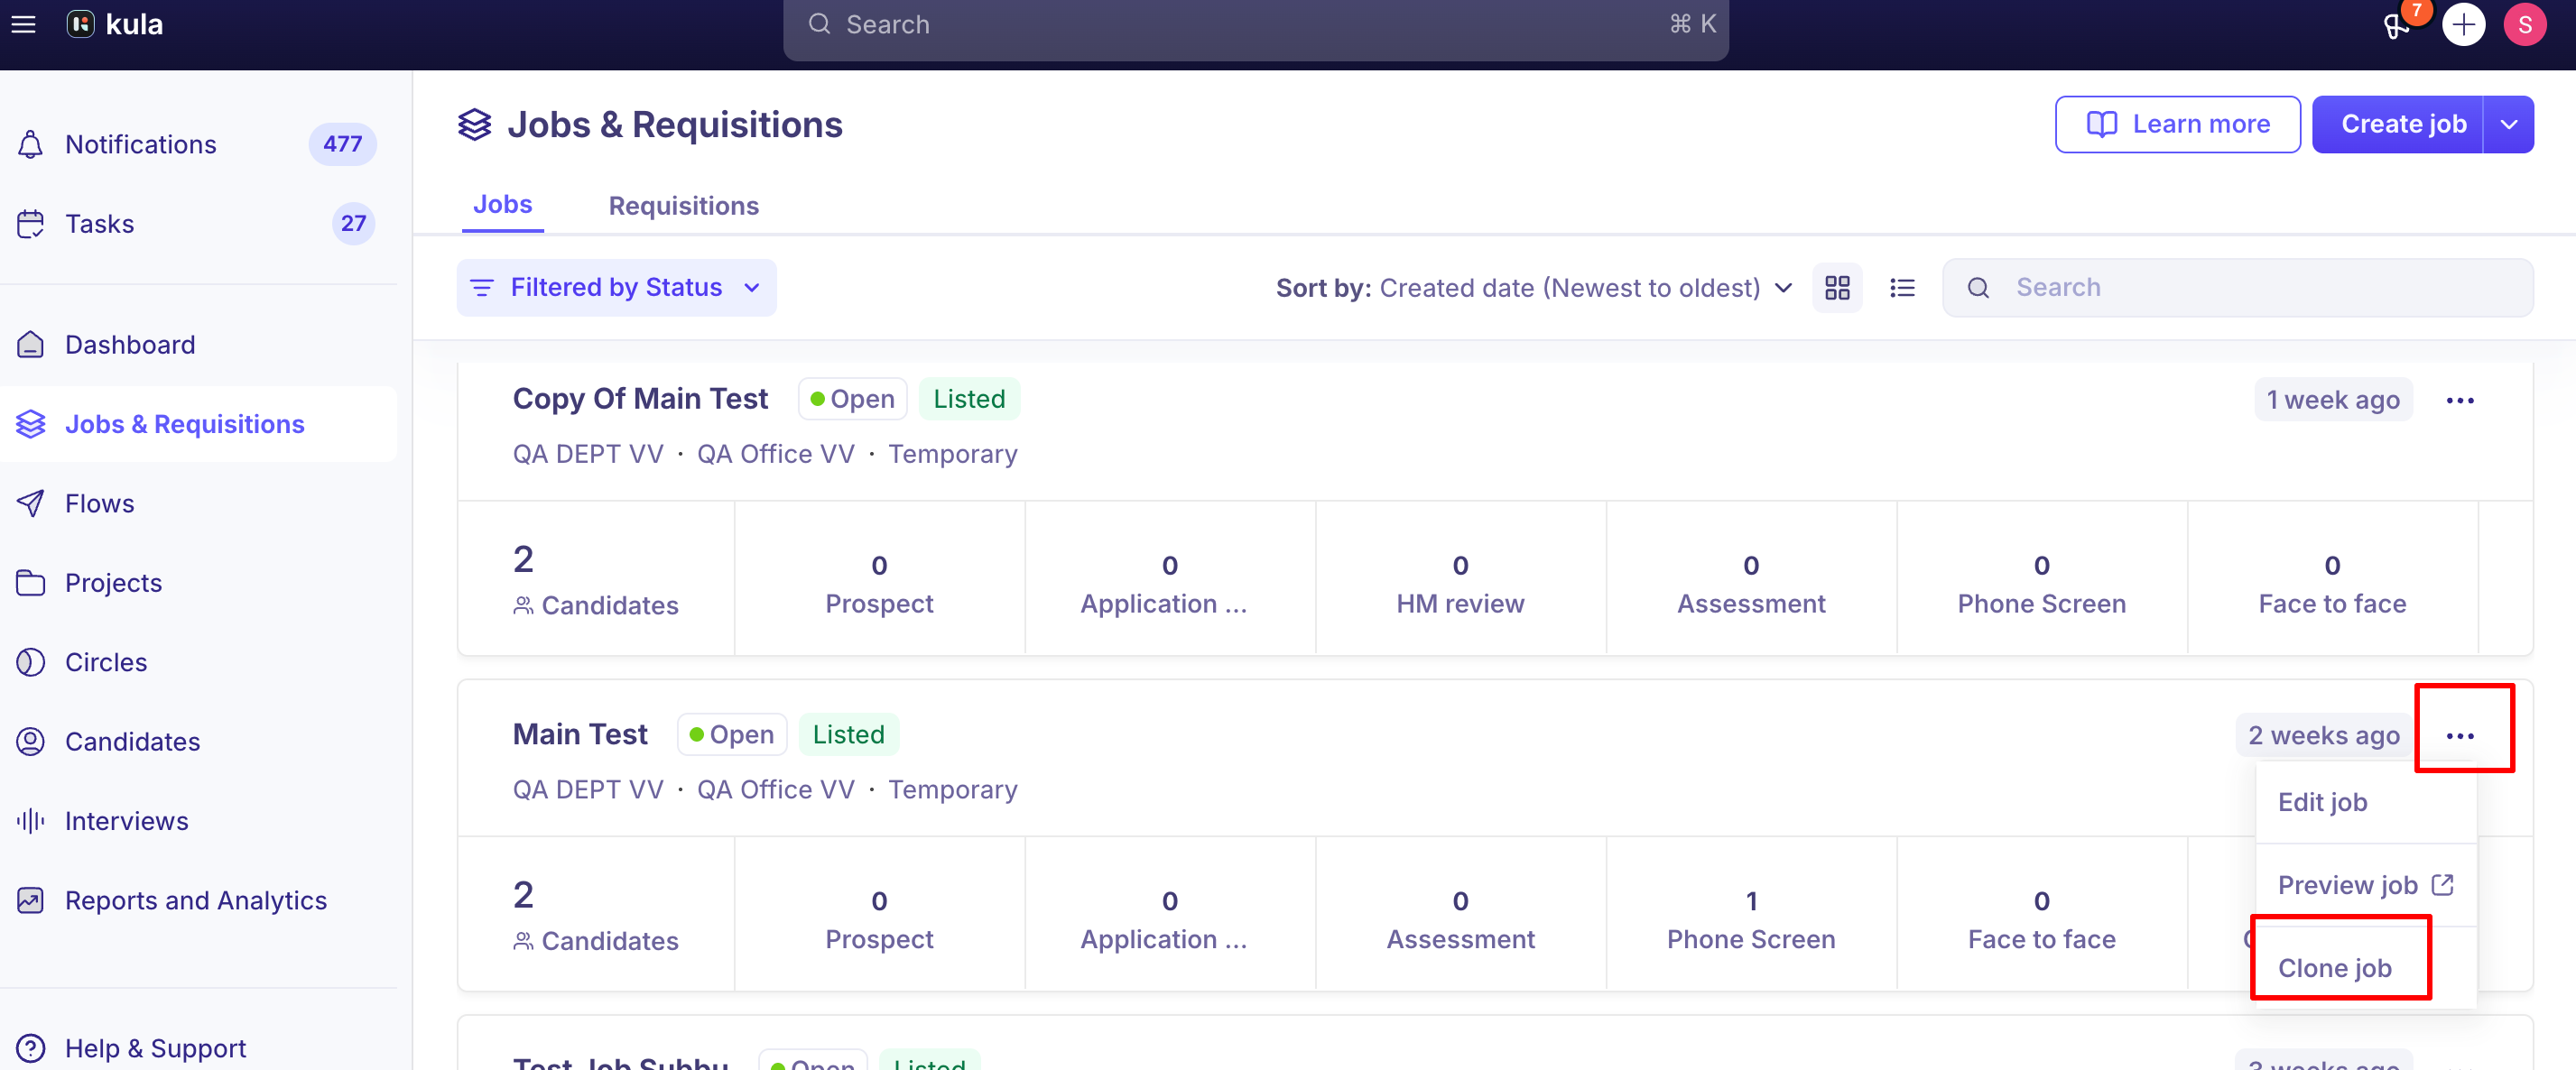
To start from an existing job instead, clone it. See Job statuses: closing, reopening, archiving and cloning.
The job opens in Draft status.
You can also start from an existing job by cloning it instead of building from a blank canvas — the same configuration tabs apply either way, and cloning carries over its existing settings as a starting point (useful if you need to resubmit a job for approval under a different approver, covered below).
Step 2: Configure job information
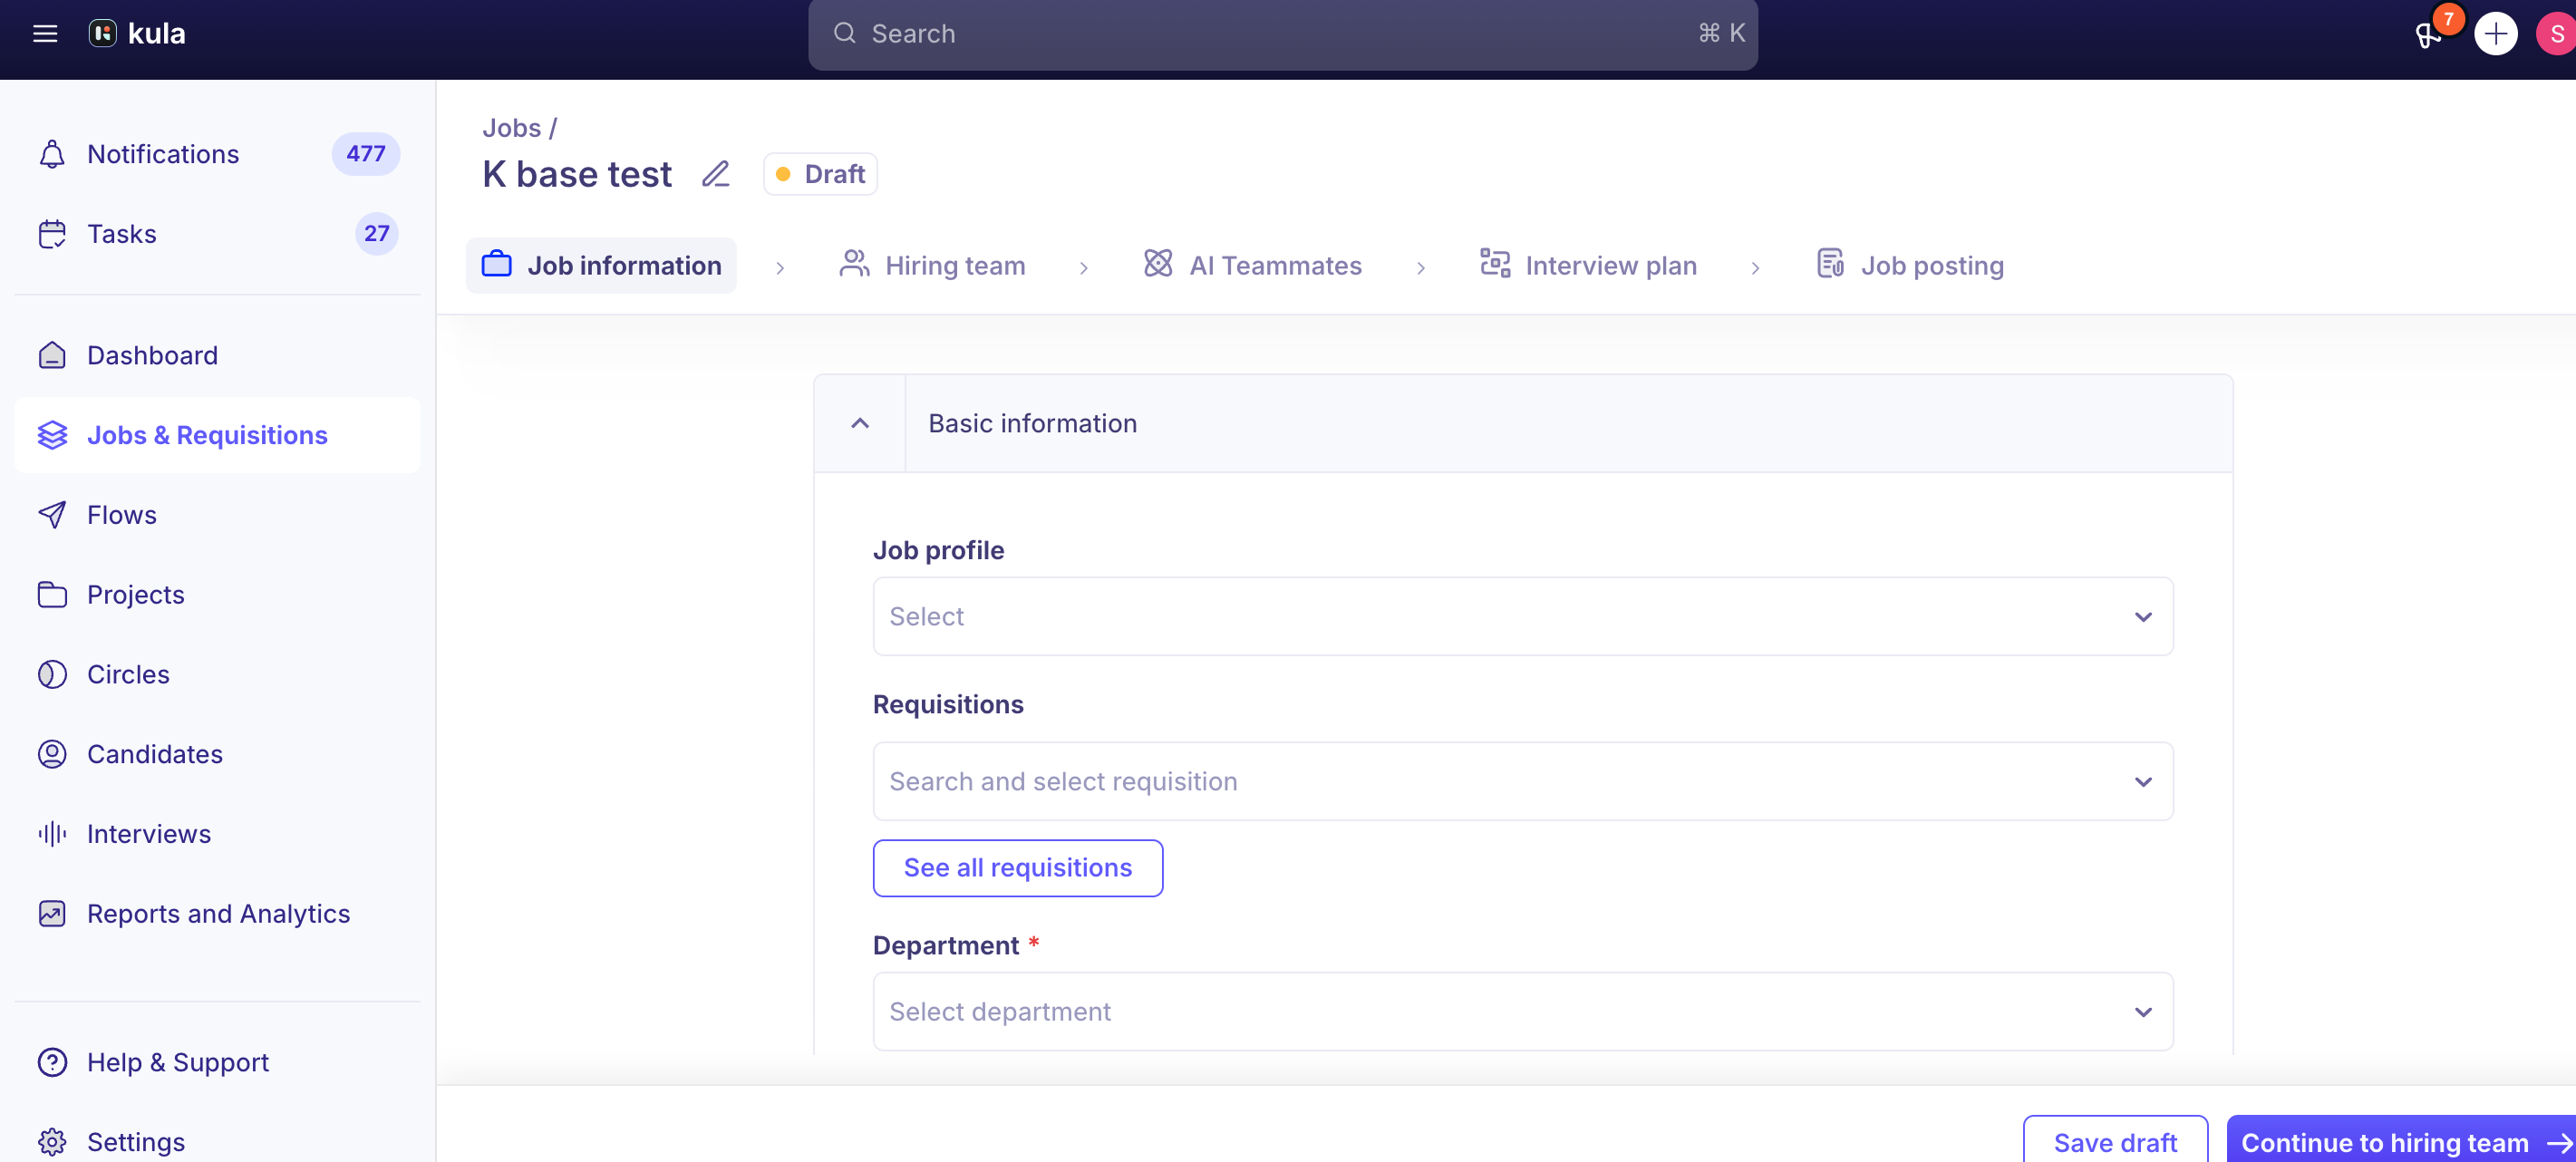
Fill in the basics: Department, Office, workplace type and Work type (Full Time by default).
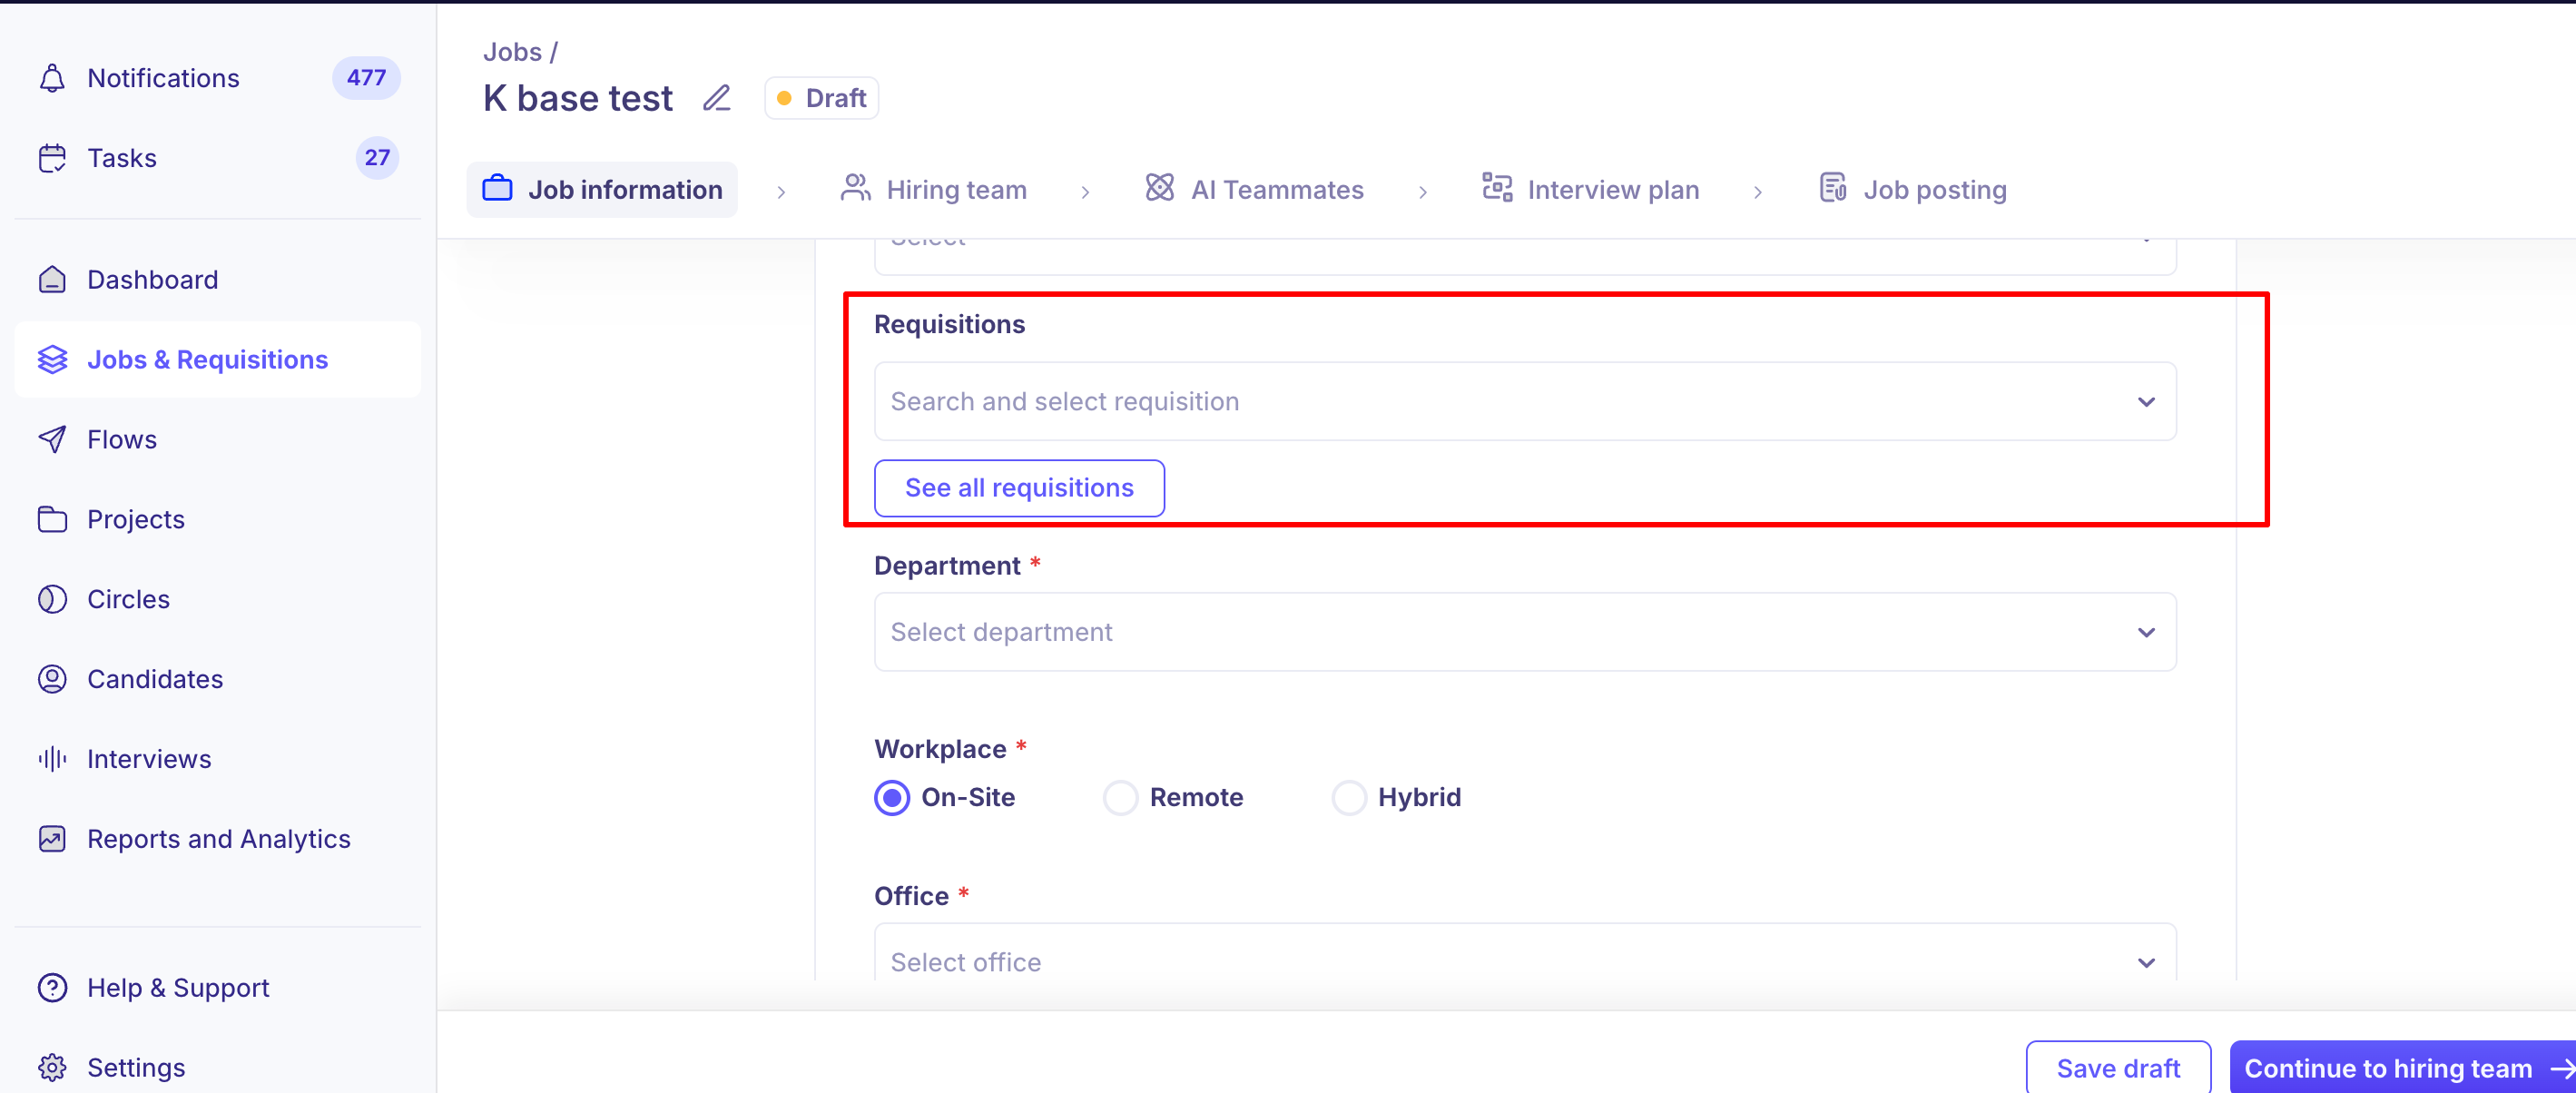
If your account uses requisitions, link the job to a requisition in the Requisition field. If requisitions are mandatory for jobs, you can't continue without one.
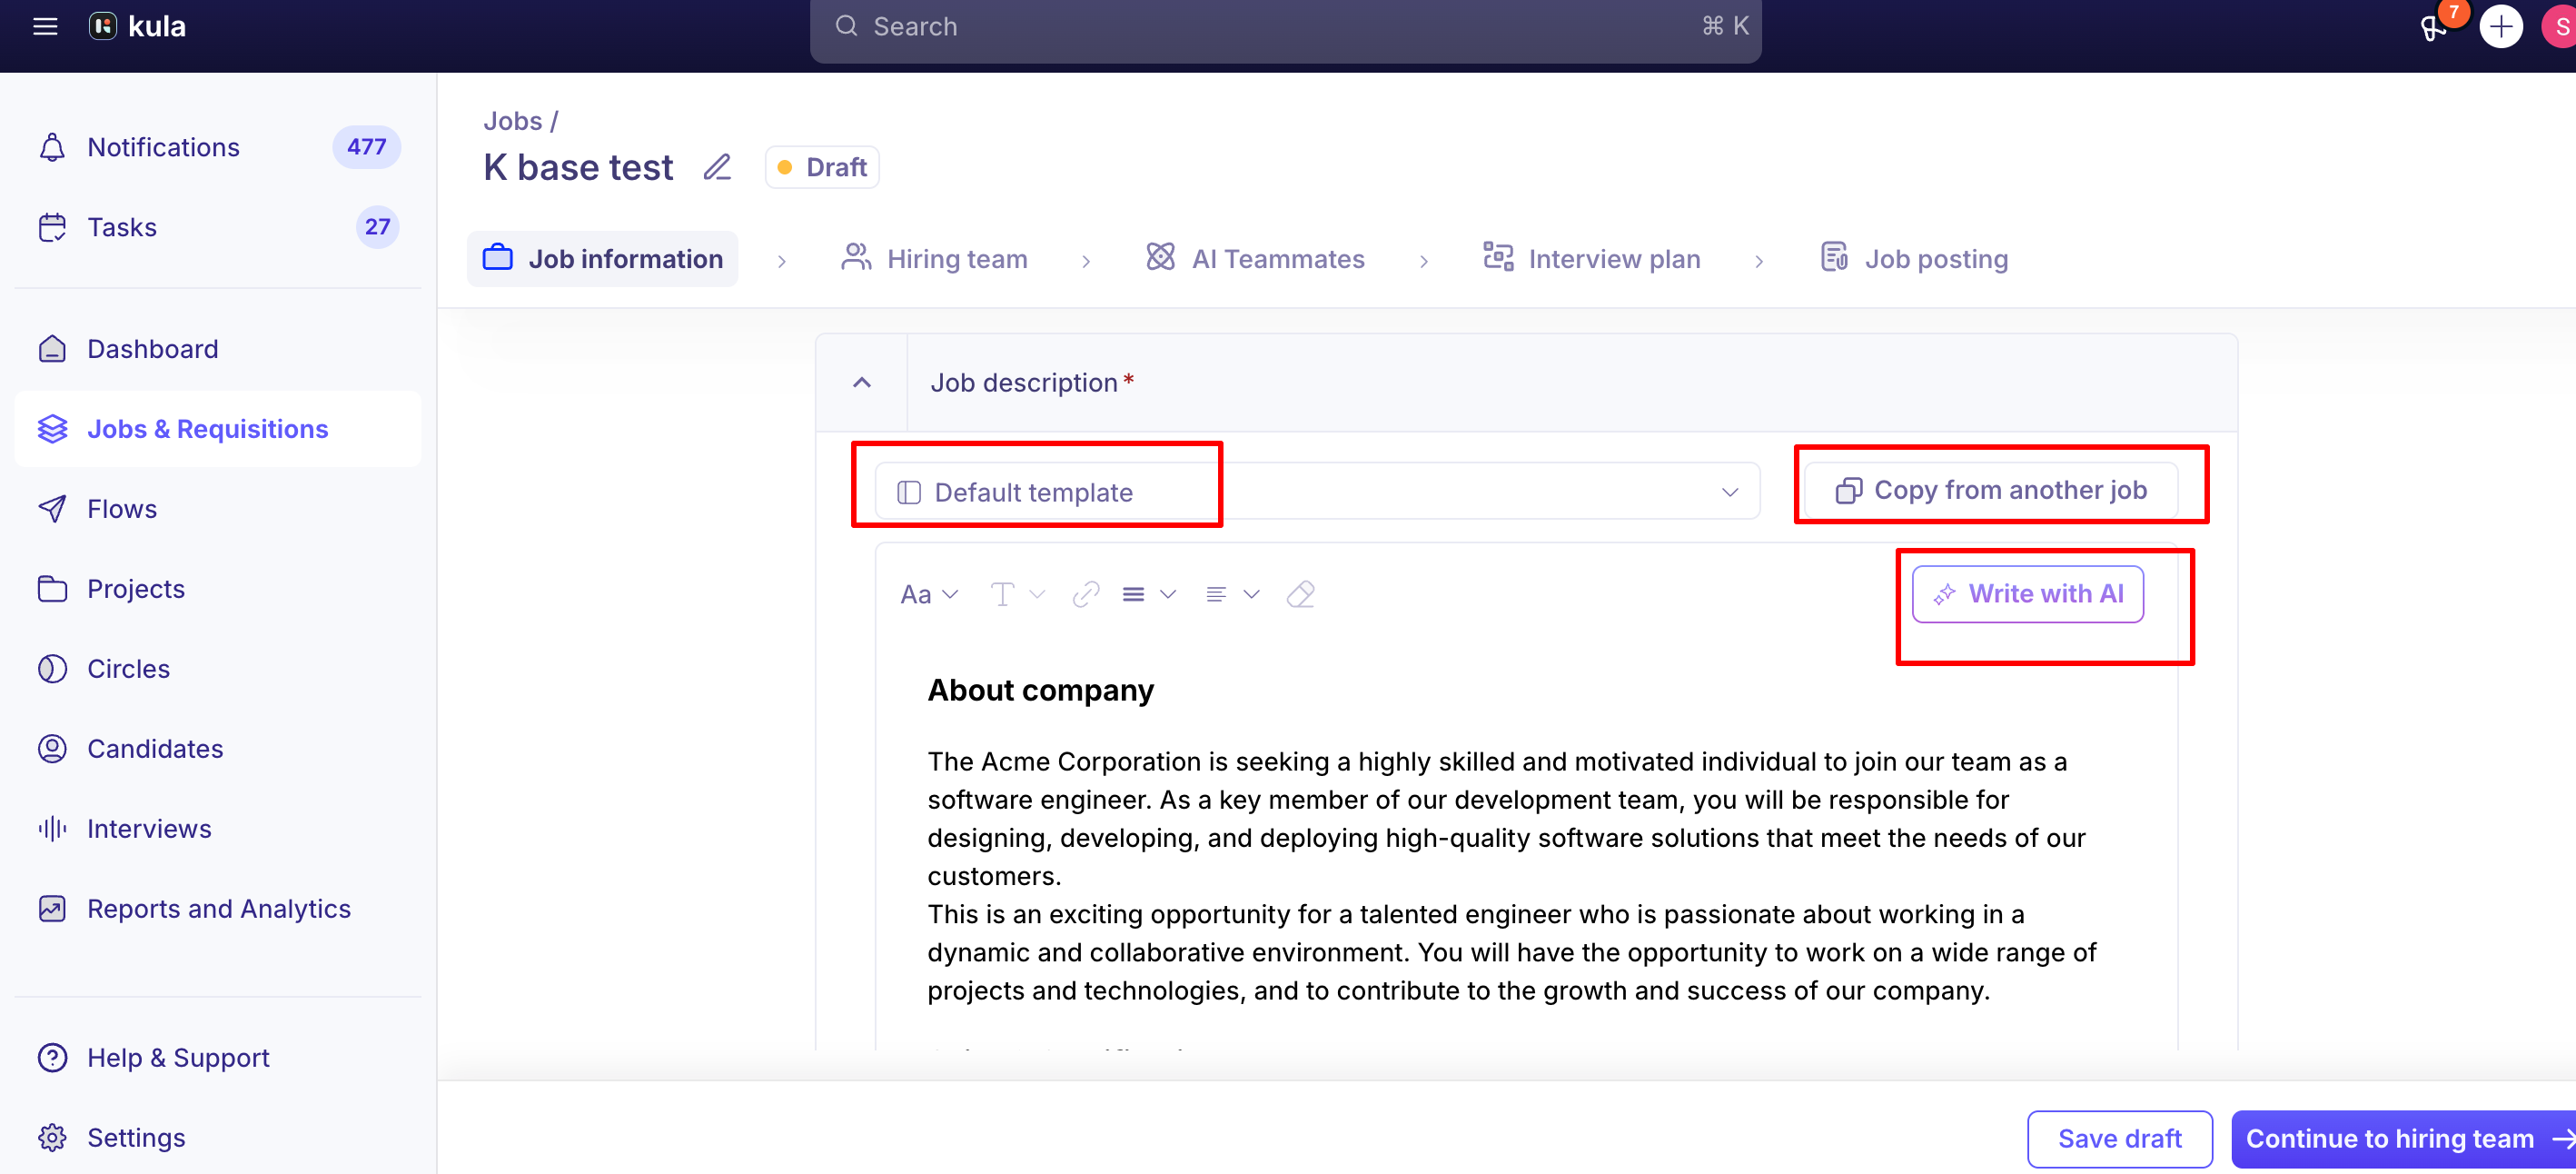
Add the job description. You can have Kula's AI draft it from a short prompt, write it yourself, or use Copy from another job. A job description template can fill it in automatically, based on the department, office and work type.
Click Continue.
Requisitions, if enabled: If your account has Requisitions Management turned on, requisitions can be created from scratch or by cloning an existing one, go through their own approval workflow, and are then associated with a job during or after job creation (one requisition maps to one job).
Step 3: Configure the hiring team
Add the people who will work on the job. Each role can do different things:
Role on the job | What they can do |
|---|---|
Recruiter | Everything on the job: edit its setup, hiring team, interview plan and job post; schedule interviews; create offers; move candidates. |
Hiring manager | Schedule interviews, create offers and move candidates. Can't change the job's setup. |
Coordinator | Schedule interviews and move candidates. Can't create or see offers. |
External recruiter (agency) | Add candidates, and schedule and move only the candidates they added. Can't see other candidates or offers. |
For who else can see the job, see Job-level permissions and visibility. Click Continue.
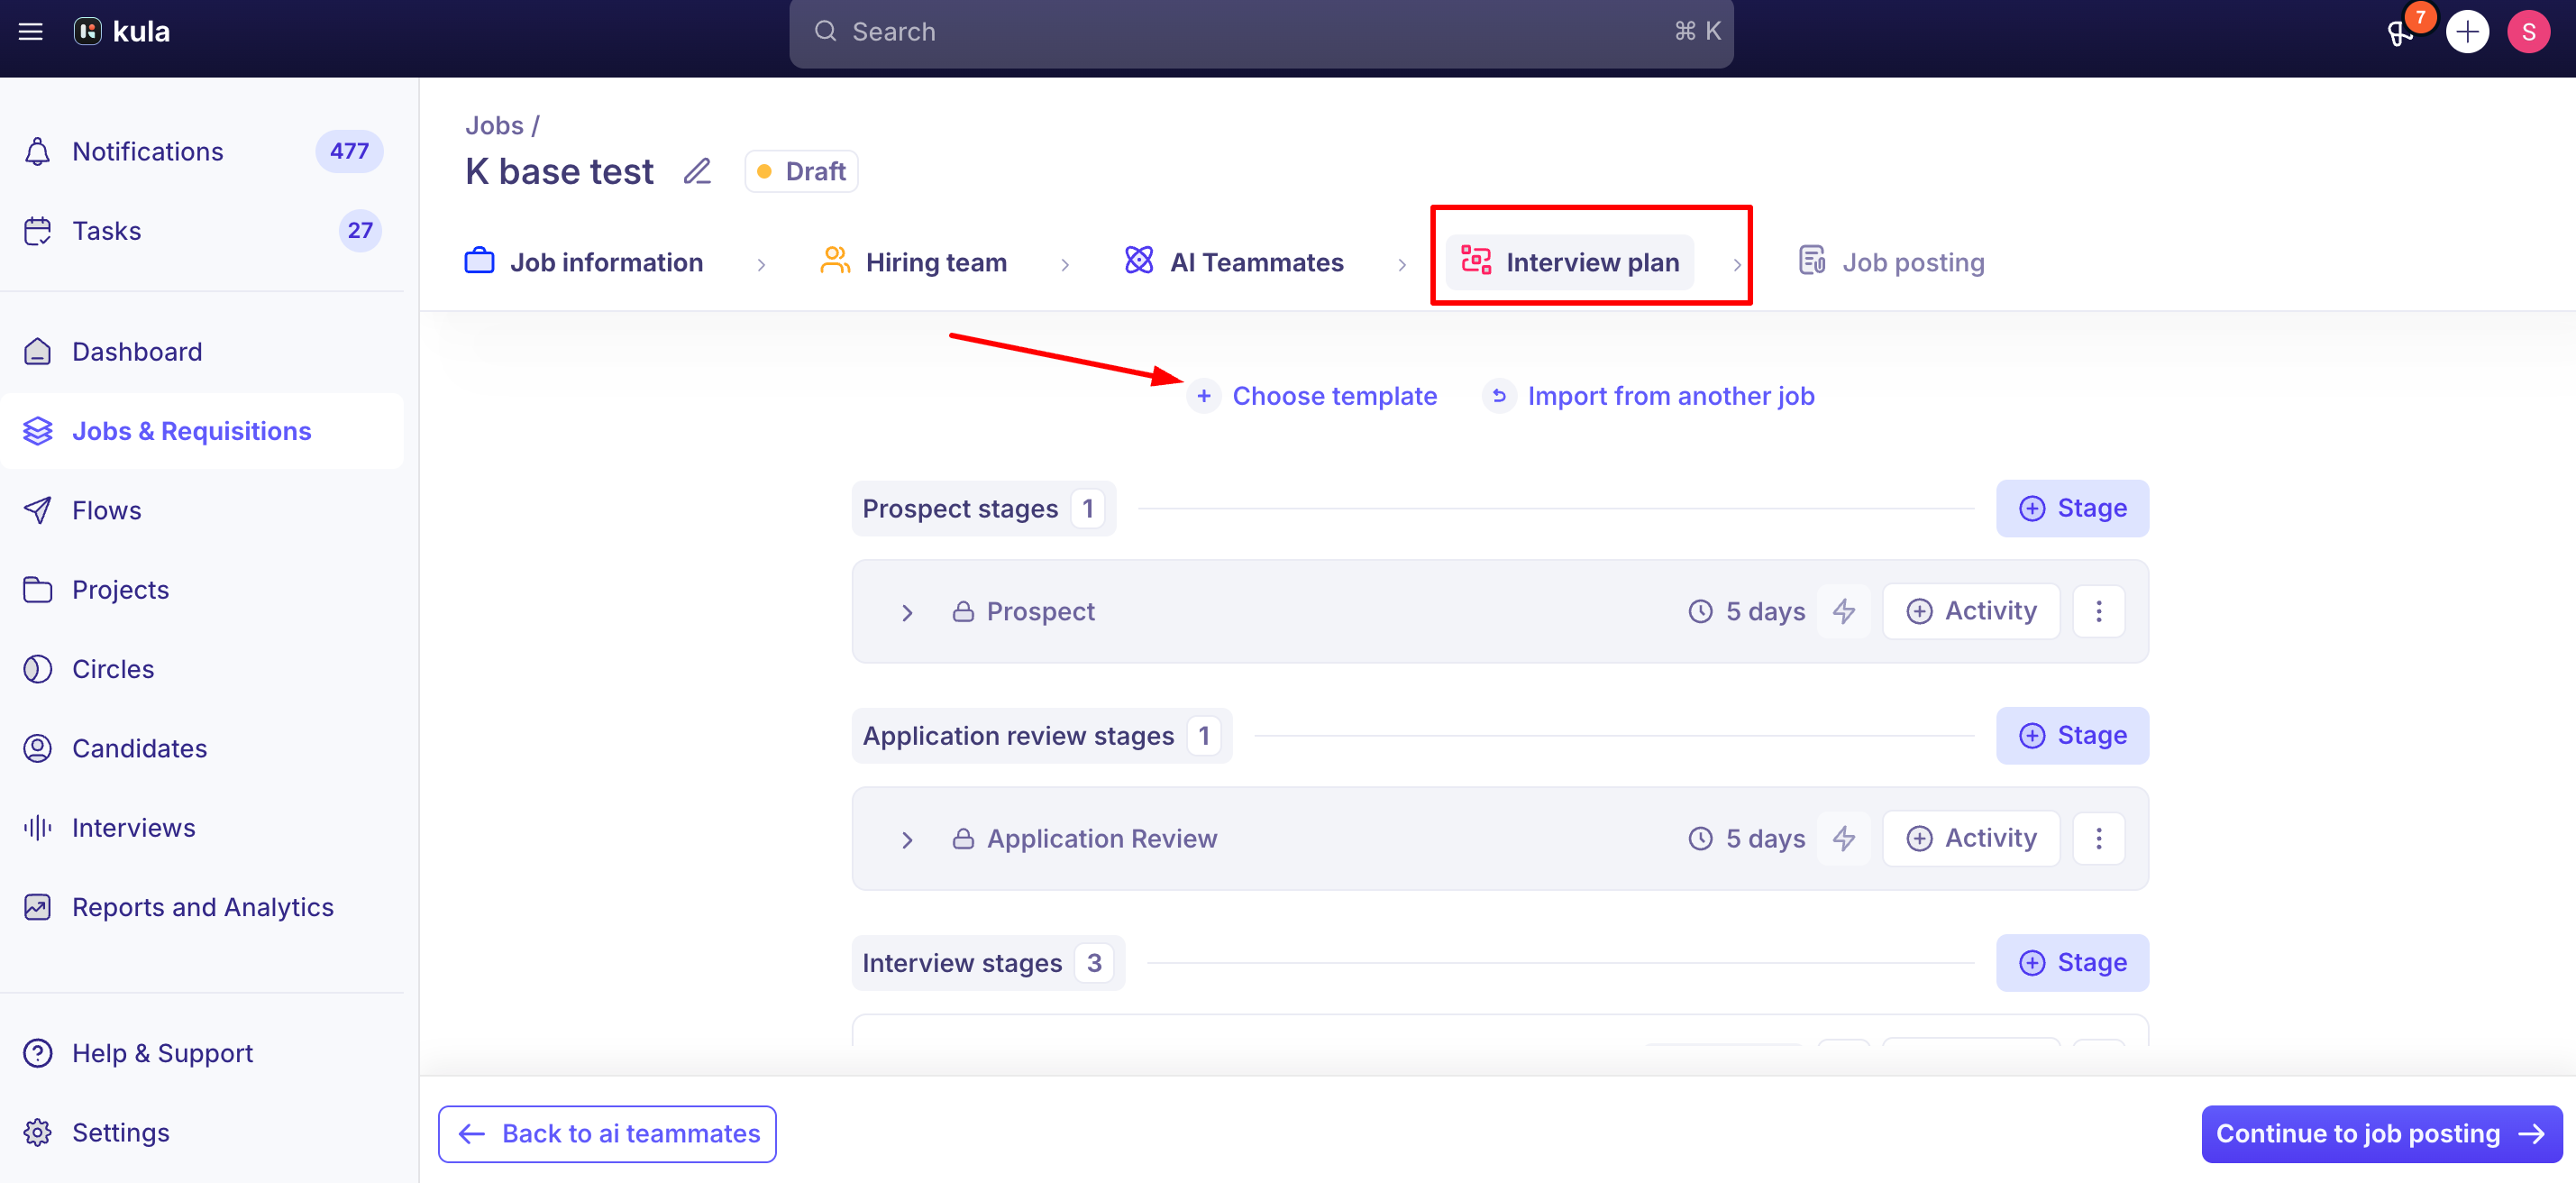
Step 4: Configure the interview plan
The interview plan is the set of stages candidates move through, grouped under five milestones: Prospect, Application, Interview, Offer and Hired. Each stage can have activities: an email, interview, assessment, review or survey.
Choose how to start the plan:
- Choose template — apply one of your saved interview plan templates, including its stages, activities, scorecards and defaults. A template can also apply automatically based on the department, office and work type.
- Import from another job — copy the plan from an existing job. Use this when a similar role already has the right plan but it was never saved as a template.Adjust the stages and activities for this role.
Click Continue.
The plan is copied onto the job once. Later changes to the template or the source job don't carry over. For editing stages and activities, see What is an interview plan?
Step 5: Configure the job posting
Enter the Job post title, the title candidates see. It can differ from the internal job name.
Choose where the job appears: external job boards and your Kula career page, the internal job board (for employees to apply, refer, or both), or unlisted.
Choose the application form. Optionally, turn on a confirmation email and auto-rejection rules. EEOC questions come from your settings and can't be edited here.
Step 6: Save or launch the job
Save draft keeps the job as a draft. Nothing is published and no one can apply.
Launch publishes it. Choose Launch immediately or Schedule the launch for a set date and time. If your account uses job approvals, the job goes to its approvers first and launches once approved. See Job approval workflows.
AI Teammates
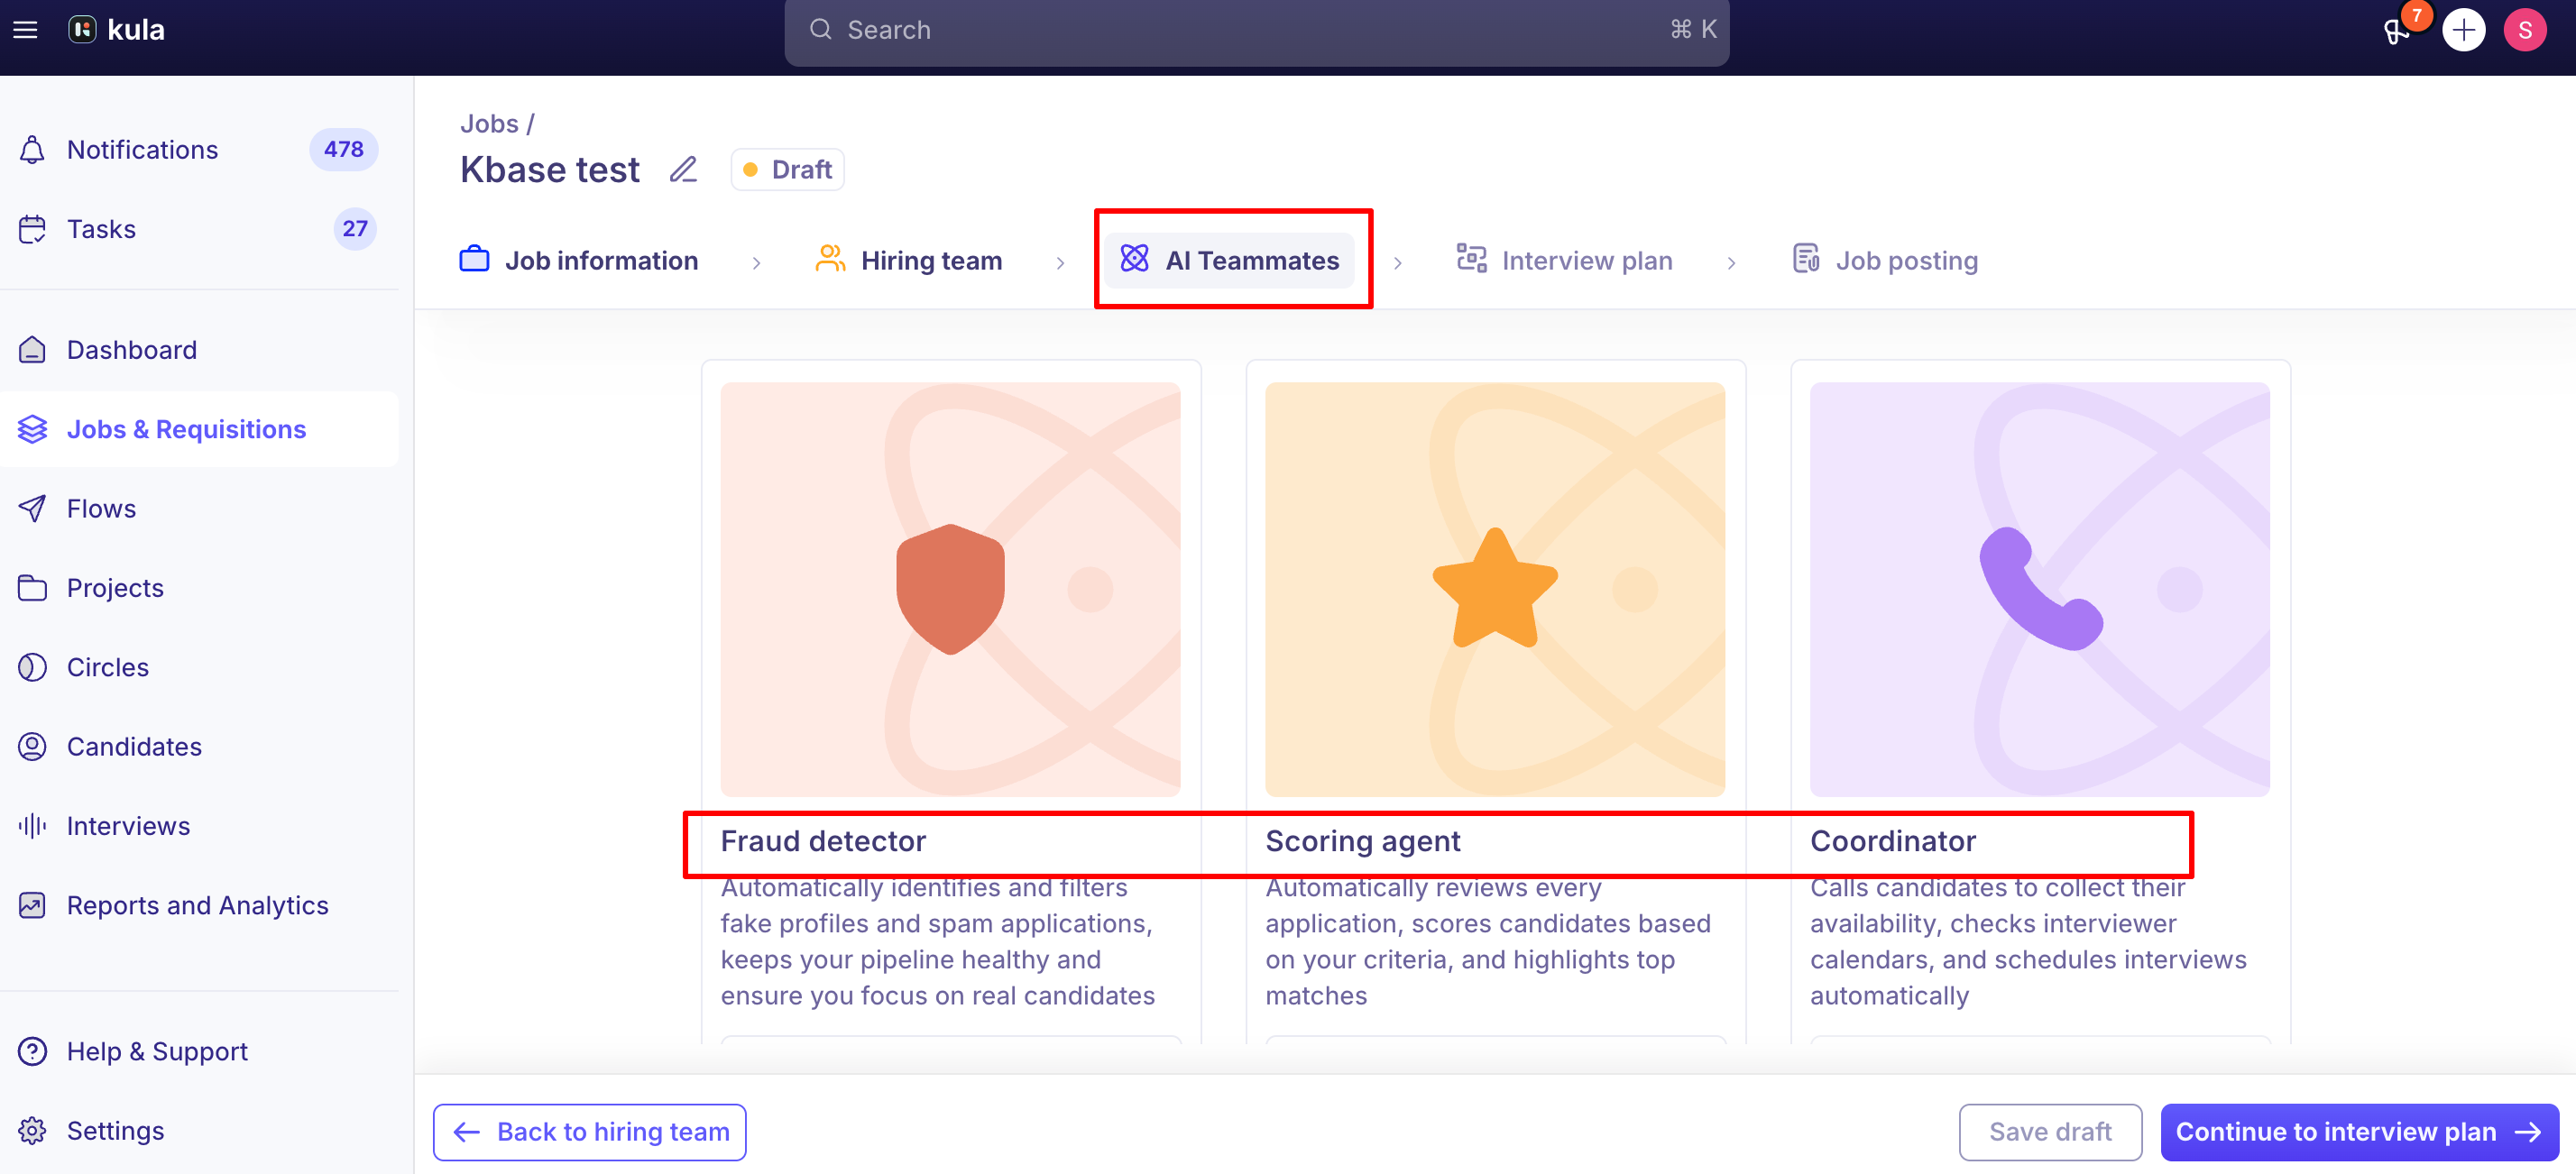
You can add AI teammates, such as the Fraud Detector, the scoring agent and the Coordinator, to the job during setup or later. See Configuring the AI teammates for the job.
Fraud Detector
The Fraud Detector helps identify potentially fake or suspicious candidate profiles submitted for a job. It automatically analyzes incoming applications and flags profiles that may require additional review, helping recruiters maintain the quality of their candidate pipeline.
Scoring Agent
The Scoring Agent evaluates candidates against the job description and hiring criteria you've configured. You can define the relevant criteria and assign weightage to each, allowing the AI to score applicants based on how well they match the role. These scores help recruiters quickly identify and prioritize the most suitable candidates.
Coordinator
The Coordinator simplifies interview scheduling by coordinating interview availability between candidates and interviewers. It helps streamline the scheduling process and reduces the manual effort involved in finding suitable interview slots.
Each of these AI teammates has its own dedicated knowledge base article with detailed setup instructions, configuration options, and best practices. Refer to the corresponding articles to learn more about using each feature effectively.
Good to know
Requisitions Management can make job creation stricter. If your account mandates a requisition before a job can be created, make sure an approved requisition exists first — this is an account-level setting under Settings → Jobs & Requisitions → Requisitions, not something visible from the job-creation screen itself.
Job approvers are usually auto-derived from Department, Office, and Work Type — and locked in once submitted. Double-check these fields before submitting for approval; changing your mind afterward means overriding or cloning, not editing.
A hiring manager needs to be assigned for approval routing to work, if approvers are configured as job-level hiring managers. A job with no hiring manager assigned can get stuck unable to open or reopen, with no obvious error explaining why.
If you're editing a draft job that uses a custom Internal Job Posting (IJP) application form, double-check it after saving. Worth a quick visual check if you're on an account that hit this before the fix.
FAQ
What roles can create a job? Super Admin, Admin, or Recruiter.
Can I start from an existing job instead of a blank one? Yes — clone an existing job. The configuration options are identical either way, and cloning is also the standard workaround if you need to resubmit a job under different approvers.
I submitted a job for approval and picked the wrong approver — can I fix it? Not by editing the existing submission. A Super Admin can override the approval, or you can clone the job with the correct Department/Office/Work Type (which auto-assigns the right approvers), submit the clone, and archive the original.
Do I need a requisition to create a job? Only if your account has Requisitions Management enabled and configured to require one. Check Settings → Jobs & Requisitions → Requisitions if job creation seems unexpectedly blocked.
Why is my job stuck and not routing for approval? If approvers are configured as the job's hiring managers, confirm a hiring manager is actually assigned to the job — without one, there's no one to route the approval to.
Does the job description stay editable forever? No — once a job is Closed or Archived, its job description becomes read-only to preserve the historical record.
Need help?
If you have questions or need assistance, reach out to us at support@kula.ai or use the in-app chat.