Get started as a Hiring Manager
Last updated: September 26, 2026
Welcome to Kula! You're here for a handful of things — open the role, agree what "good" looks like, shortlist, interview, and sign off the offer. Kula is built so you can do all of that without living in the tool.
Where to find it: Sign in at yourcompany.kula.ai
Who this is for: anyone with the Hiring Manager role.
What you'll do in Kula
Area | What you do there |
|---|---|
Dashboard | Your open tasks — reviews, scorecards, job and offer approvals |
Jobs & Requisitions | Raise or approve a requisition, and follow your roles |
Interviews | Join your own interviews, and read the panel's feedback |
Reports and Analytics | Pipeline health for your roles, if your admin has enabled it |
Sign in and find your way around
Your organization has its own Kula address — yourcompany.kula.ai. Bookmark it. You'll sign in with a password, with Google or Microsoft, or through your company's single sign-on.
First, set yourself up
Two minutes here saves your recruiter a week of scheduling emails. In Settings → My settings:
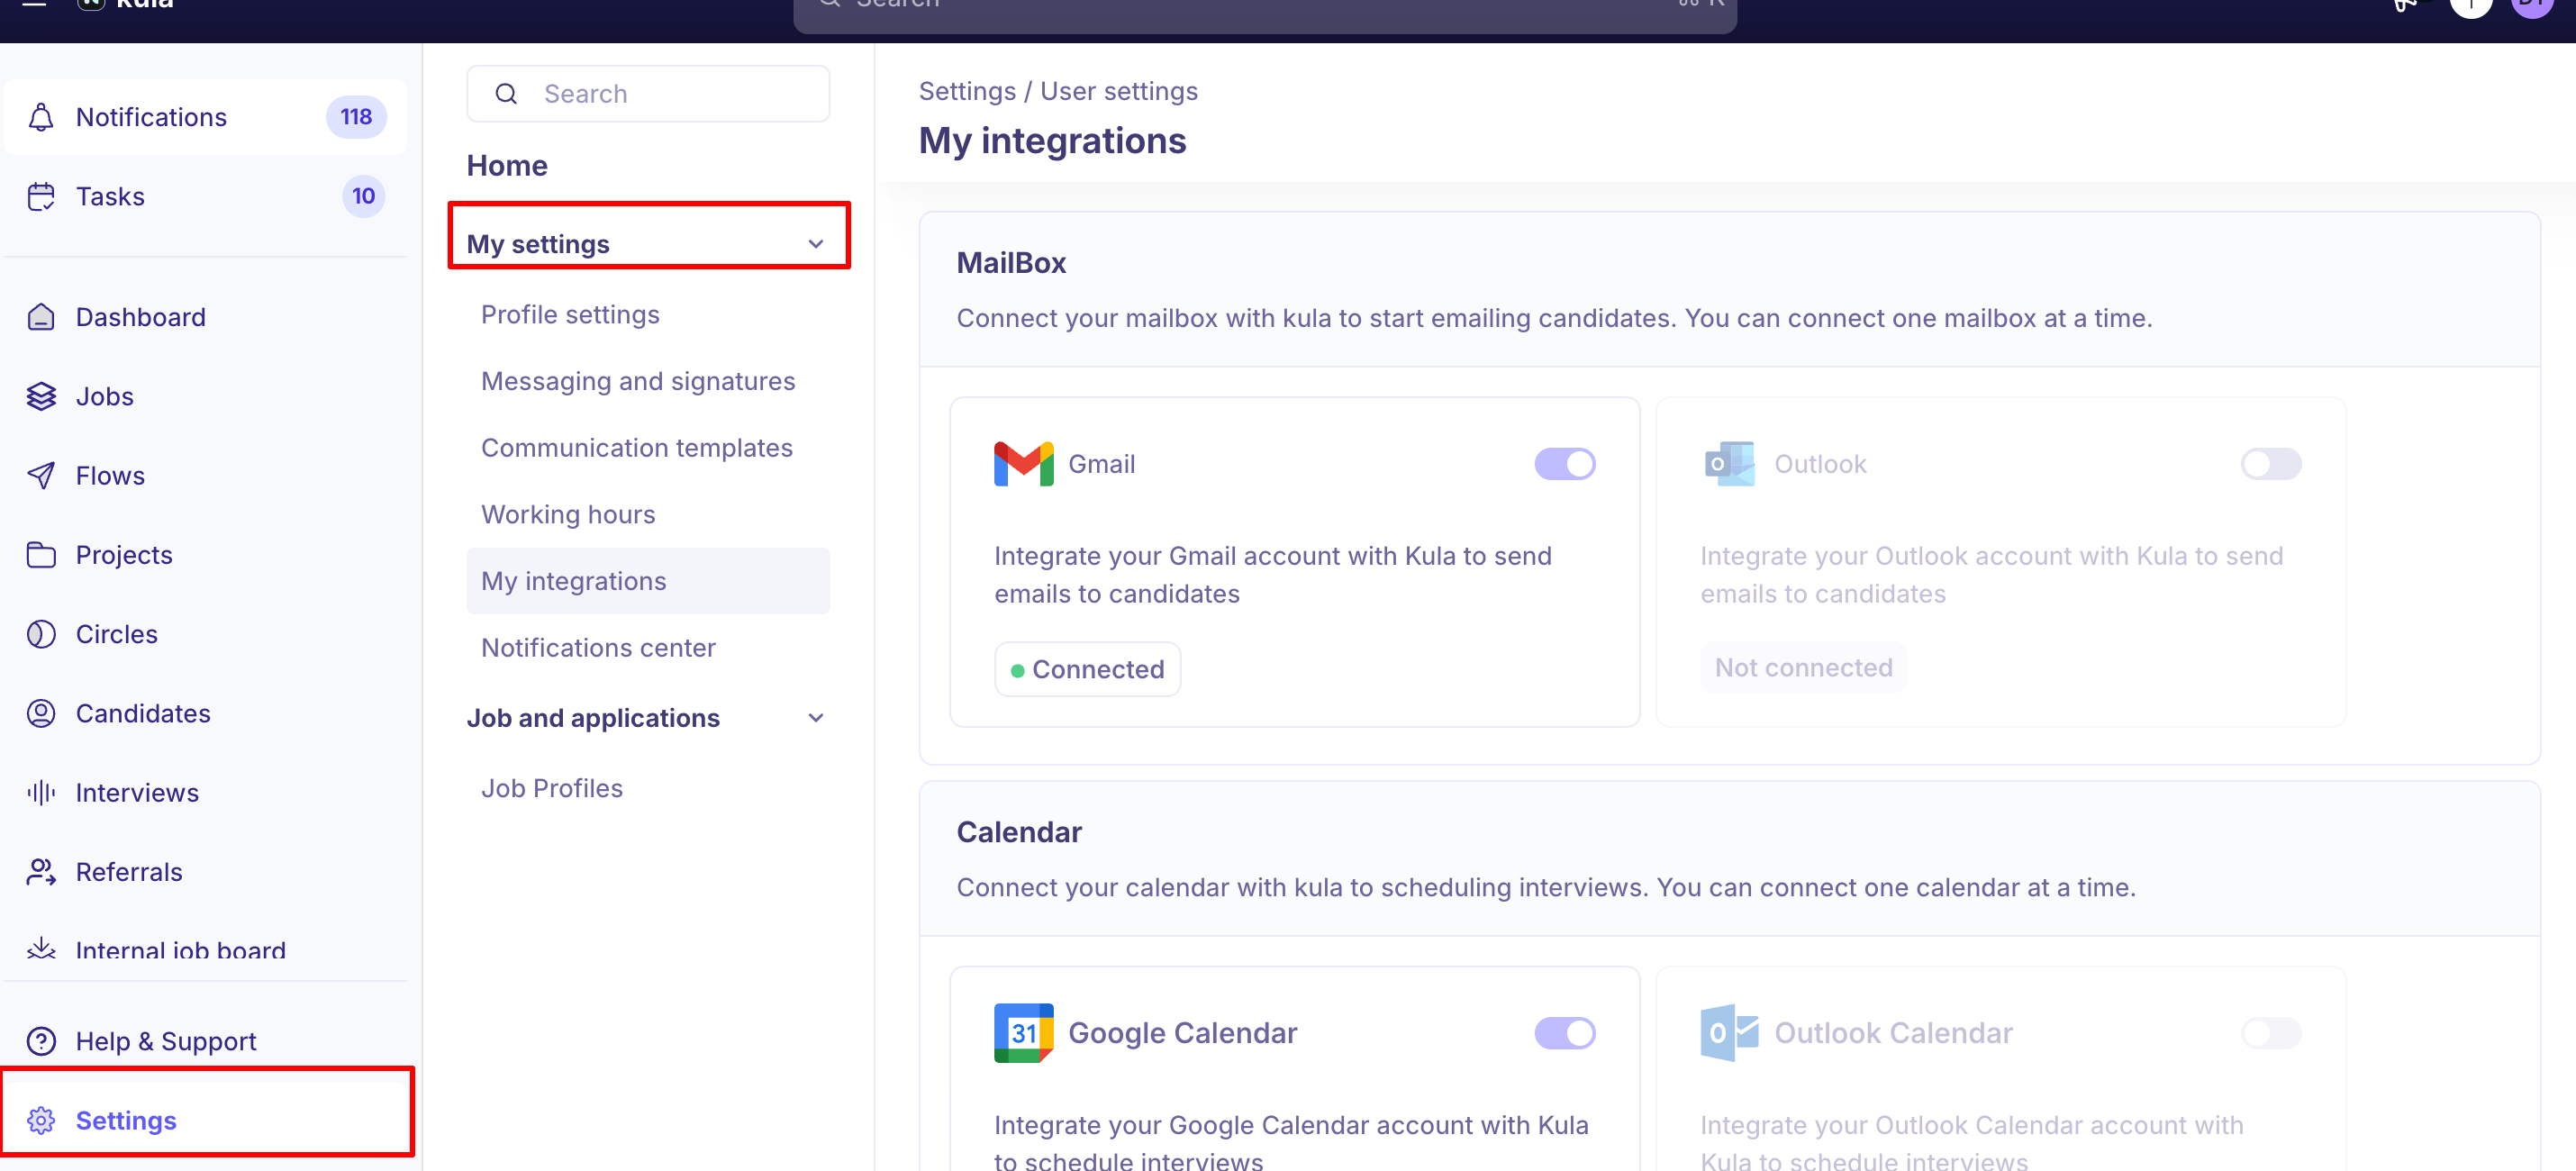
Connect your calendar under My integrations — Kula reads it to find slots that are genuinely free
Set your working hours — your availability for interviews, so you can protect focus time even when your calendar looks free
Set your time zone — every interview time you see displays in it
Choose your notification channels — Slack, email or in-app
Work from your Dashboard
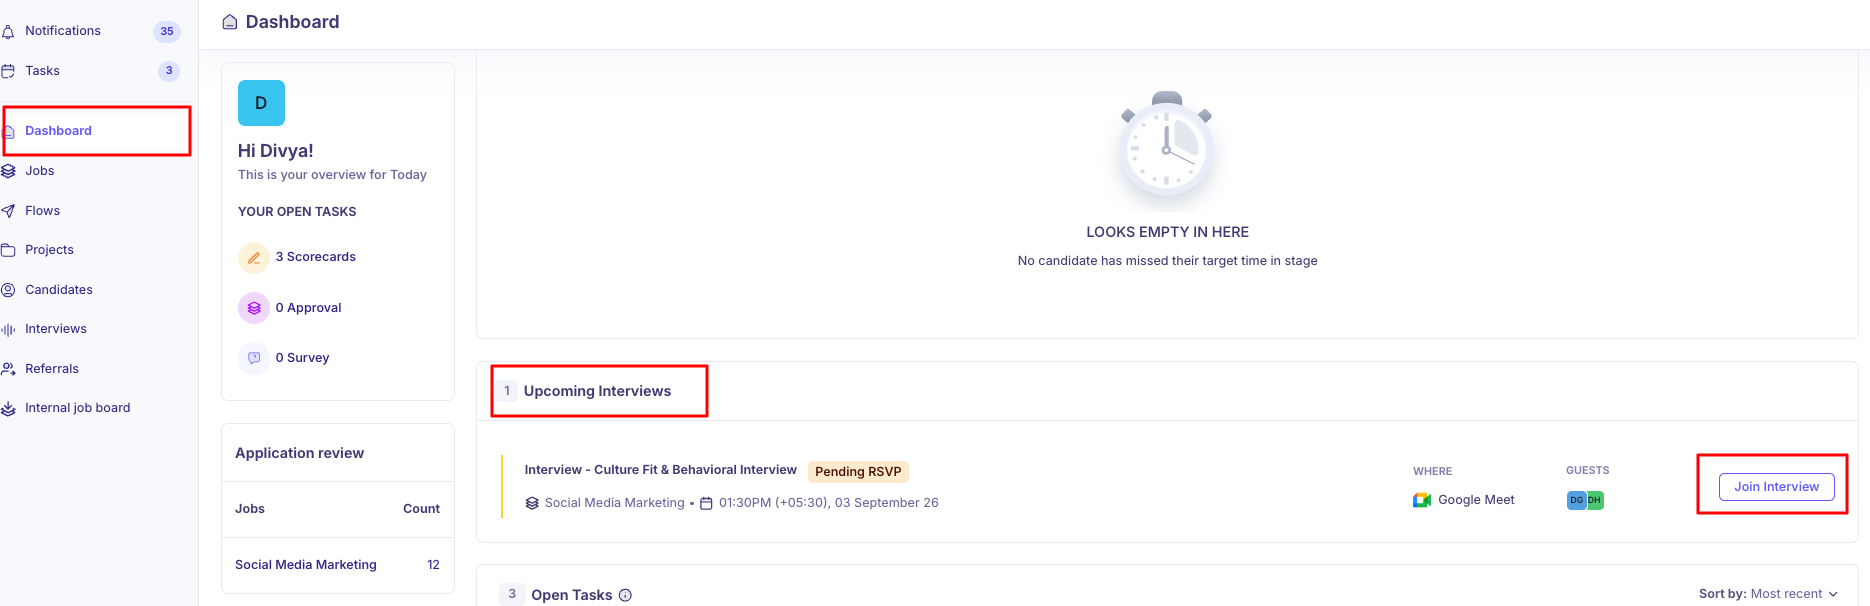
For most hiring managers this is the only page you need.It lists everything waiting on you, and items drop off as you complete them. See .
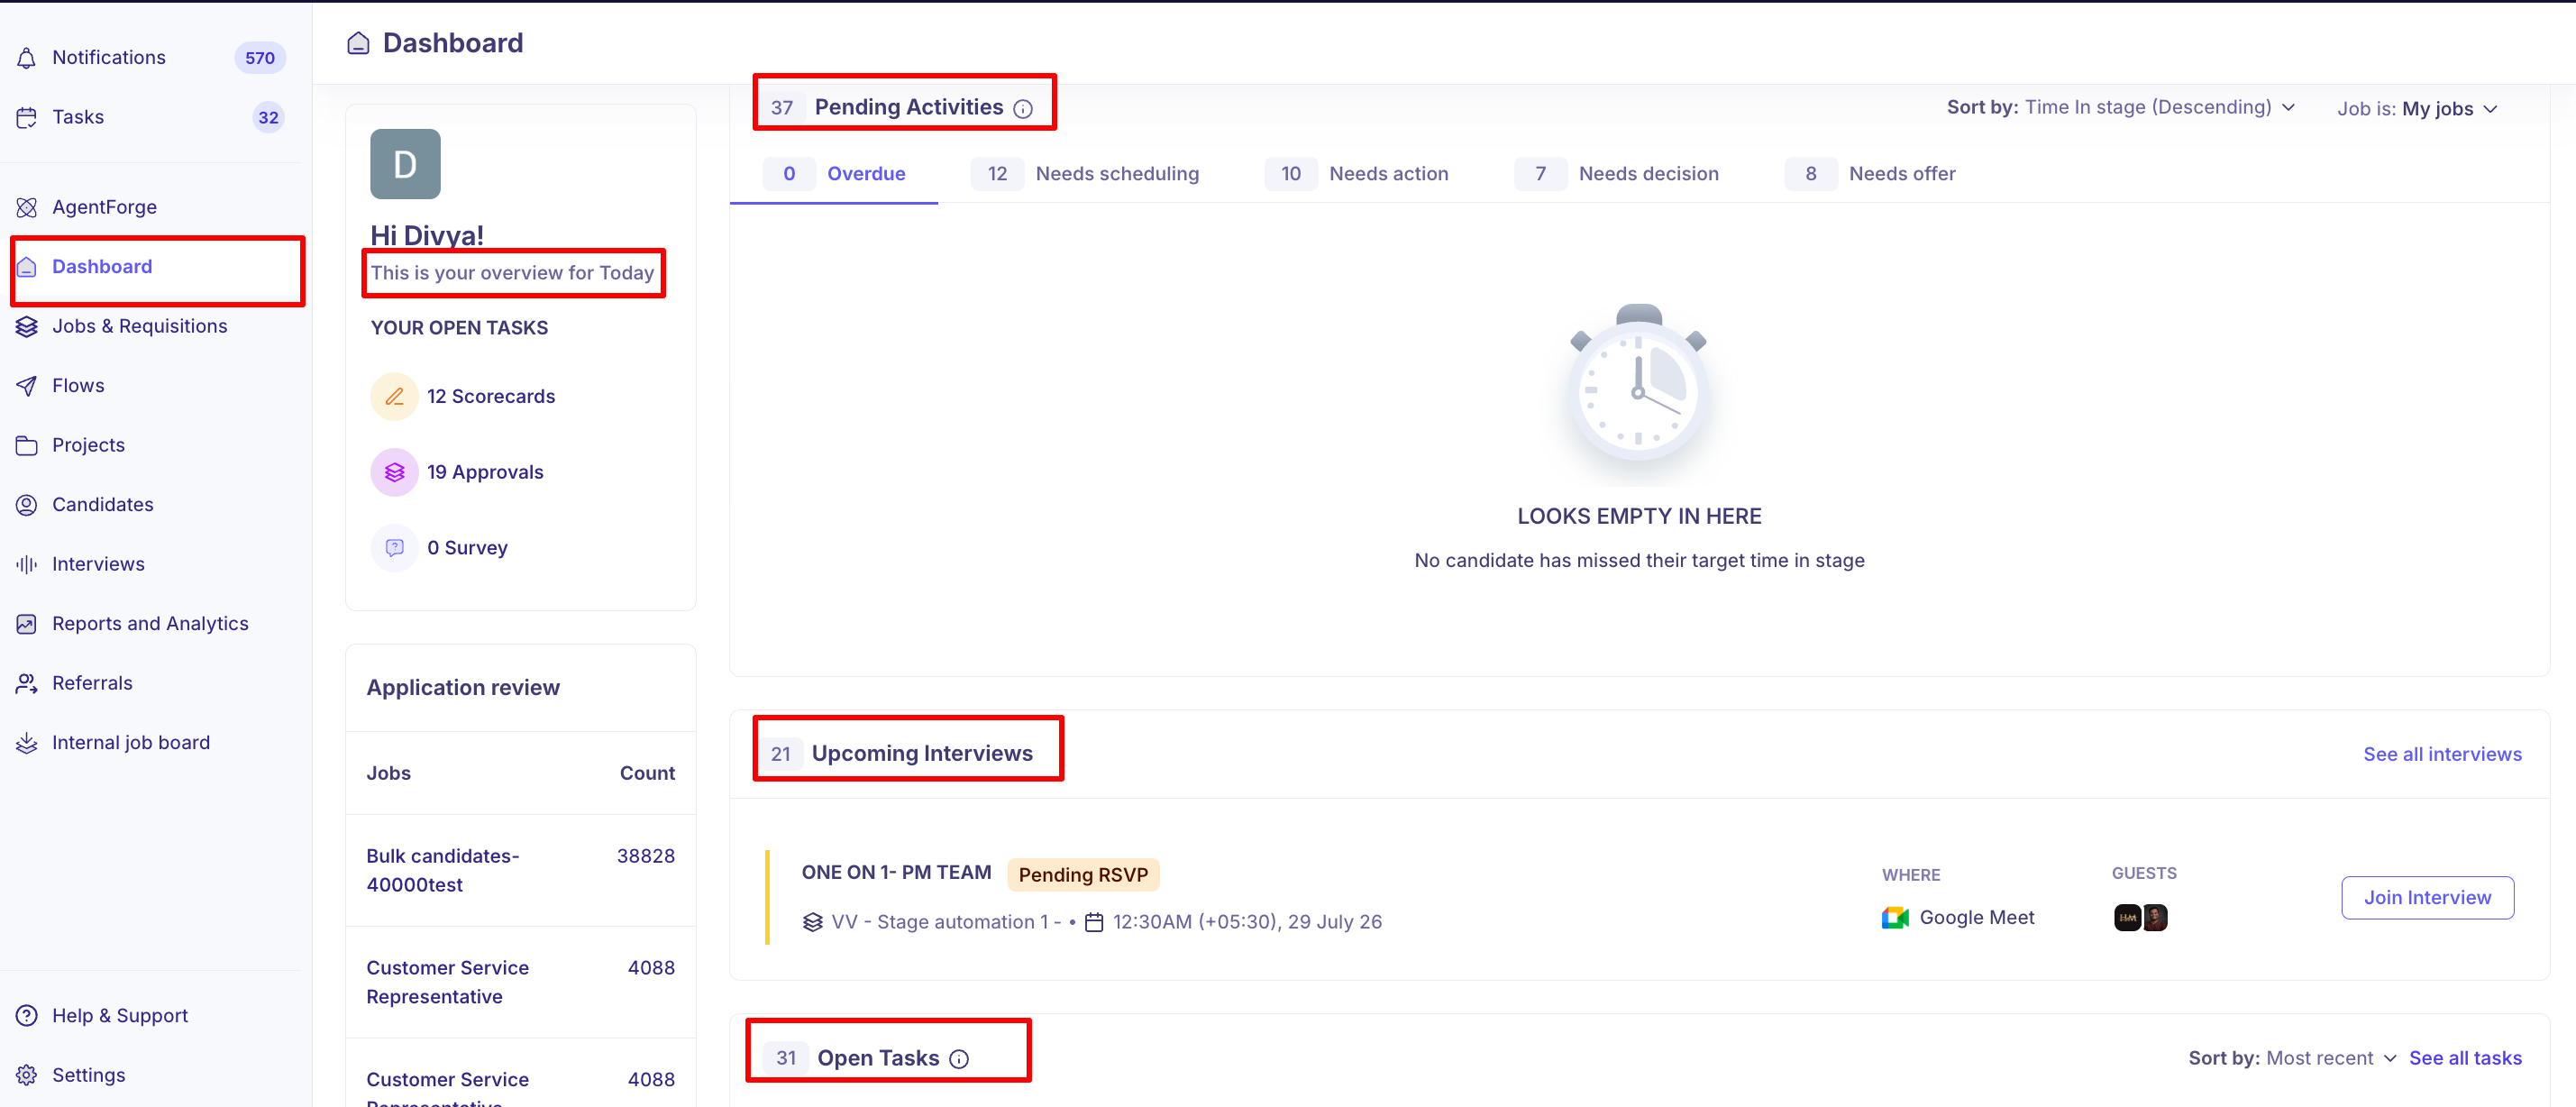
Open tasks — your Scorecards, and your Approvals across jobs, offers and requisitions
Pending activities — candidates stuck waiting, grouped as Needs Decision, Needs action and Overdue, so you can see what your answer is holding up
Upcoming interviews — what's booked, and who booked it
Application review — candidates waiting on your first look
Filter by job when you only want one role.
Raise or approve a requisition
If your organisation runs requisitions, a role starts as one rather than as a job.
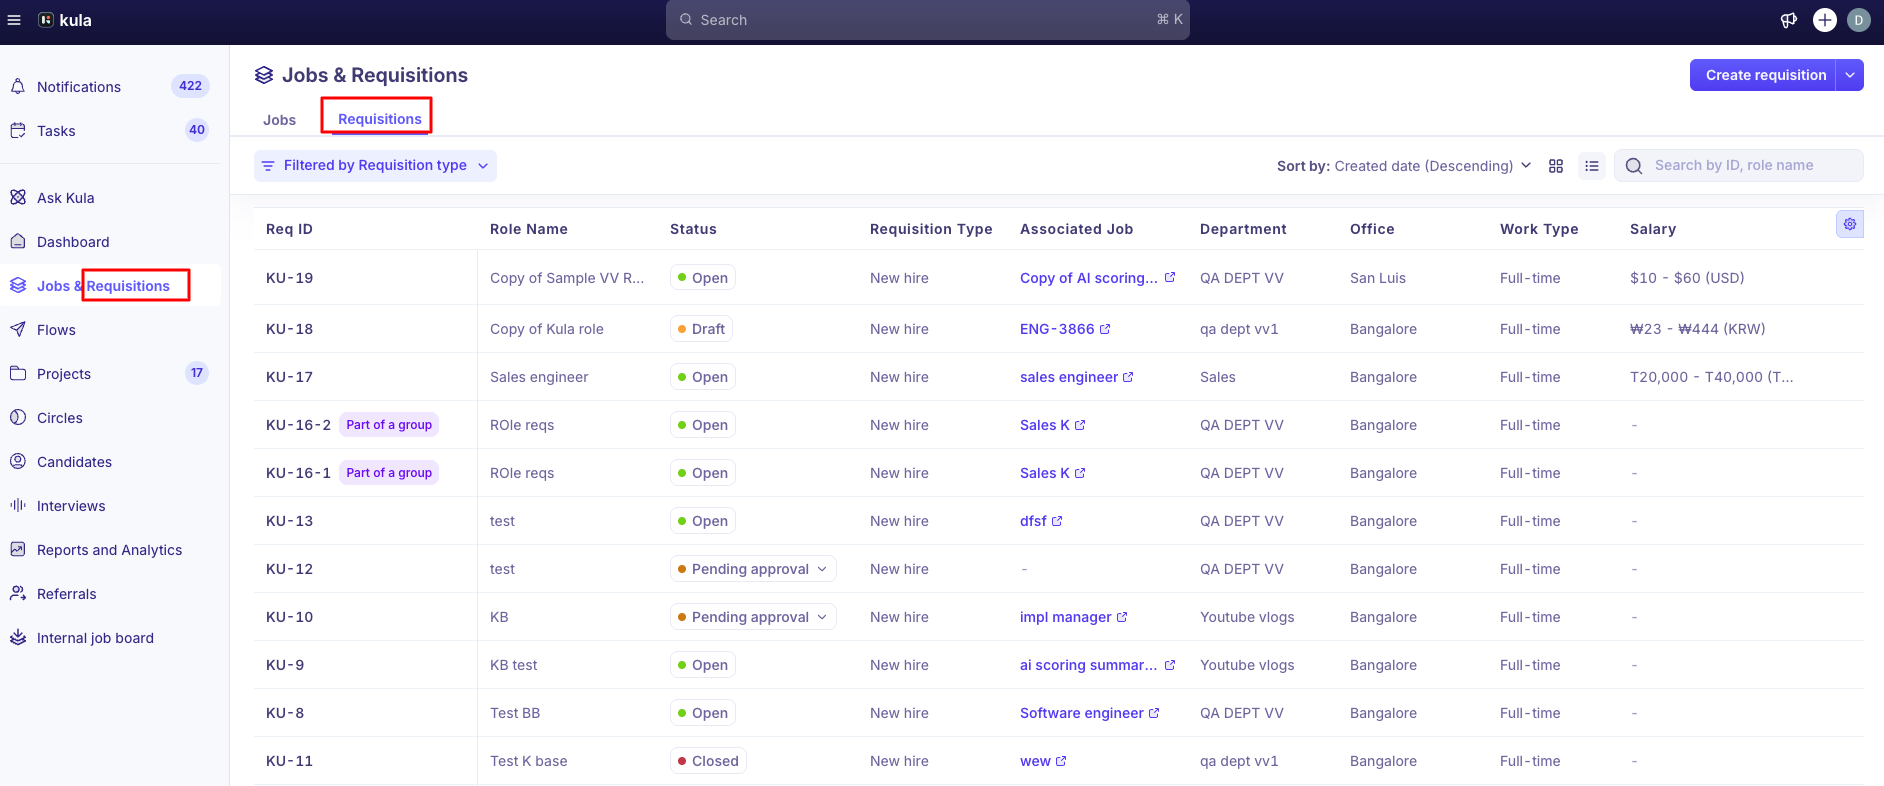
Create a requisition from scratch or by cloning a previous one
Approve requisitions routed to you
Track it through Draft → Pending approval → Approved → Open → Filled or Closed
→
Shortlist candidates sent for review
Your recruiter screens first, then sends you a batch. You get a notification and it appears on your Dashboard. For each candidate you see the resume and the Scoring agent's score with its attribute breakdown, and submit a short review.
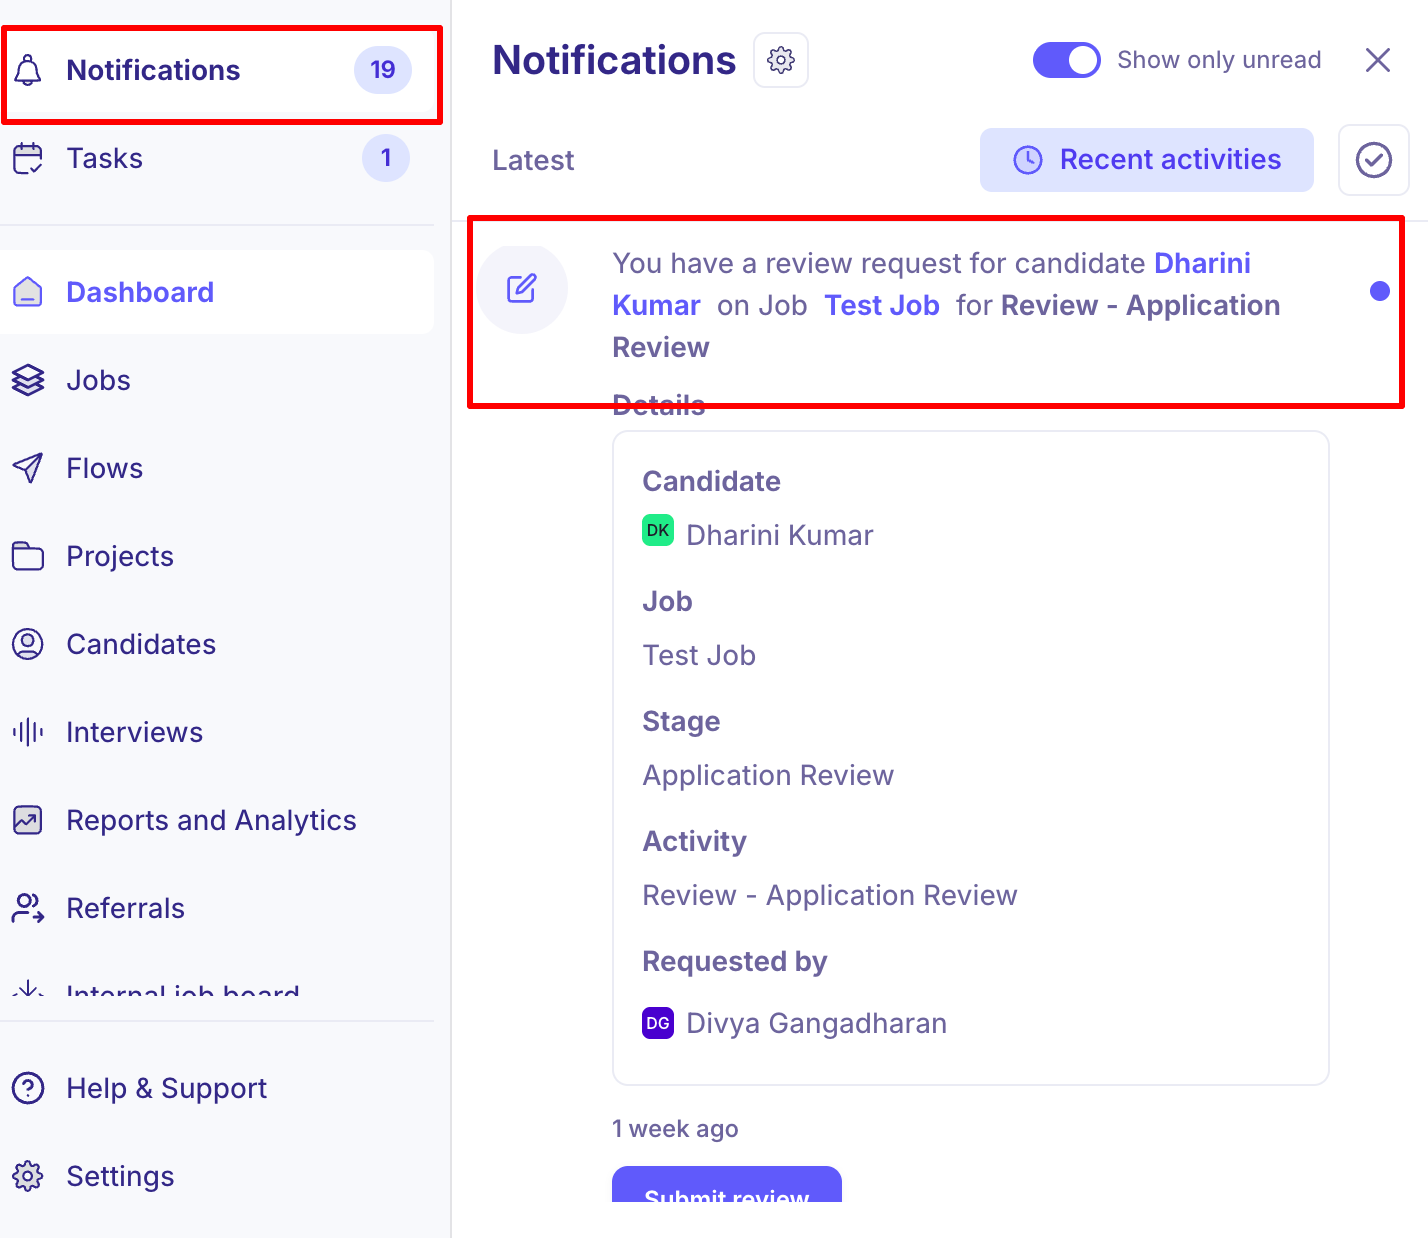
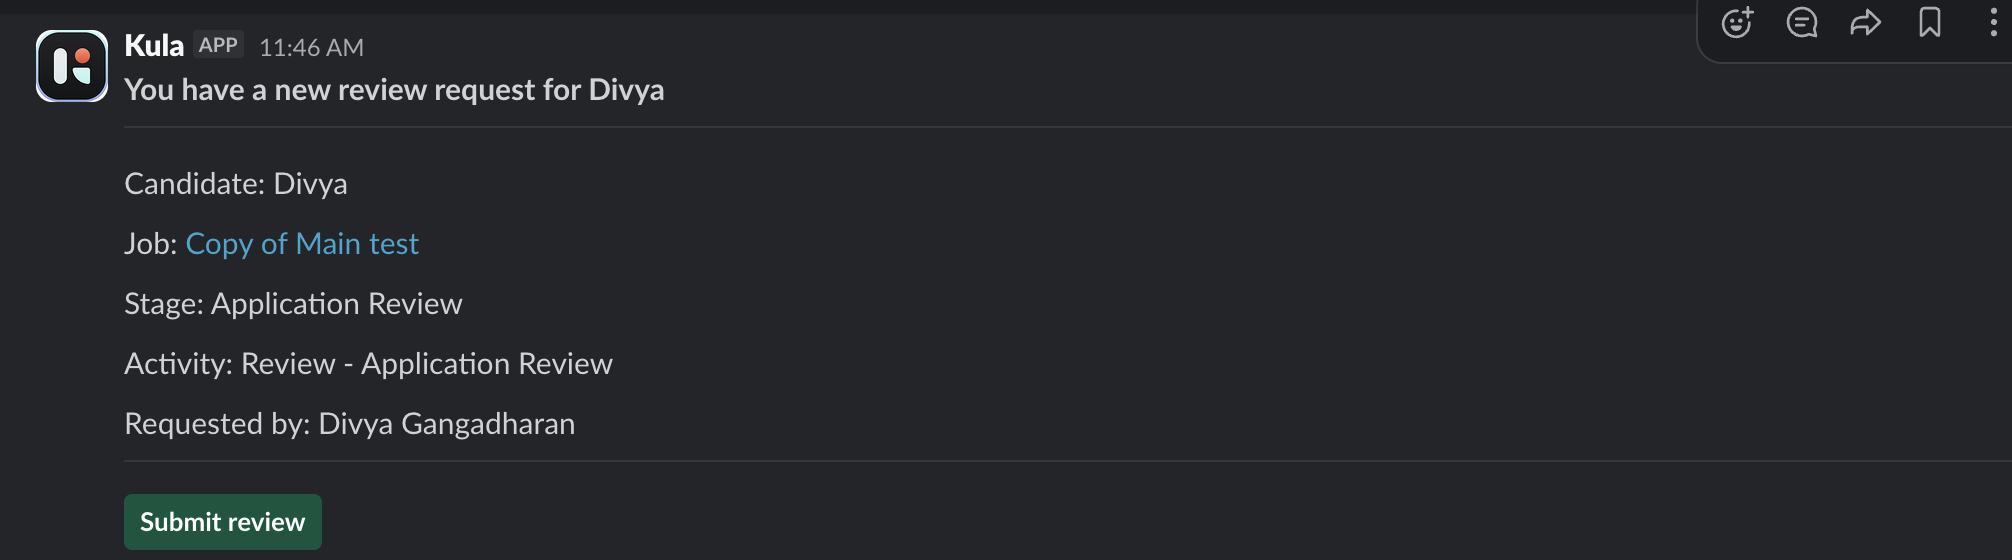
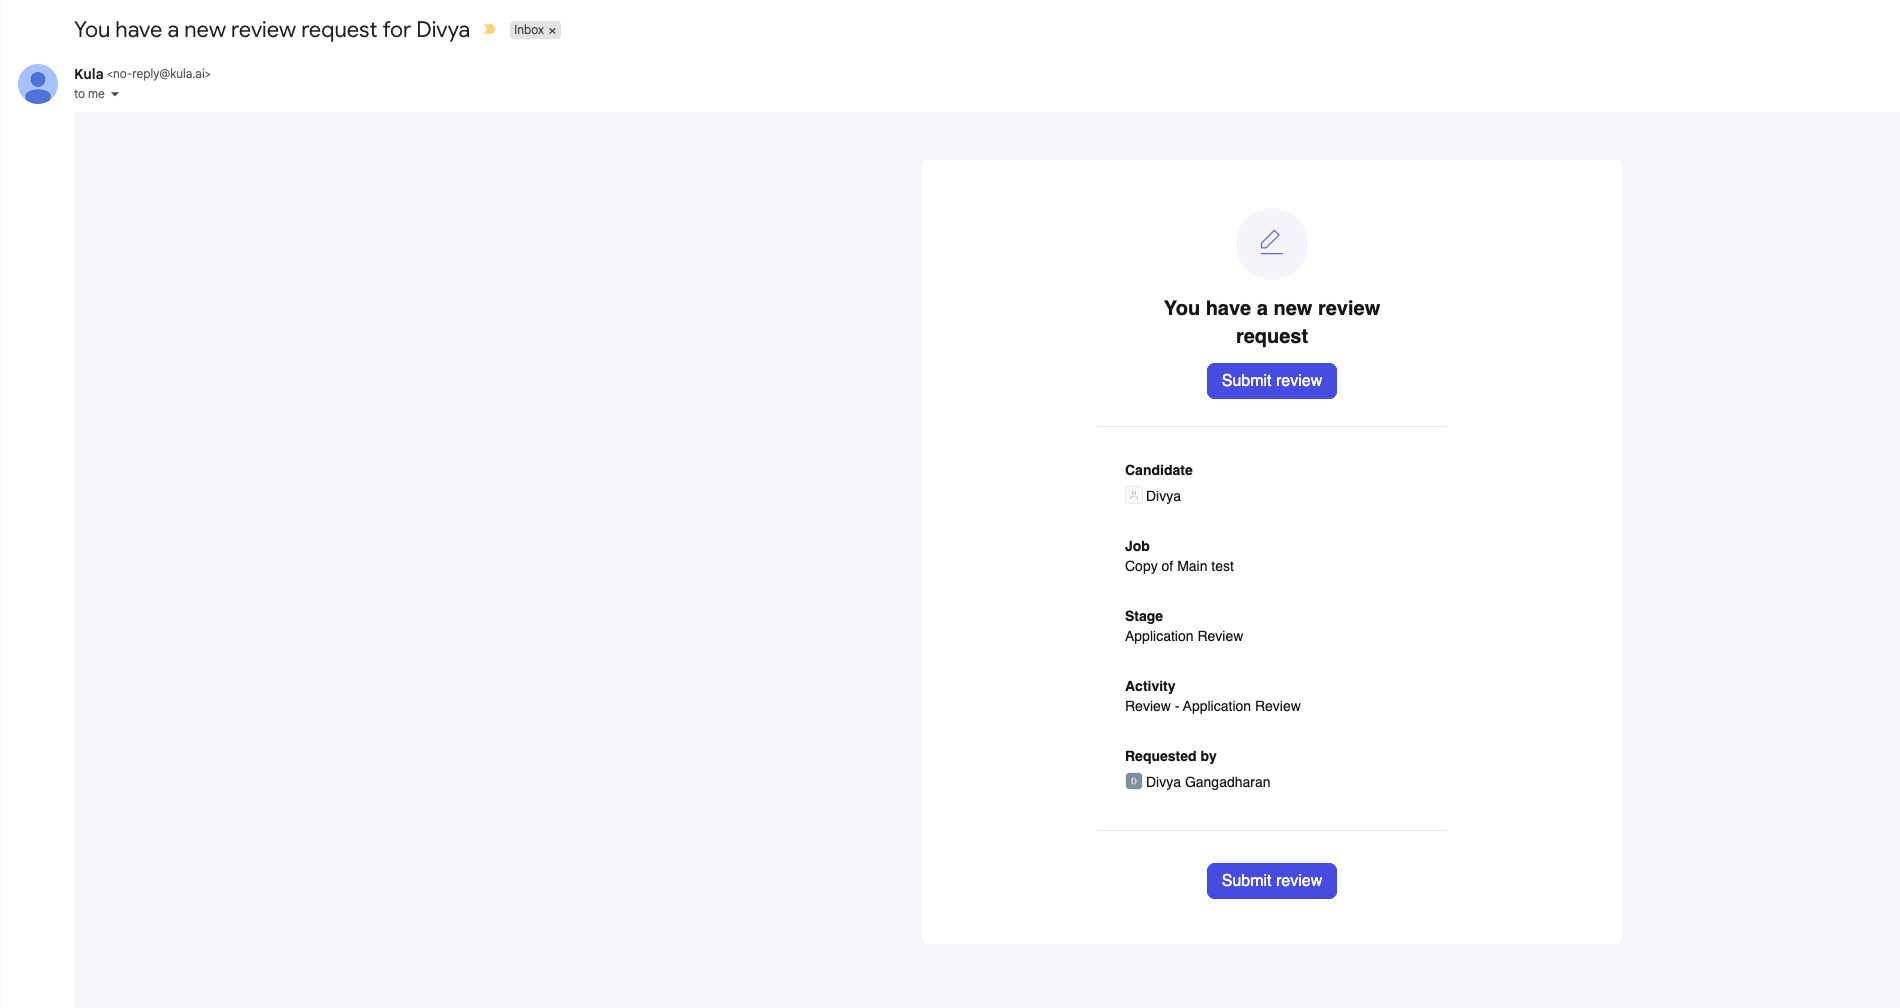
Submitting is what unblocks your recruiter — a pending review stalls the pipeline.
Move candidates and set up interviews
You're not only a reviewer — on a job you're on, you can act on candidates directly.
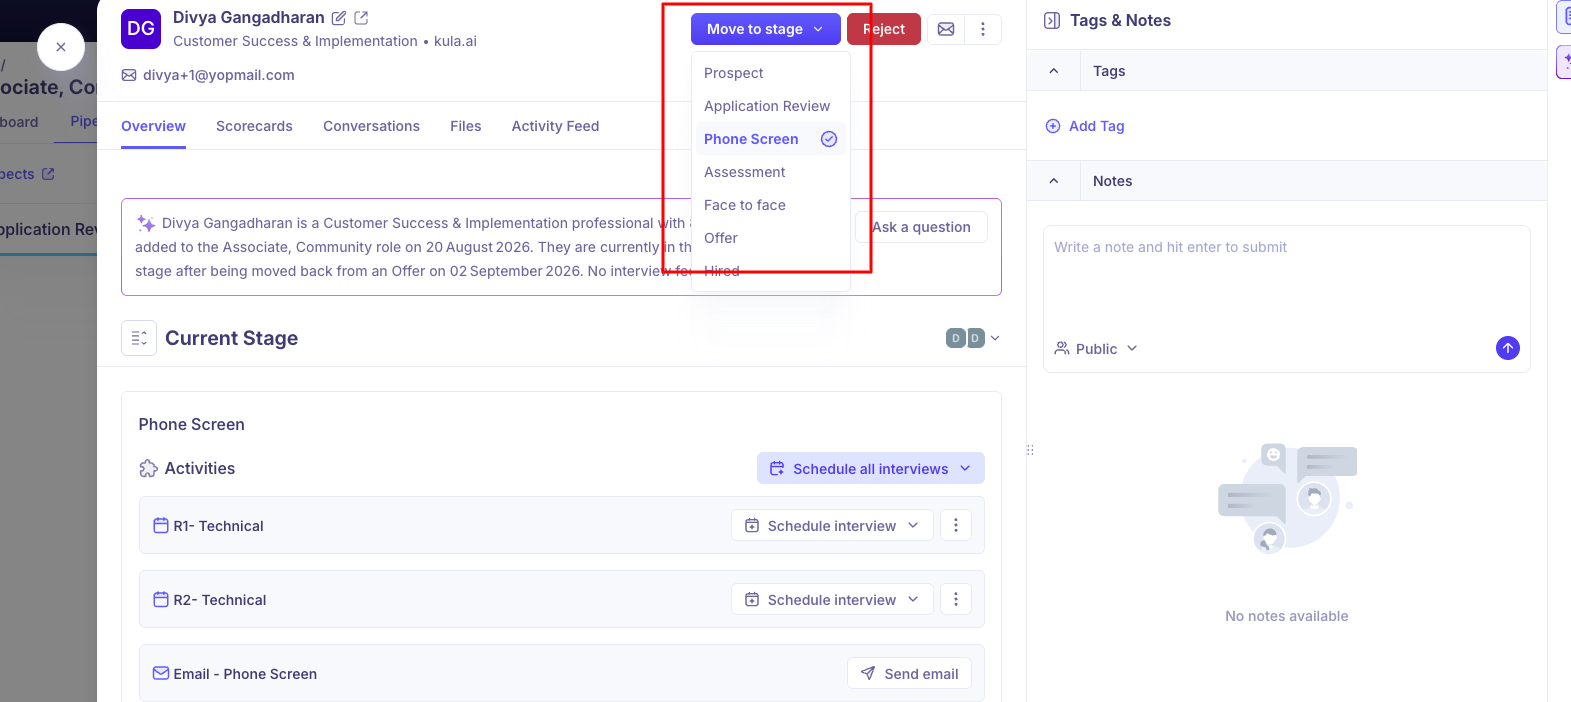
Move to stage to advance someone, or Reject to end it and send the rejection email
Schedule the interview yourself rather than waiting on your recruiter. Book from the interview plan activity so the invite, scorecard and notetaker all follow automatically
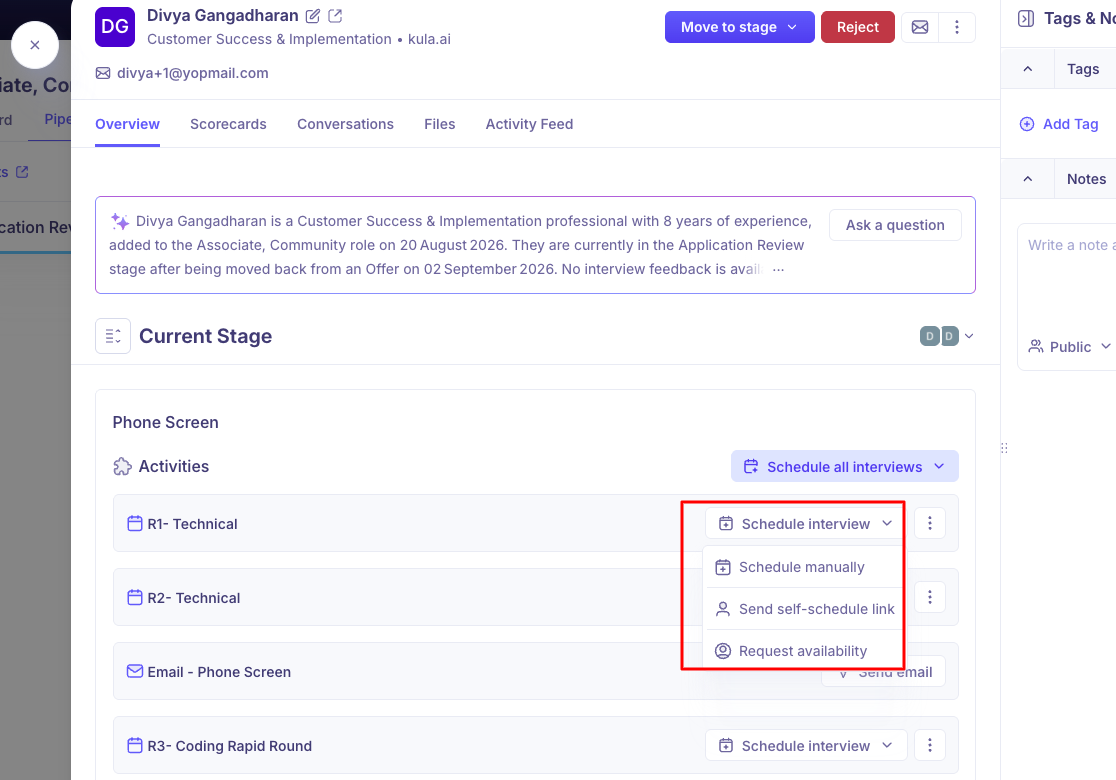
Pick a time by Find time (you choose from the panel's real availability), self-schedule (the candidate books a slot), or a candidate availability request (they send times and you book)
Add notes on the candidate, public to the hiring team or private, and tags so a good-but-not-now candidate is findable later
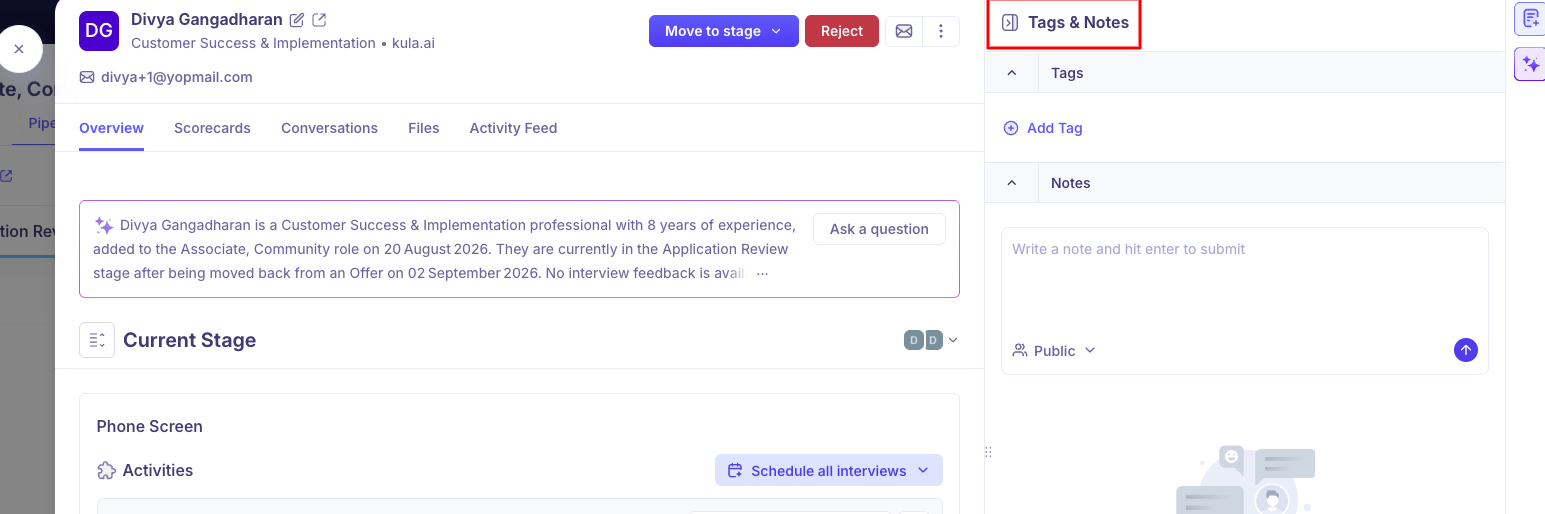
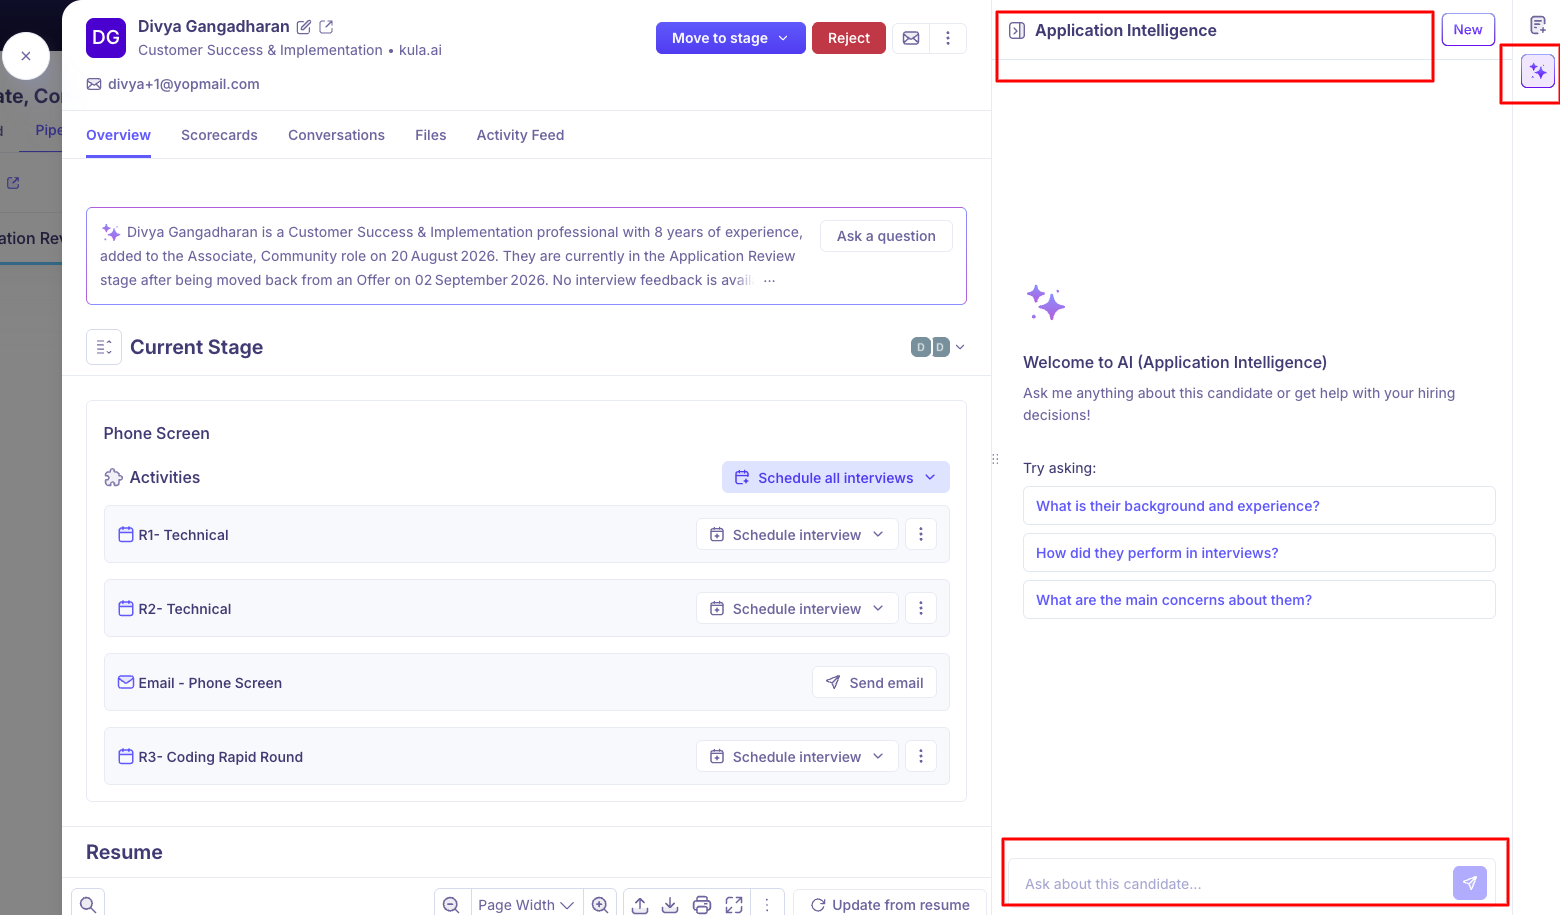
Ask Application Intelligence anything about the candidate from the right-hand panel — "How did they perform in interviews?", "What are the main concerns about them?" It reads the resume, screening answers and interview feedback, which beats scrolling three tabs before a debrief.
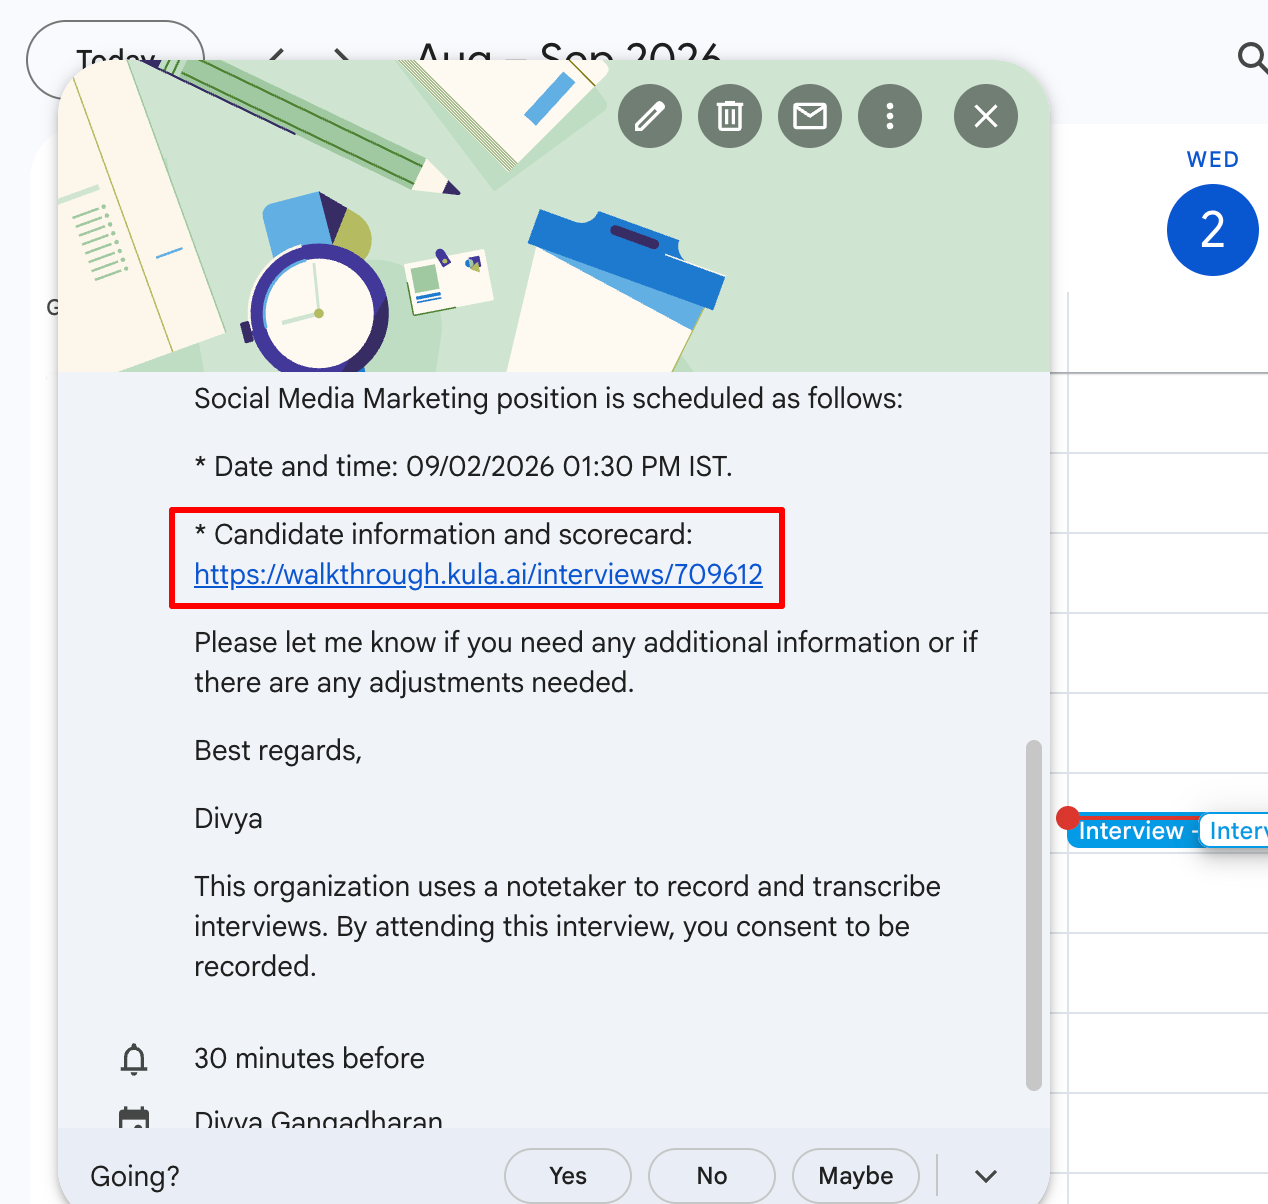
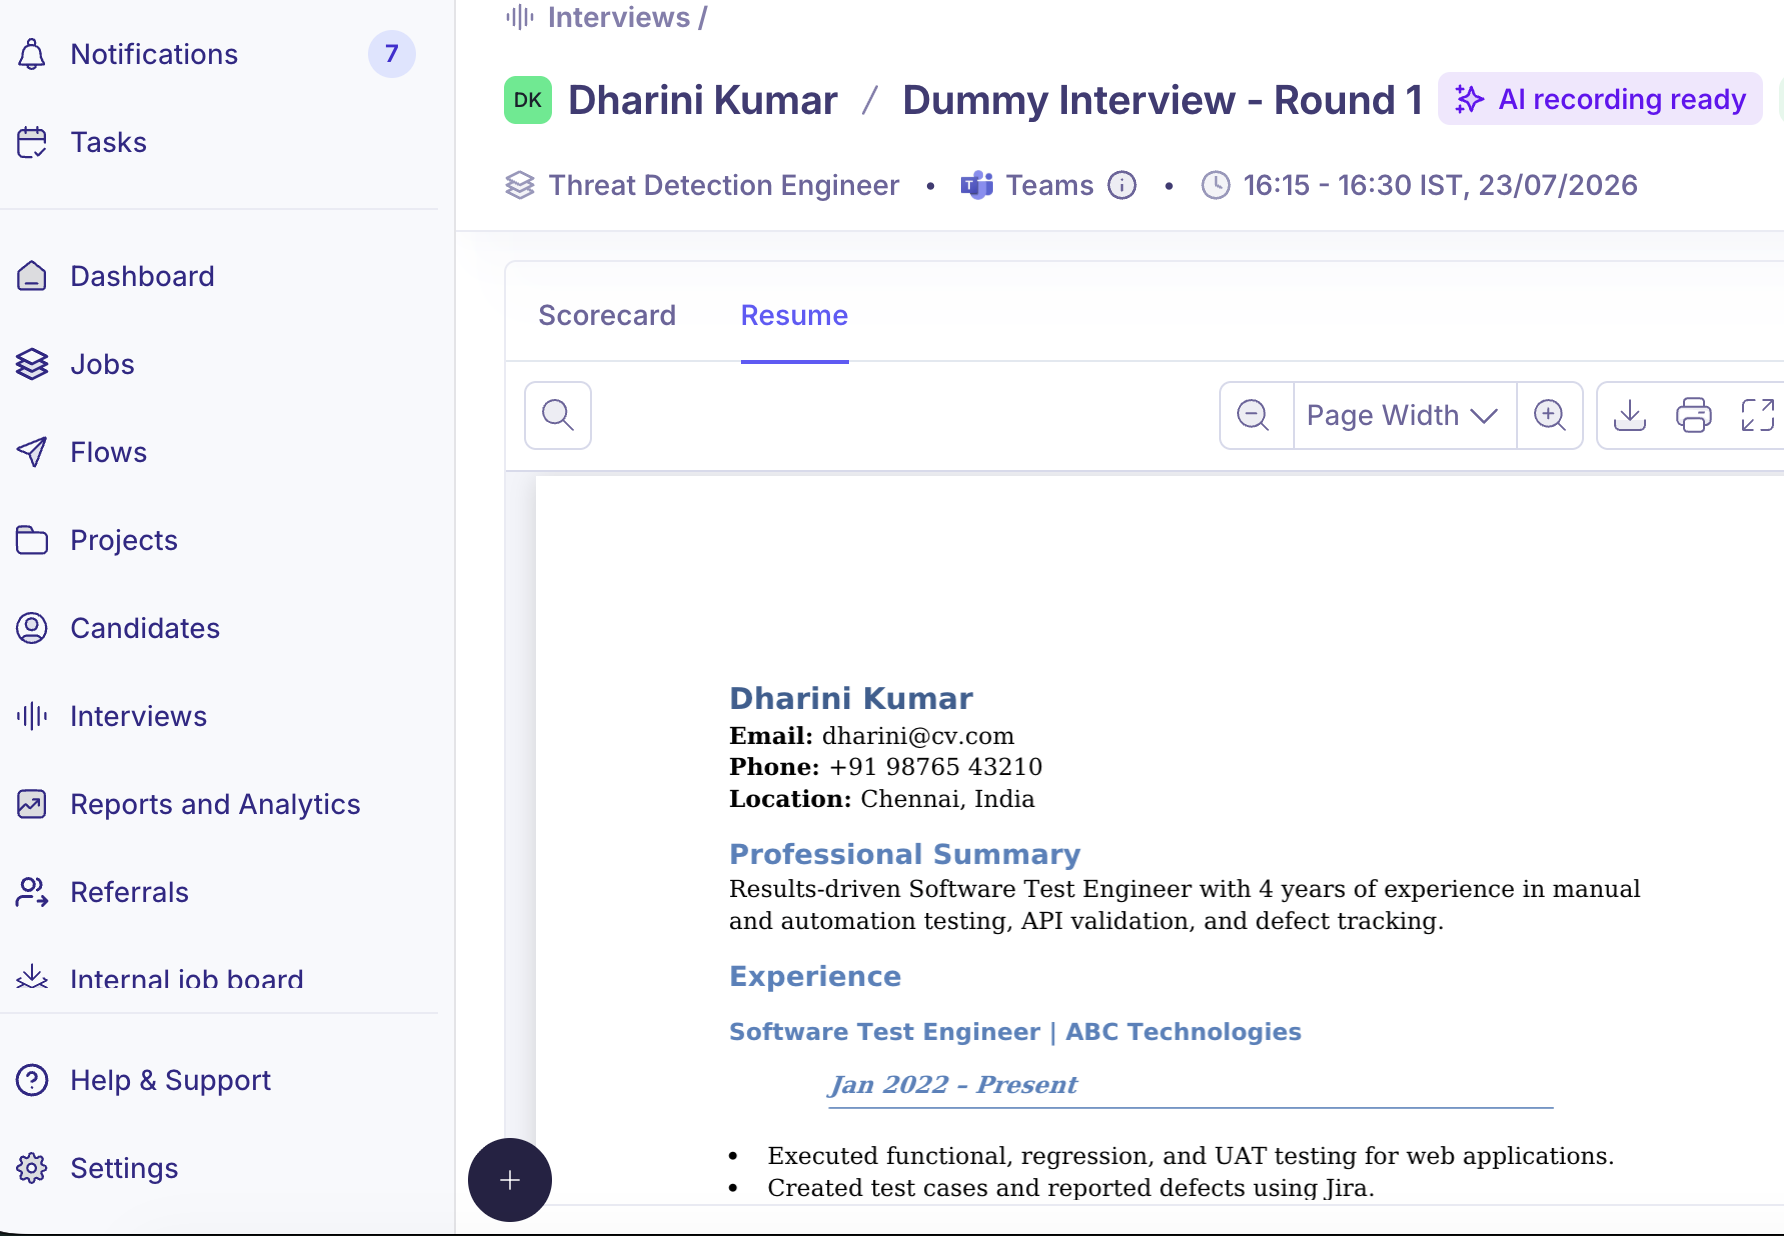
Viewing the candidate profile before your interview
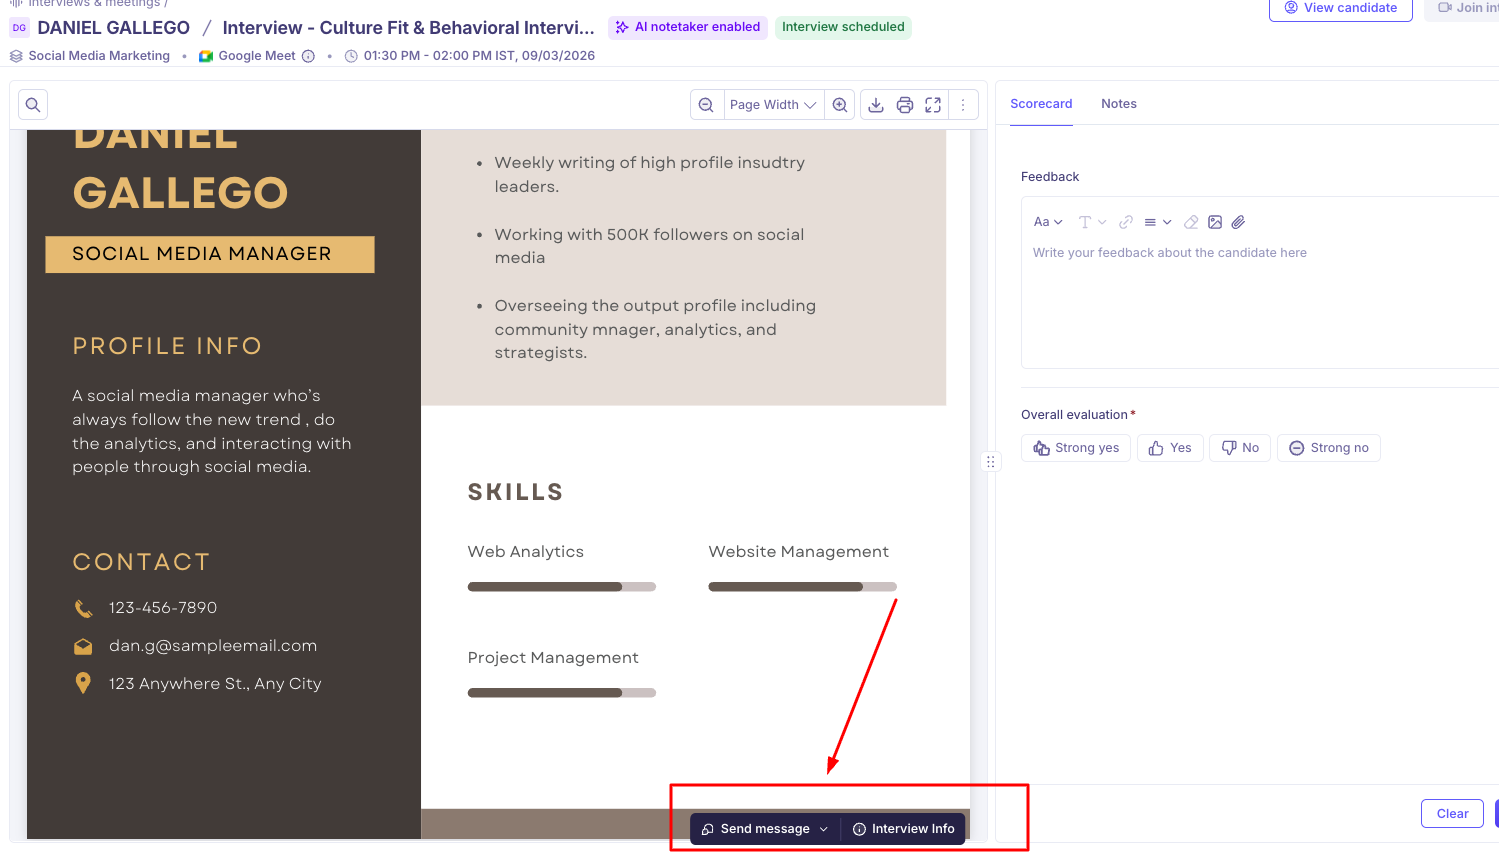
Read the candidate's resume from the interview link itself. Open the interview link that you see in the invite and you'll see the resume alongside the scorecard, so you can prepare in the same place you'll later score, rather than hunting through email attachments. See .
Join the Interview
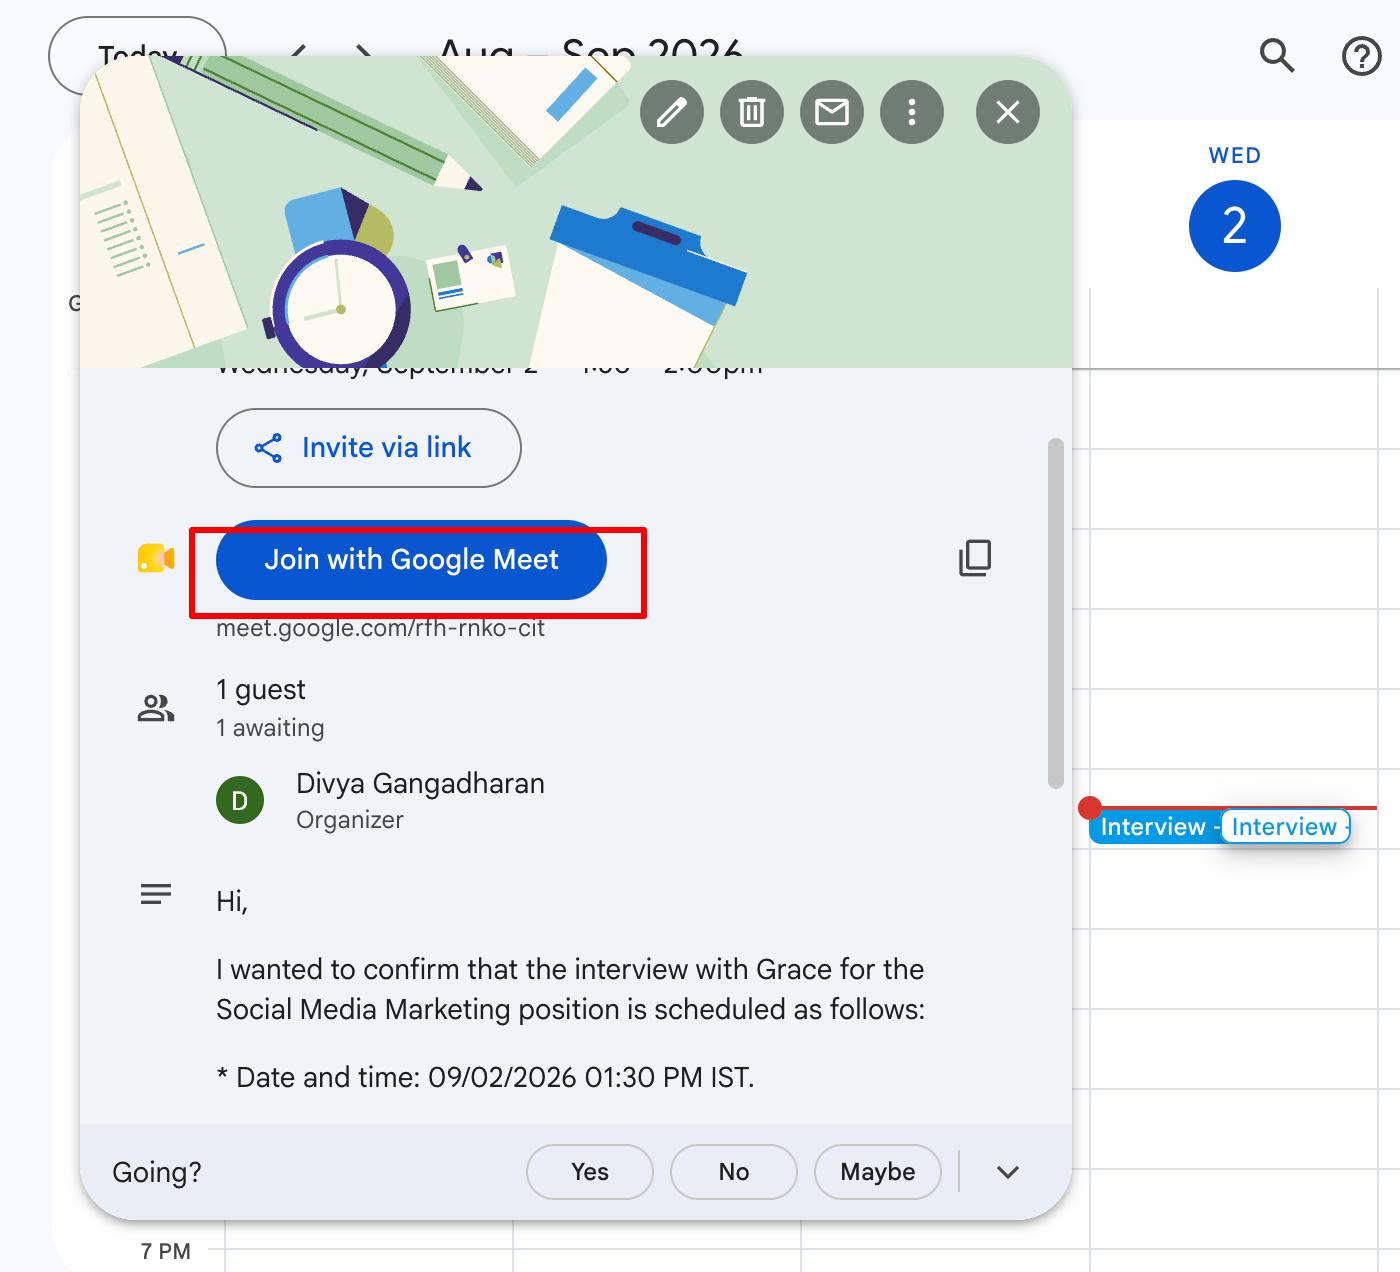
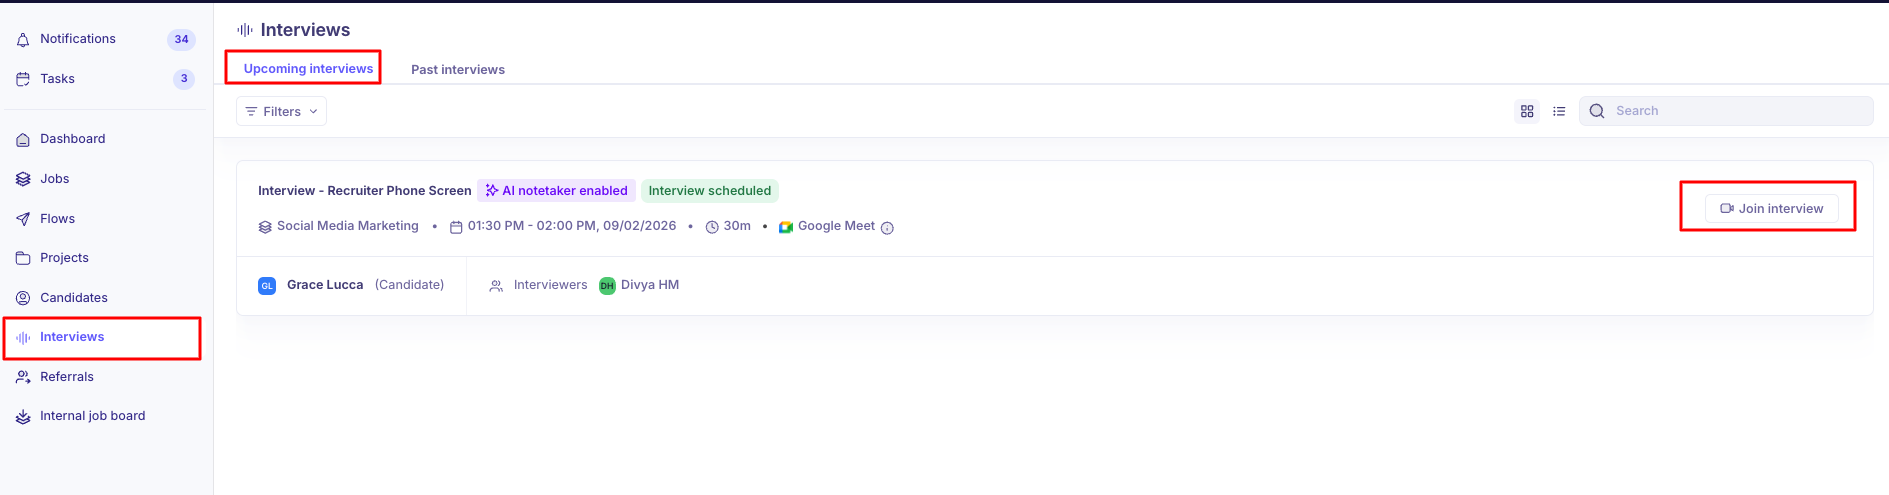
Join with the Join interview button — on the interview page, your Dashboard's upcoming interviews, or the Interviews list. It opens the Google Meet, Teams or Zoom call, and becomes active 10 minutes before the start time, so an early click will show you a tooltip rather than a link. The calendar invite carries the same joining details if you'd rather go from there.
If plans change, you don't have to email around. From the interview, Send message gives you ready-made options — I need this interview rescheduled, I need more information, I will be late to the interview, Change in venue or the meeting link — or a custom message, sent to the right people without drafting anything from scratch.
Submit Scorecard
The AI notetaker captures the transcript and drafts a scorecard from what was actually said; you review, correct and submit. Submit promptly — the process waits on the last scorecard.
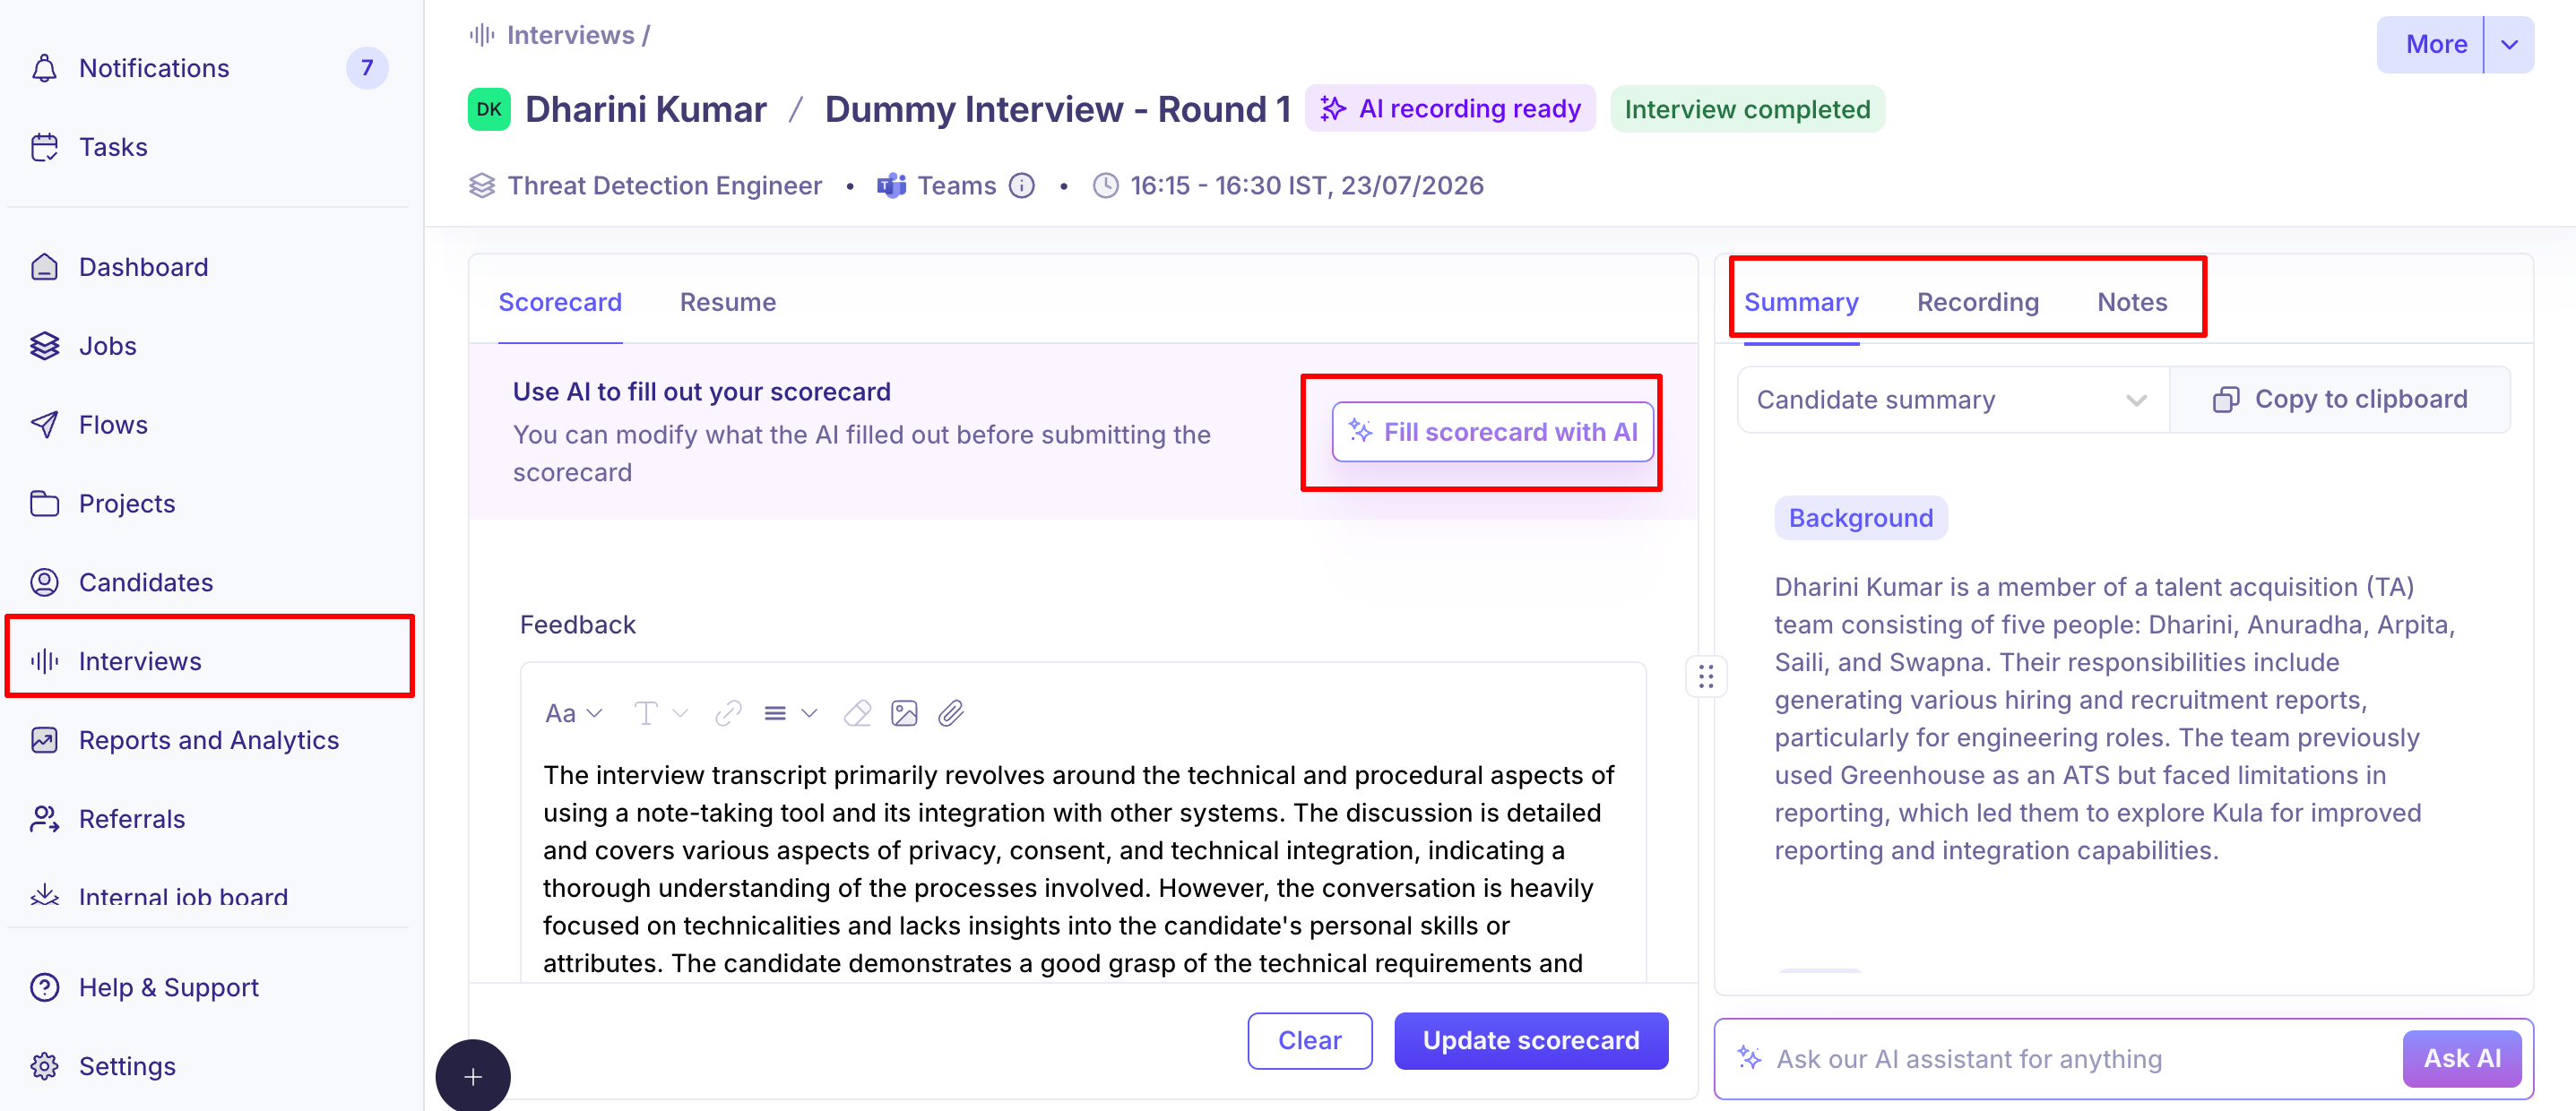
Check here for Leaving interview feedback & scorecards
Whether AI drafts it or you write it from scratch, fill the scorecard the same day. It's the first thing the next interviewer reads, and a stale scorecard is worse than none.
Read the panel's feedback
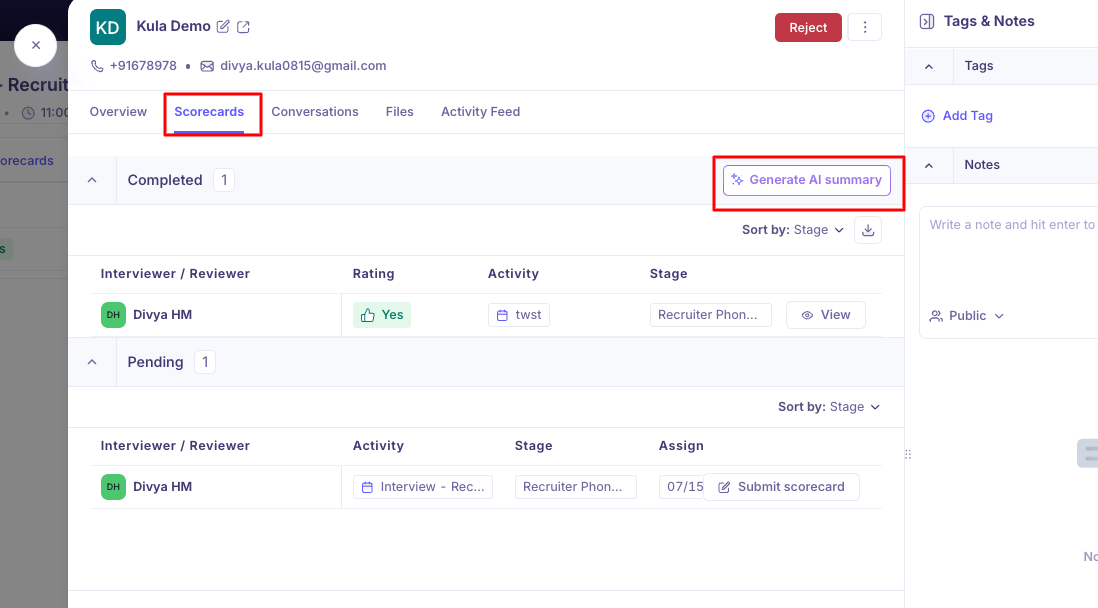
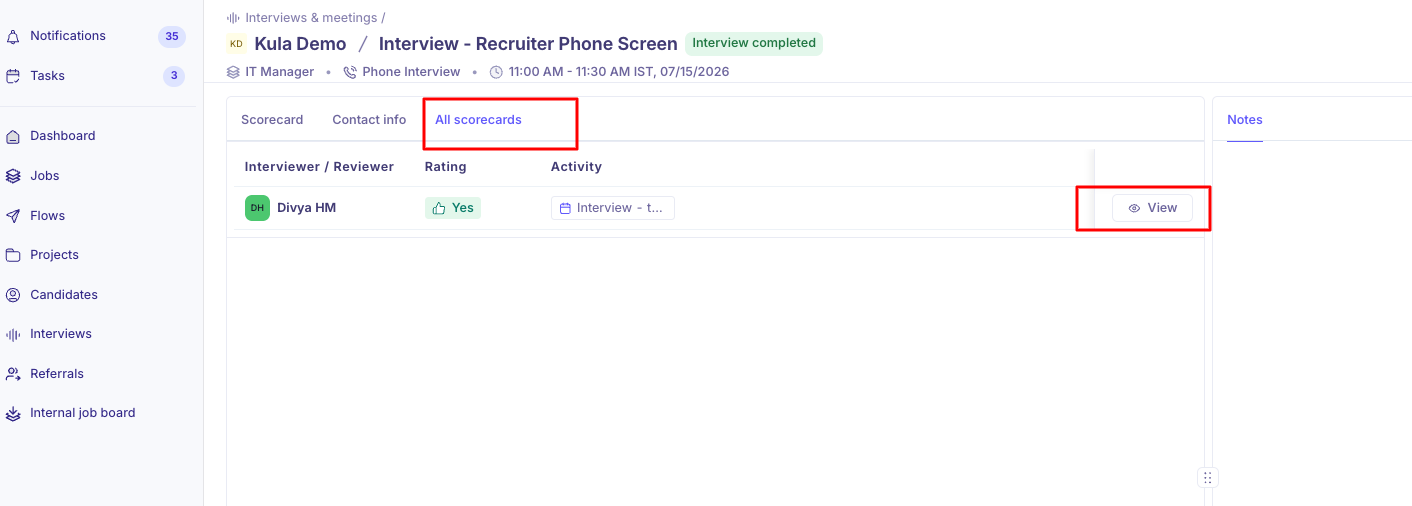
On the candidate's Scorecards tab, read every round side by side or ask the AI to summarise them all at once. You can download the full set as a PDF when building an offer case. See
Whether you see others' scorecards before submitting your own depends on a setting your admin controls — hiring teams always retain full visibility.
Approve an offer
Where you sit in the approval chain is set by your admin — it varies by department, office and work type, so you may be first, later in the chain, or not on it at all for some roles. When a request does reach you it arrives on Slack, email and in-app, with the full offer detail and a link to the candidate's scorecards. Approve or reject from Slack, your phone, or Kula.
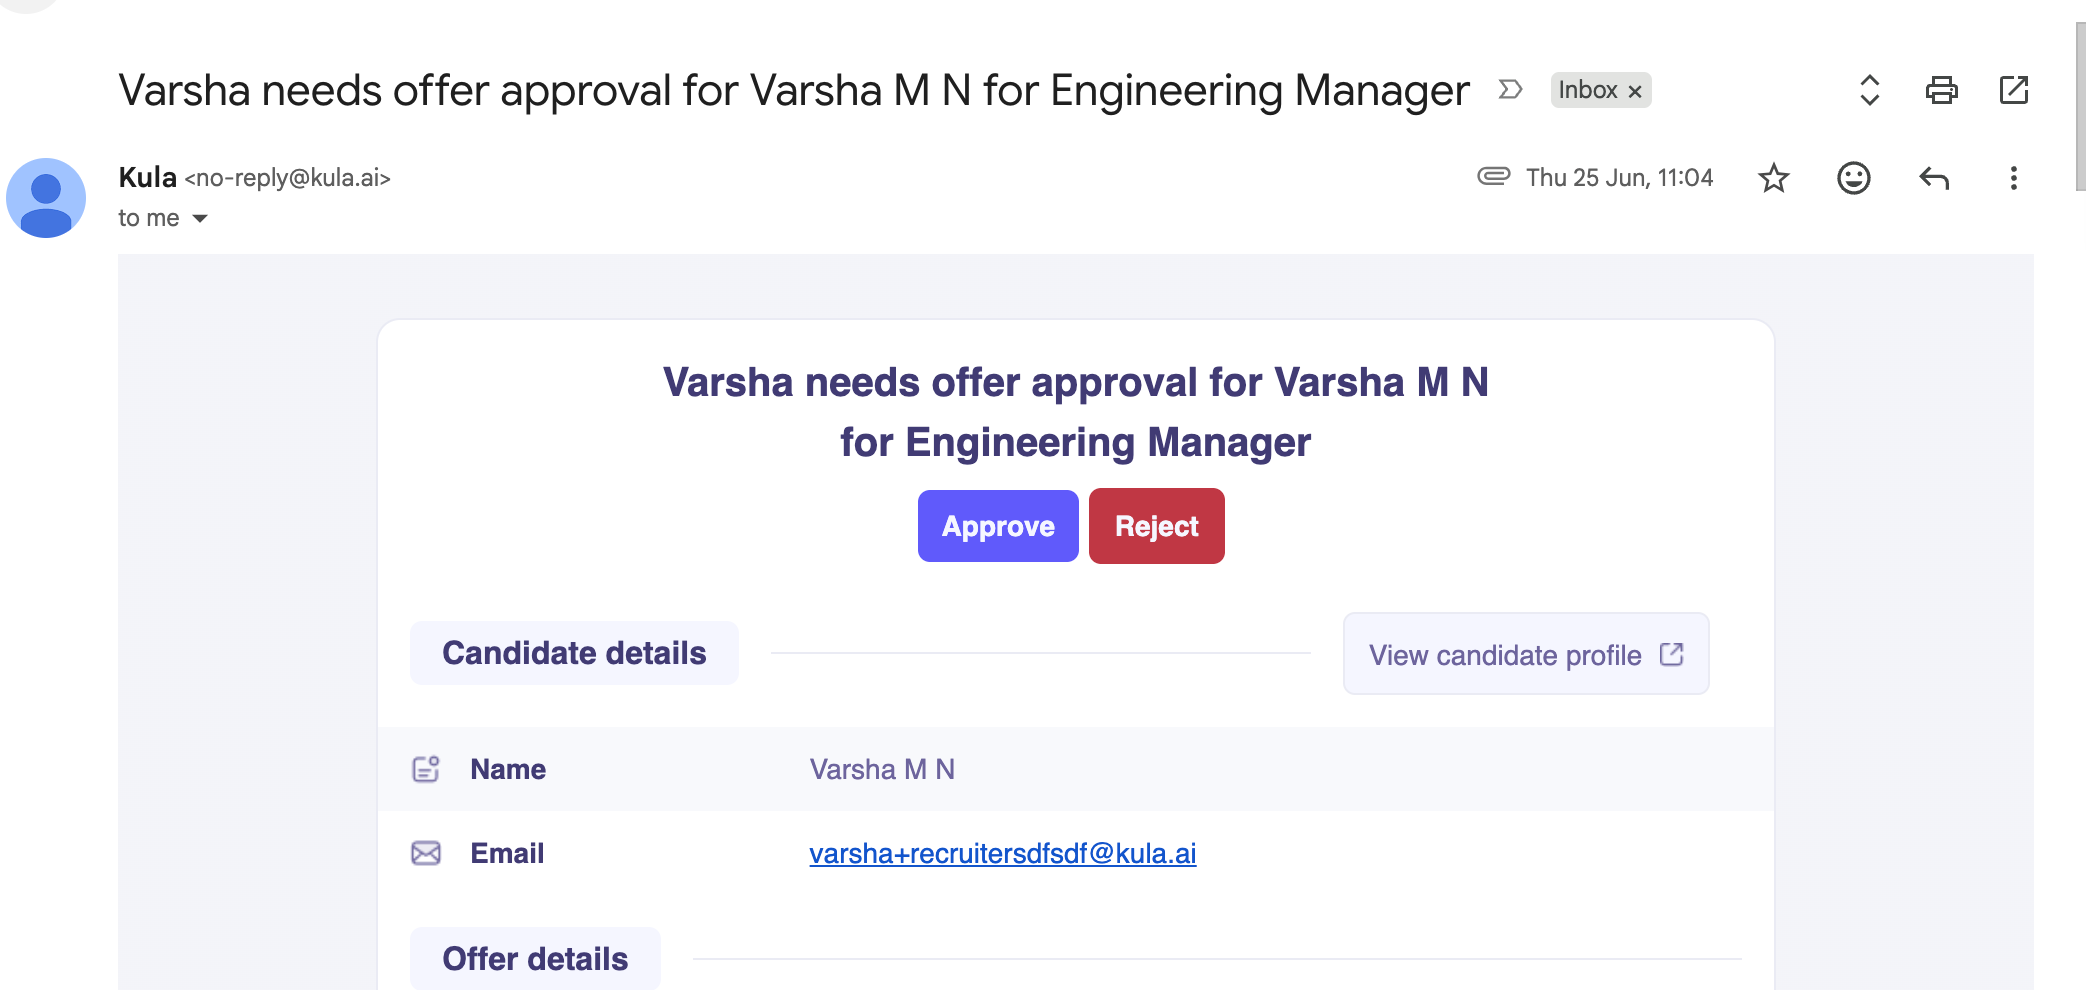
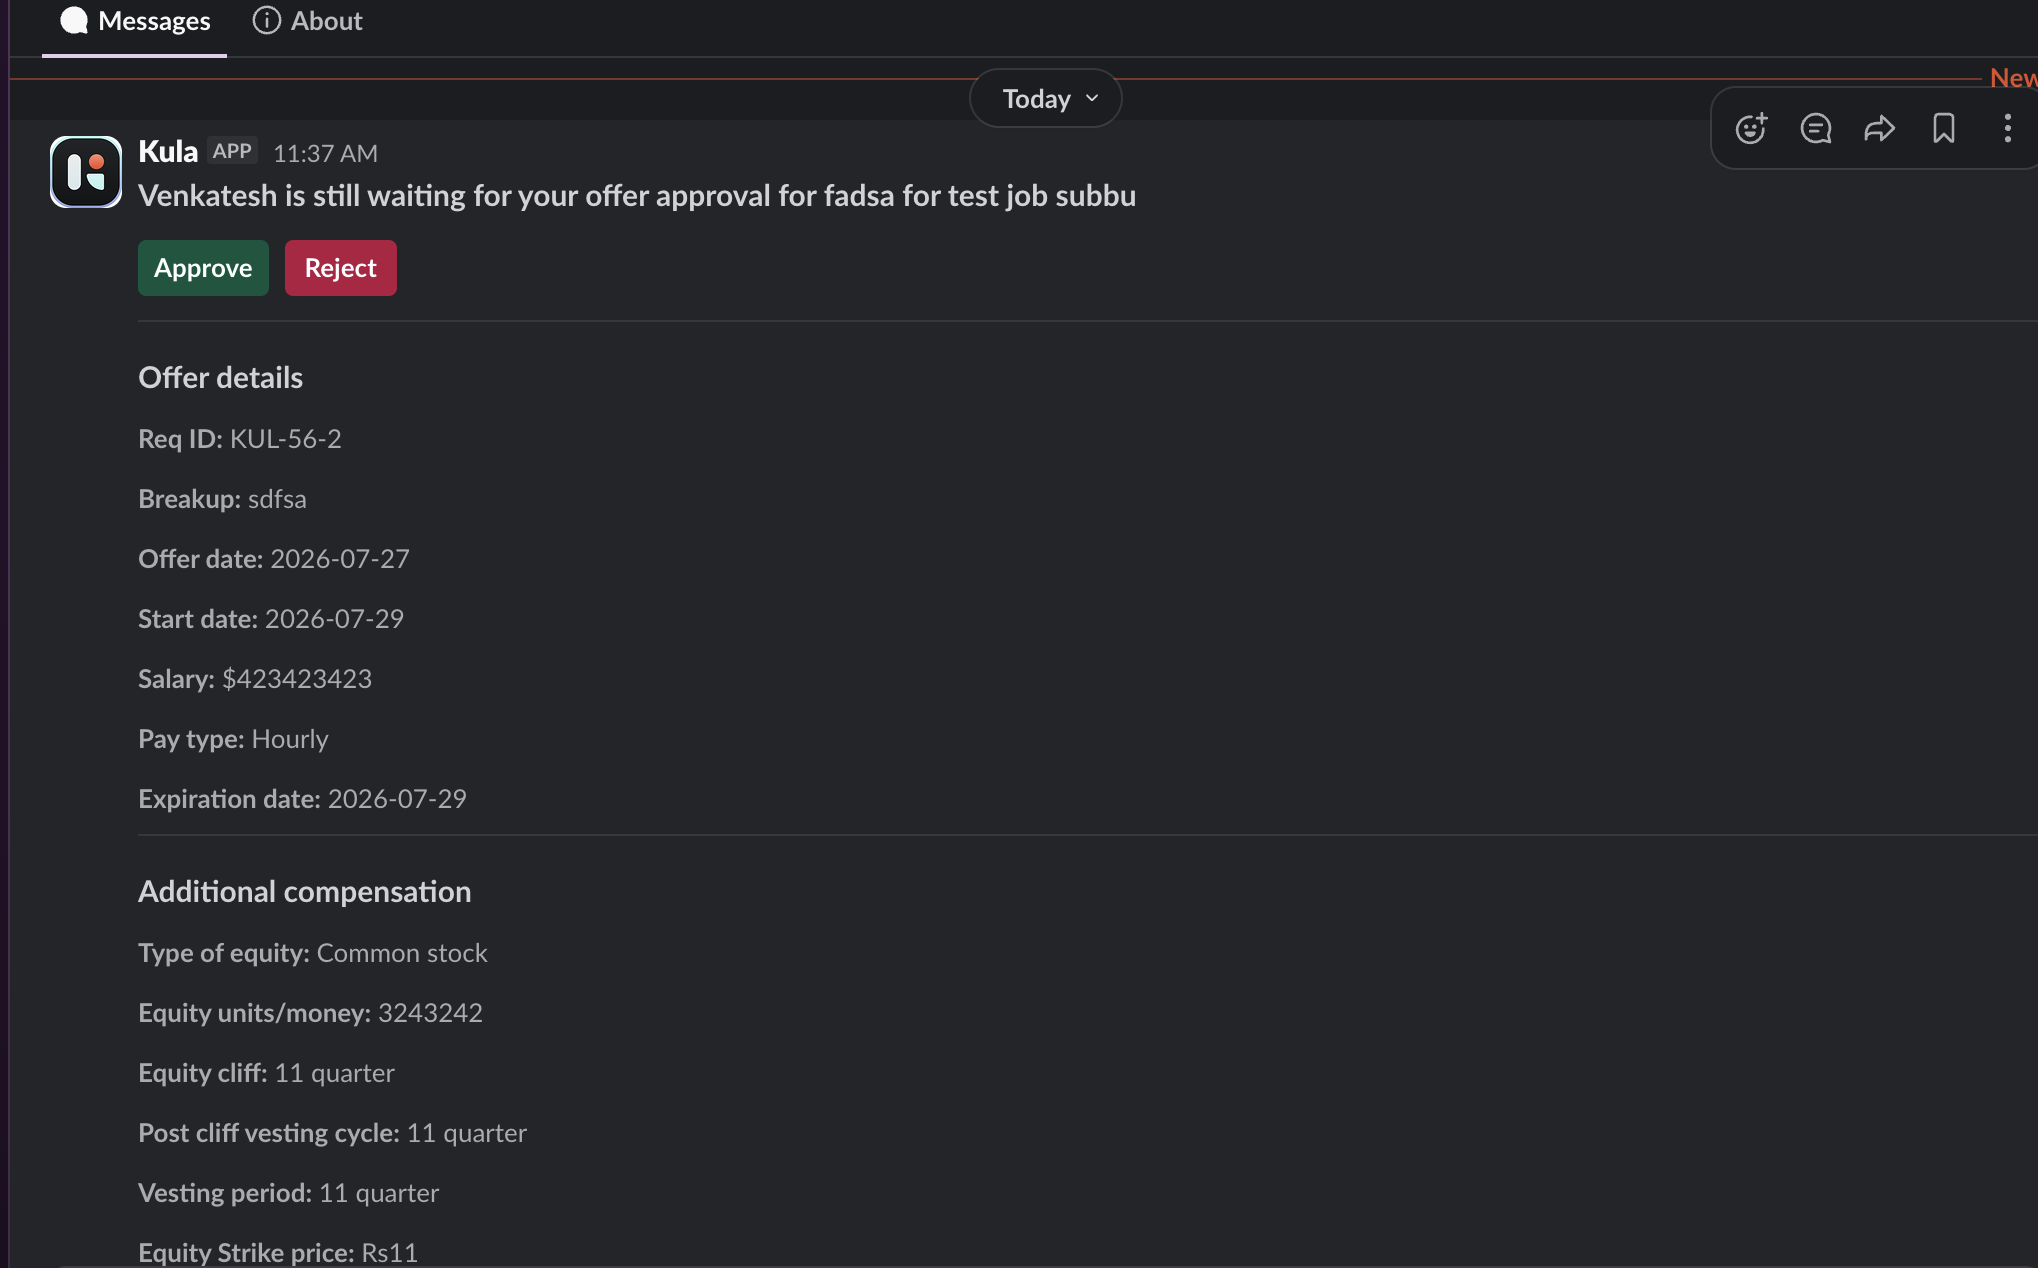
Any later edit comes back to you for re-approval, so nothing goes out changed without sign-off.
→
Refer someone you know
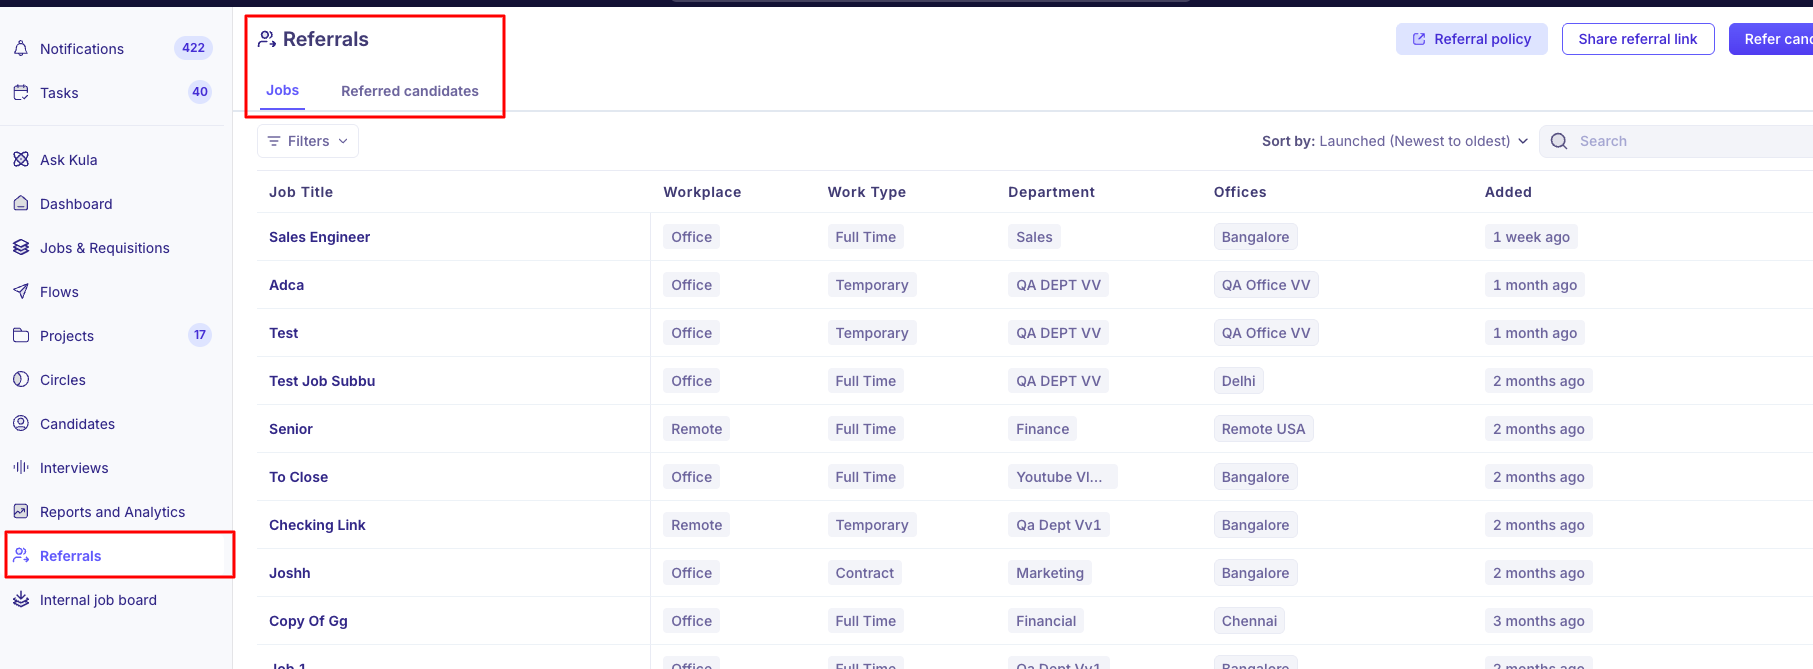
Add the person and the job, share your referral link, and follow their progress from the Referrals page. Your recruiter can also log a referral on your behalf and credit it to you.
→
Apply for an internal role
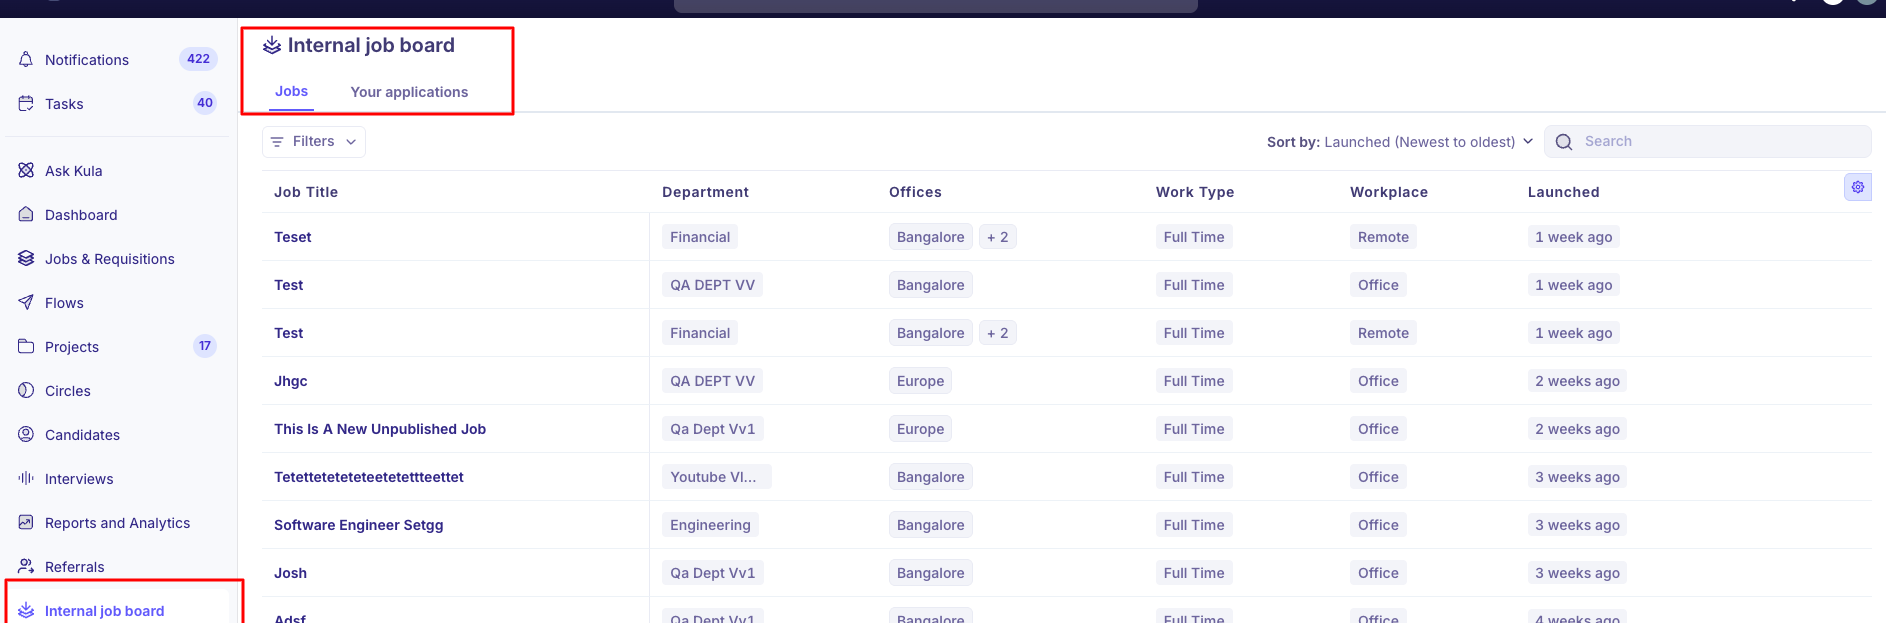
If your organisation runs an internal job board, browse it and apply on the page. Your applications shows where each stands — Under review, Interviewing, Offer, Hired or Not selected. Roles you've applied to stay on the board with an Applied tag.
→
Your first week, in short
Calendar connected and timezone set
Notifications pointed at the channel you actually read
Requisition raised, if your organisation uses them
One shortlist reviewed with the resume open
One scorecard submitted the same day — let AI draft it, then make it yours
Good to know
Jobs are created by your recruiter or an admin, and you join the hiring team. Requisitions you can create yourself.
Being on the hiring team is what gives you access — and what makes you assignable as an interviewer. Ask to be added if you're missing from the interviewer picker.
You see every candidate on your job, including the application-review stage. For a shorter list, work from your Dashboard review requests and ask your recruiter for a dedicated review stage.
Approvals leave a trail — an admin overriding a step must record a note.
FAQ
Can I create a job myself? No. Jobs are created by your recruiter or an admin, and you join the hiring team. You can raise a requisition yourself if your organization uses them.
I'm not in the interviewer list for my own job. Why? You need to be on the job's hiring team to be picked as an interviewer. Ask your recruiter to add you.
There are too many candidates on my job to review. Can I see fewer? You see every candidate on your job, including the application-review stage. Work from the review requests on your Dashboard, or ask your recruiter to set up a dedicated review stage.
Can I see the other interviewers' feedback before I submit mine? It depends on a setting your admin controls. Once you're on the hiring team you can read every round on the candidate's Scorecards tab.
Can I approve an offer without opening Kula? Approvals come to you as notifications and sit on your Dashboard until you act. See .
Need help? If you have questions or need assistance, reach out to us at support@kula.ai or use the in-app chat.