Get started as a Recruiter
Last updated: September 26, 2026
Welcome to Kula!
As a Recruiter you have the widest access in Kula: you run the role end to end — opening the job, filling the pipeline, moving people through it, and getting the offer out. This guide covers what you'll do most often and links to the detail for each. It assumes your admin has already set Kula up.
Where to find it: Sign in at yourcompany.kula.ai
Who this is for: anyone with the Recruiter role.
What you will do in Kula
Area | What you do there |
|---|---|
Dashboard | Your open tasks — scorecards, approvals, reviews |
Jobs & Requisitions | Create the job, set the hiring team, build the interview plan, publish |
Candidates | Search, add and manage every candidate in your database |
Flows | Run outbound sequences to candidates who haven't applied |
Projects | Pool and share candidates for review, or for a role later on |
Interviews | Schedule, reschedule, watch recordings, chase feedback |
Reports and Analytics | Pipeline and time-to-hire — if your admin has given you access |
Sign in and find your way around
Your organization has its own Kula Login URL — yourcompany.kula.ai. Bookmark it. Depending on how your admin set things up, you'll sign in with a password, with Google or Microsoft, or through your company's single sign-on.
For a tour, see .
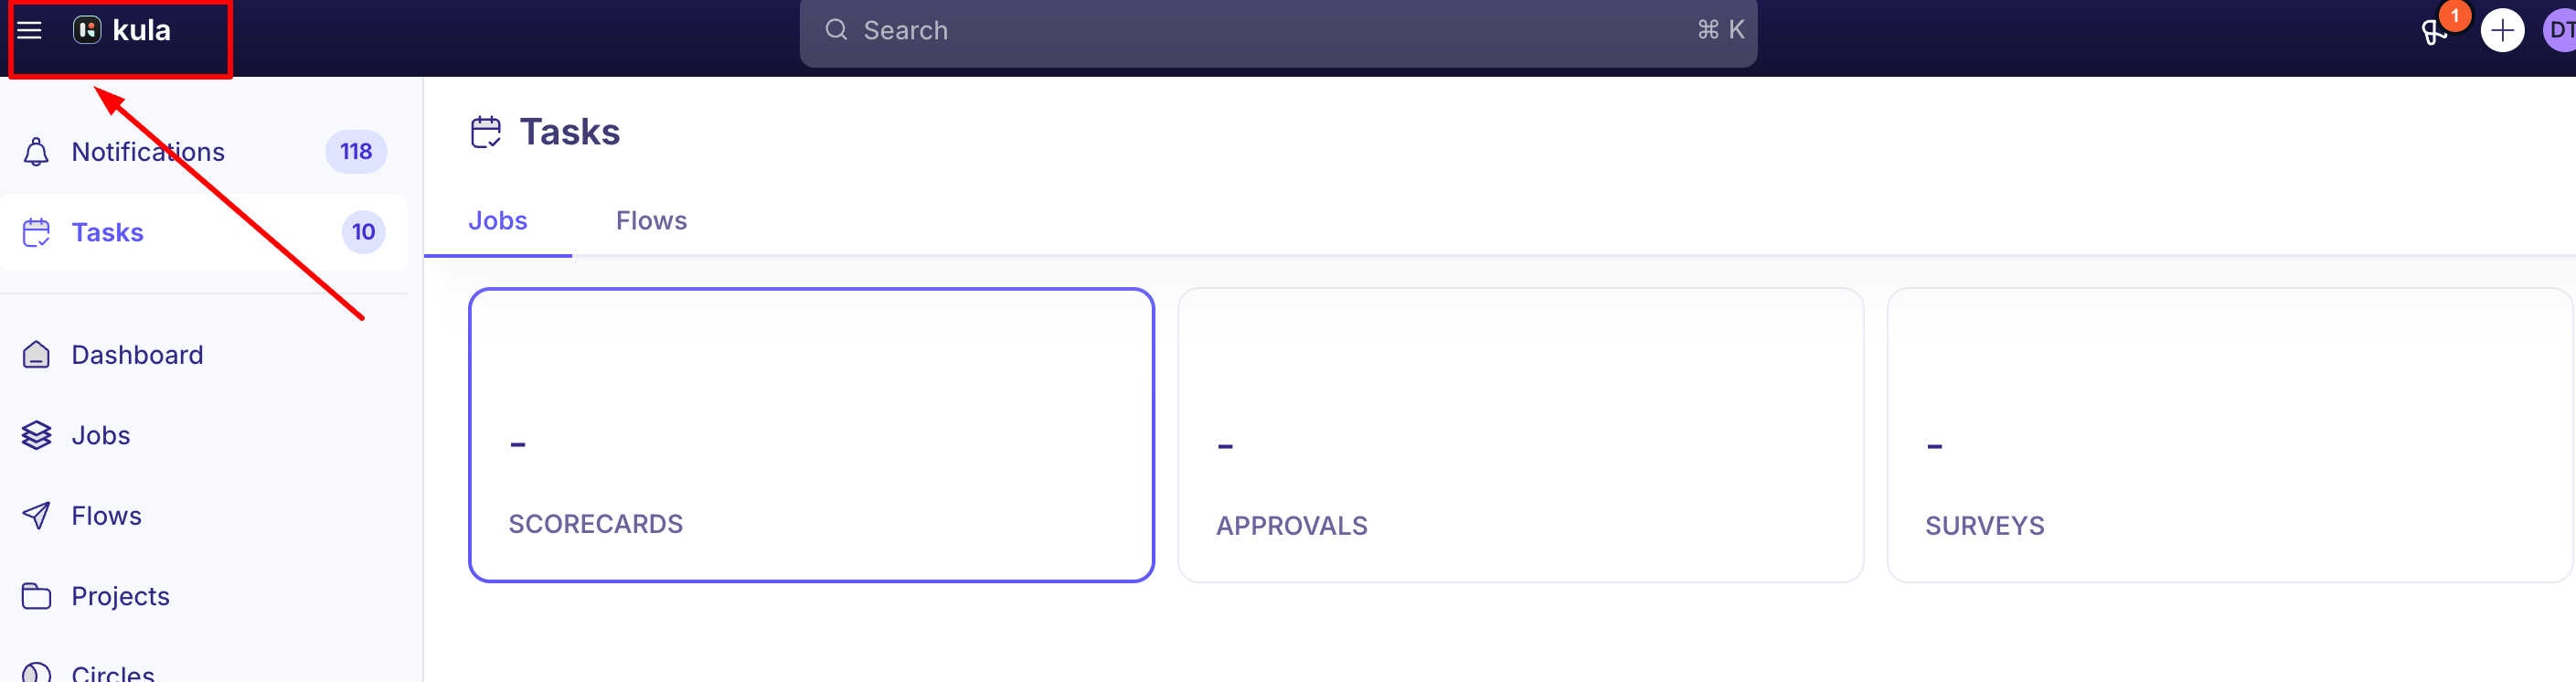
The left navigation is where everything lives!
Your dashboard
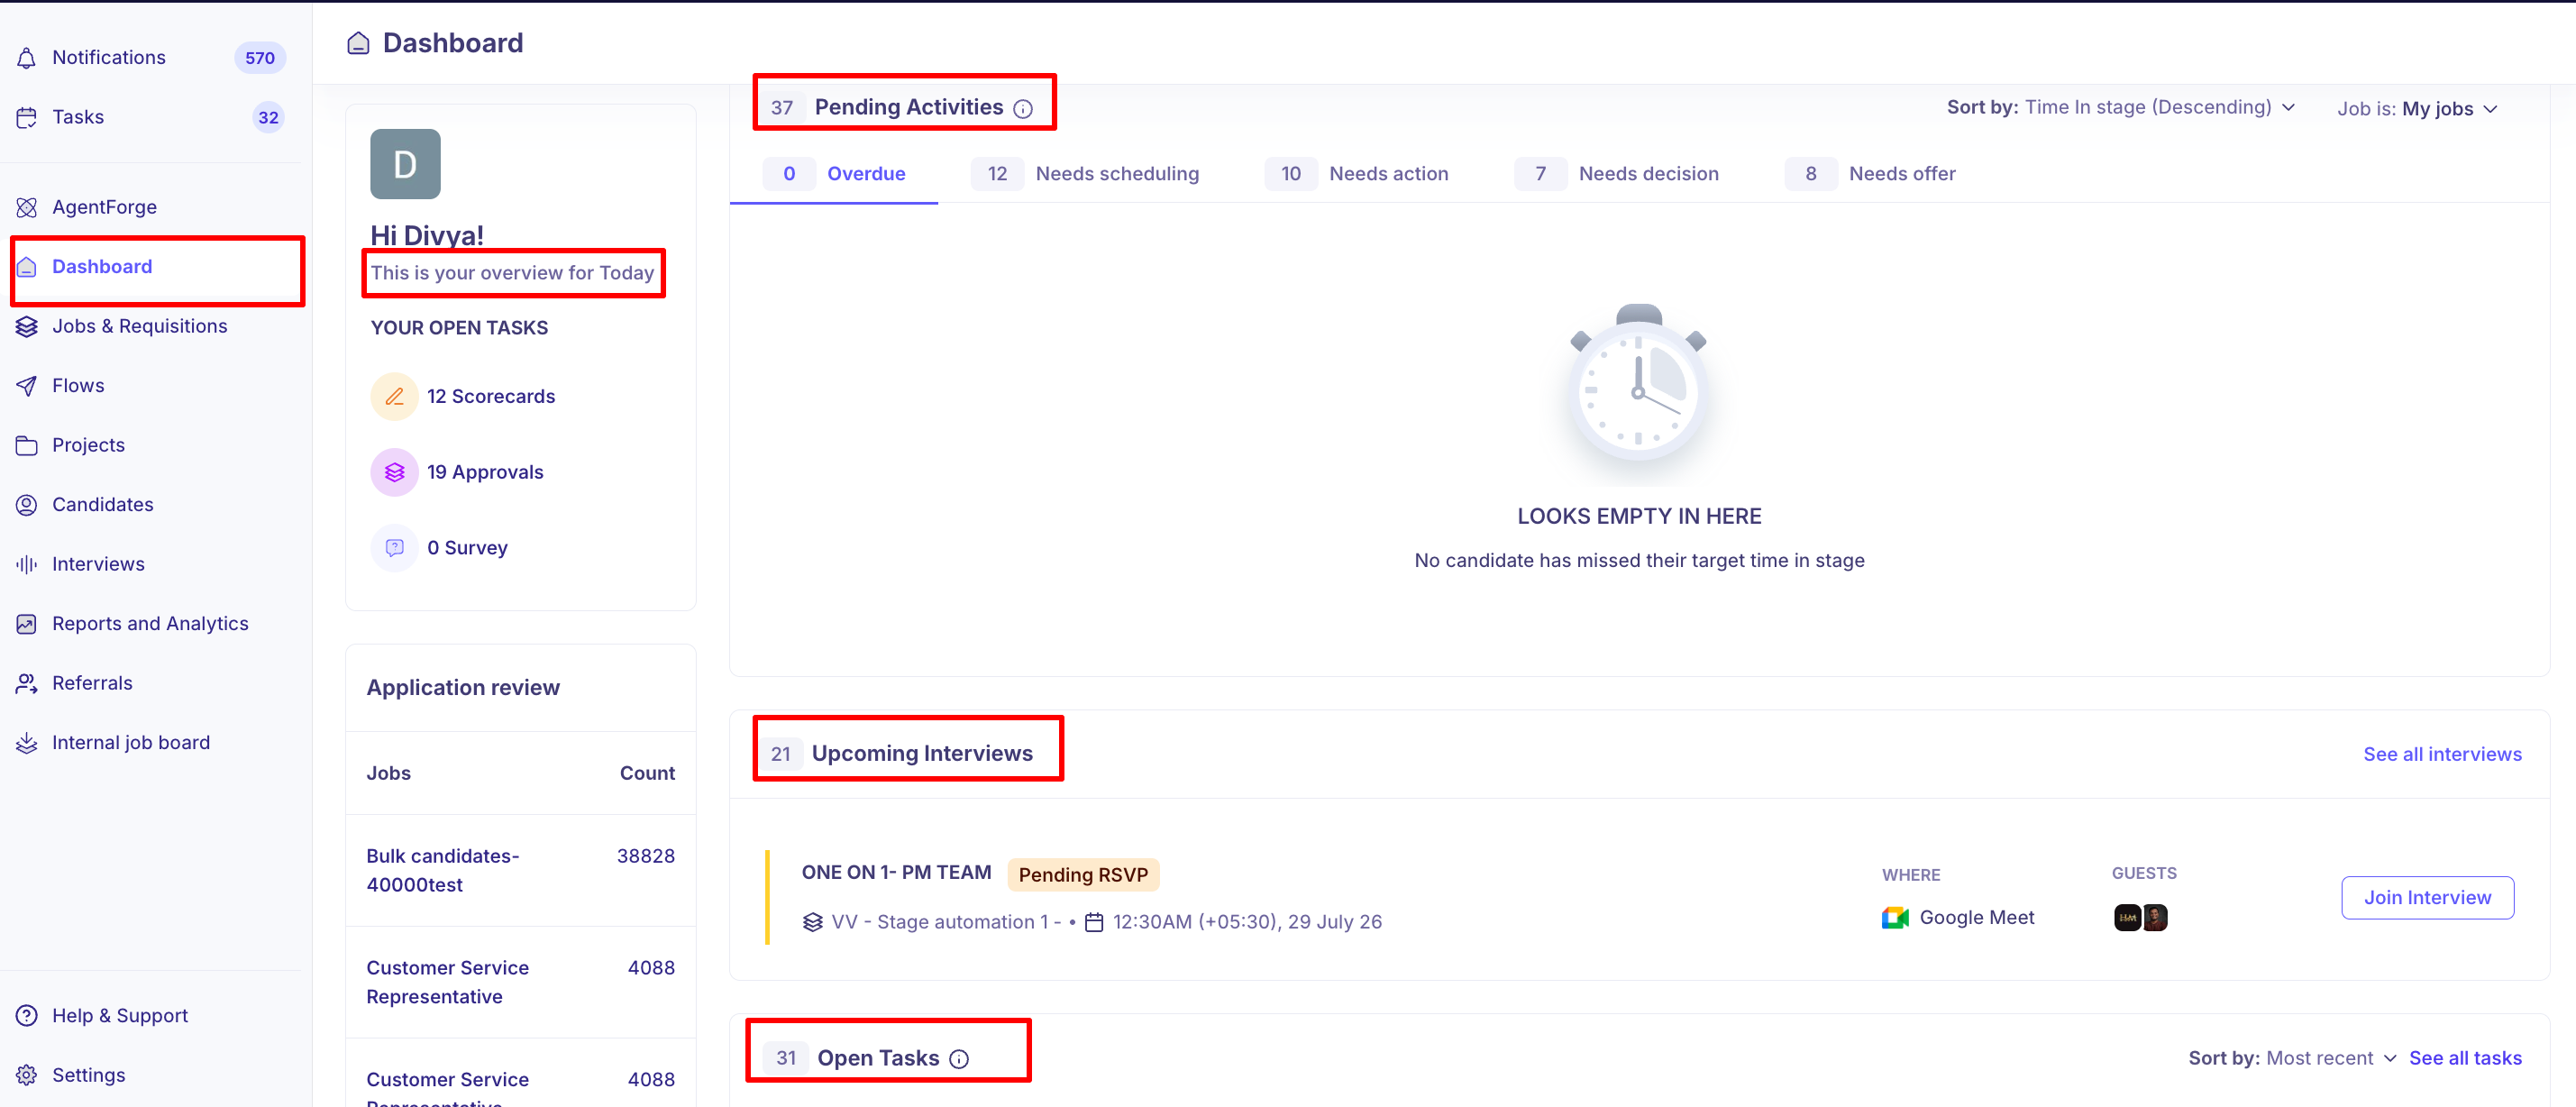
You land here every time you sign in, and it's built to answer one question: what needs me today? Rather than opening jobs one by one, work down this page.
Pending activities is the heart of it — everything across your roles that's waiting on somebody.
Around it you'll find:
Your open tasks — scorecards, approvals and surveys waiting on you, with counts. The list underneath lets you fill a scorecard without leaving the dashboard, and shows how long each has been pending. See Task management.
Application review — a count per job of applications nobody has looked at yet.
Upcoming interviews — what's on today and next.
Notifications and the activity feed — what's moved since you last looked. See Notifications Center.
There's a proper tour of the dashboard in Understanding the Kula home screen when you want it.
First, set yourself up
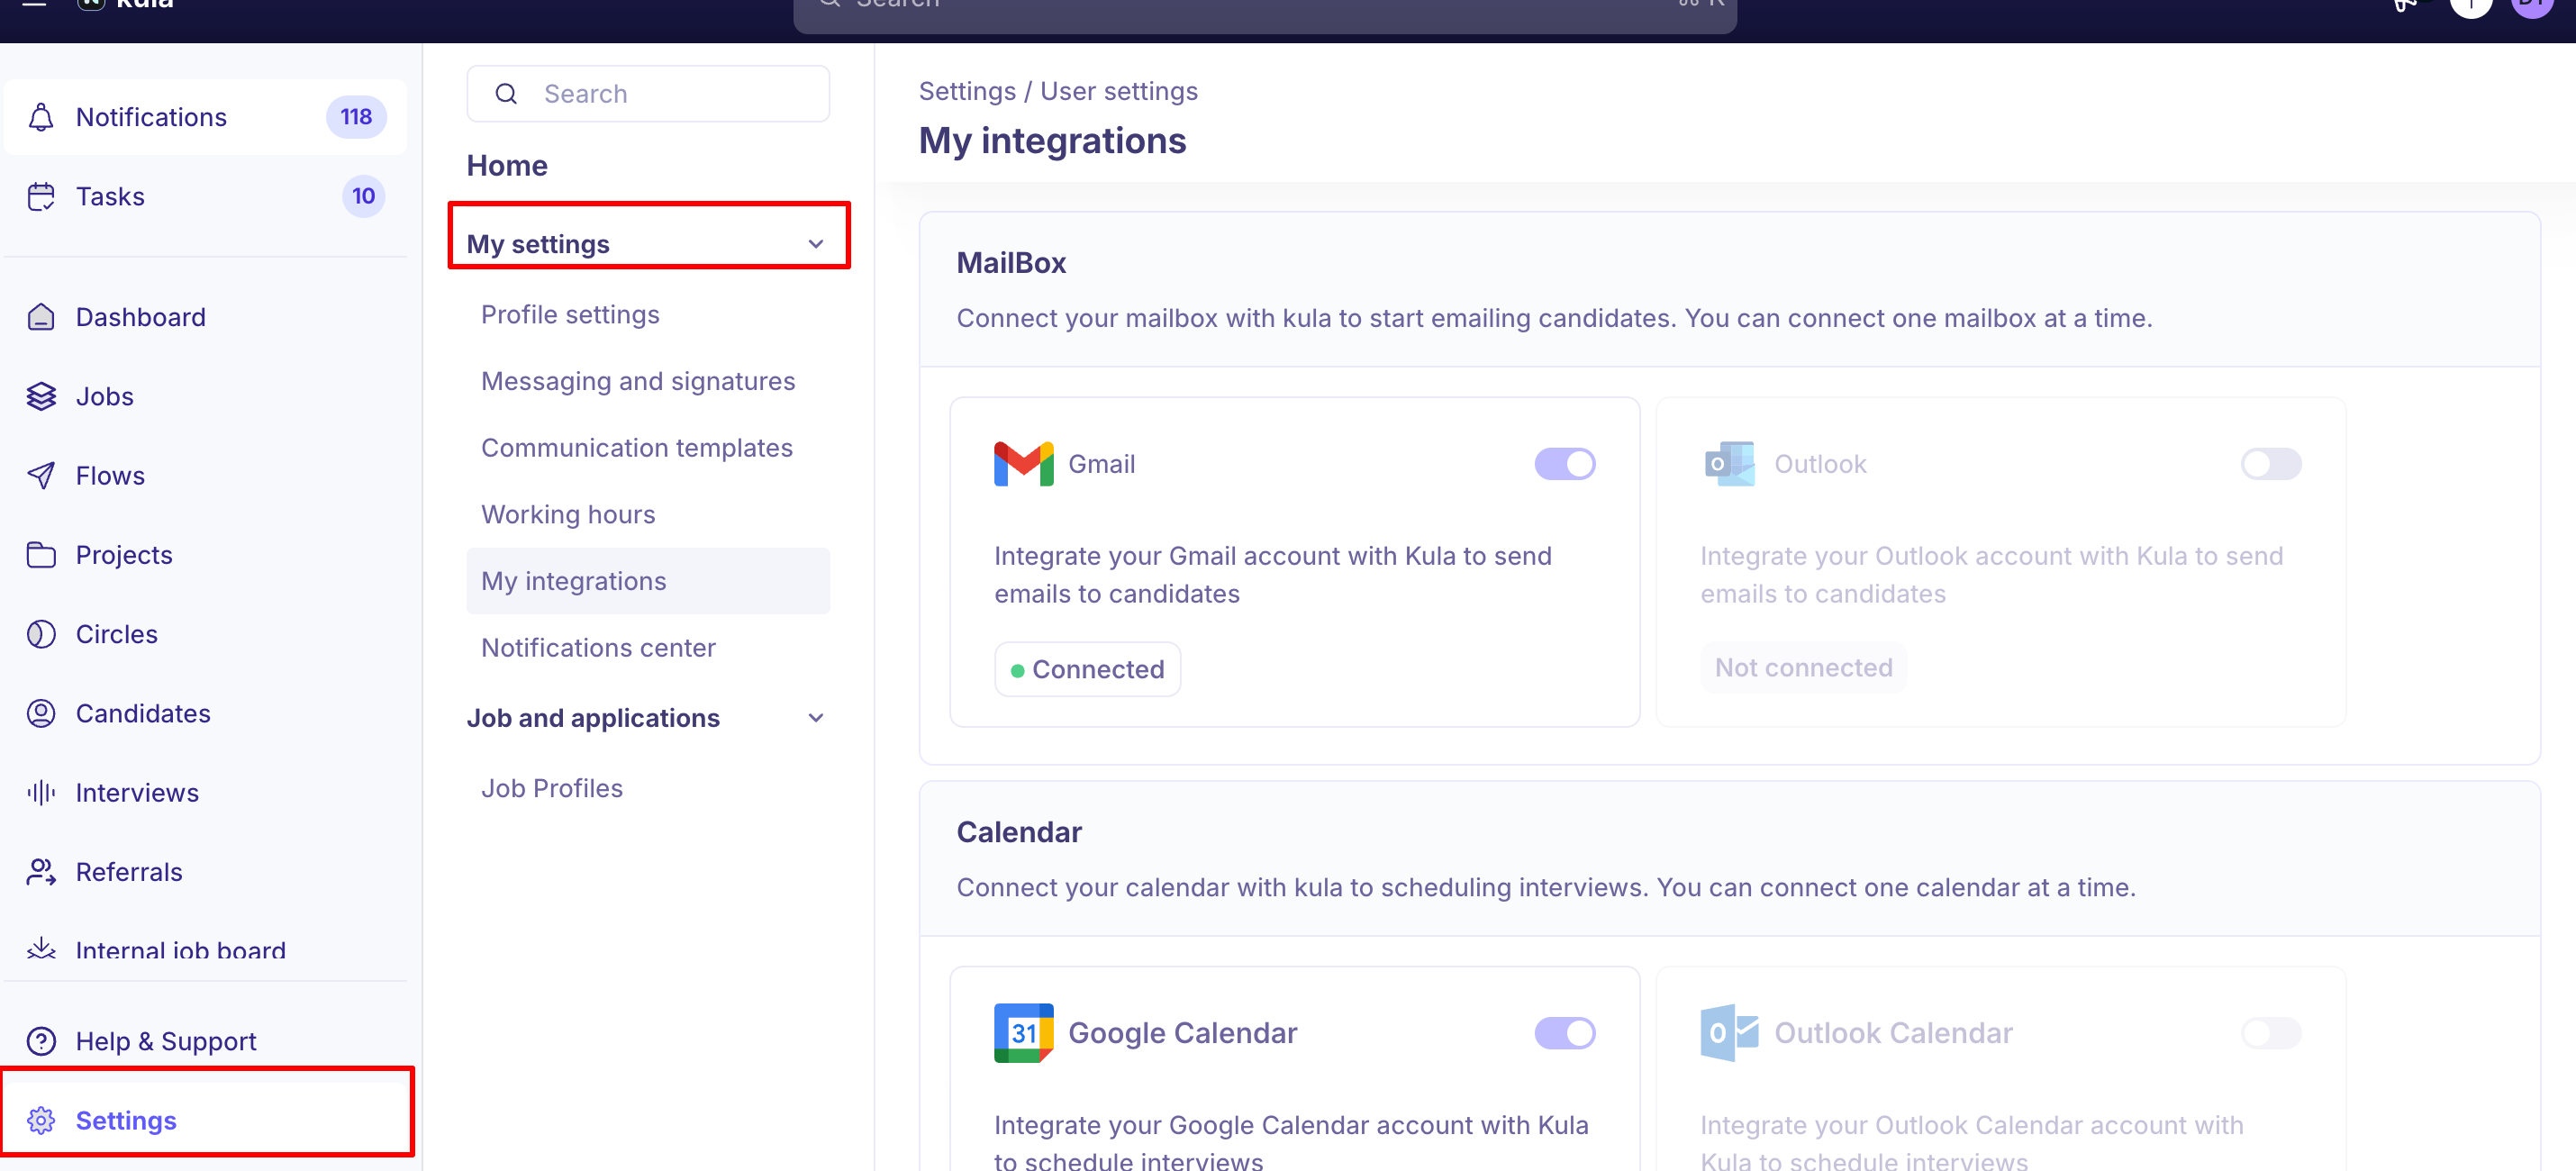
Connect your calendar and email under My integrations — scheduling is guesswork until you do
Install Kula Everywhere, the Chrome extension, to source from LinkedIn
Set your time zone and working hours
Tune the Notifications center — you'll get approval decisions, review requests, scorecard reminders, flow replies and requisition updates, so it's worth choosing what reaches you on Slack, email and in-app
Create a job
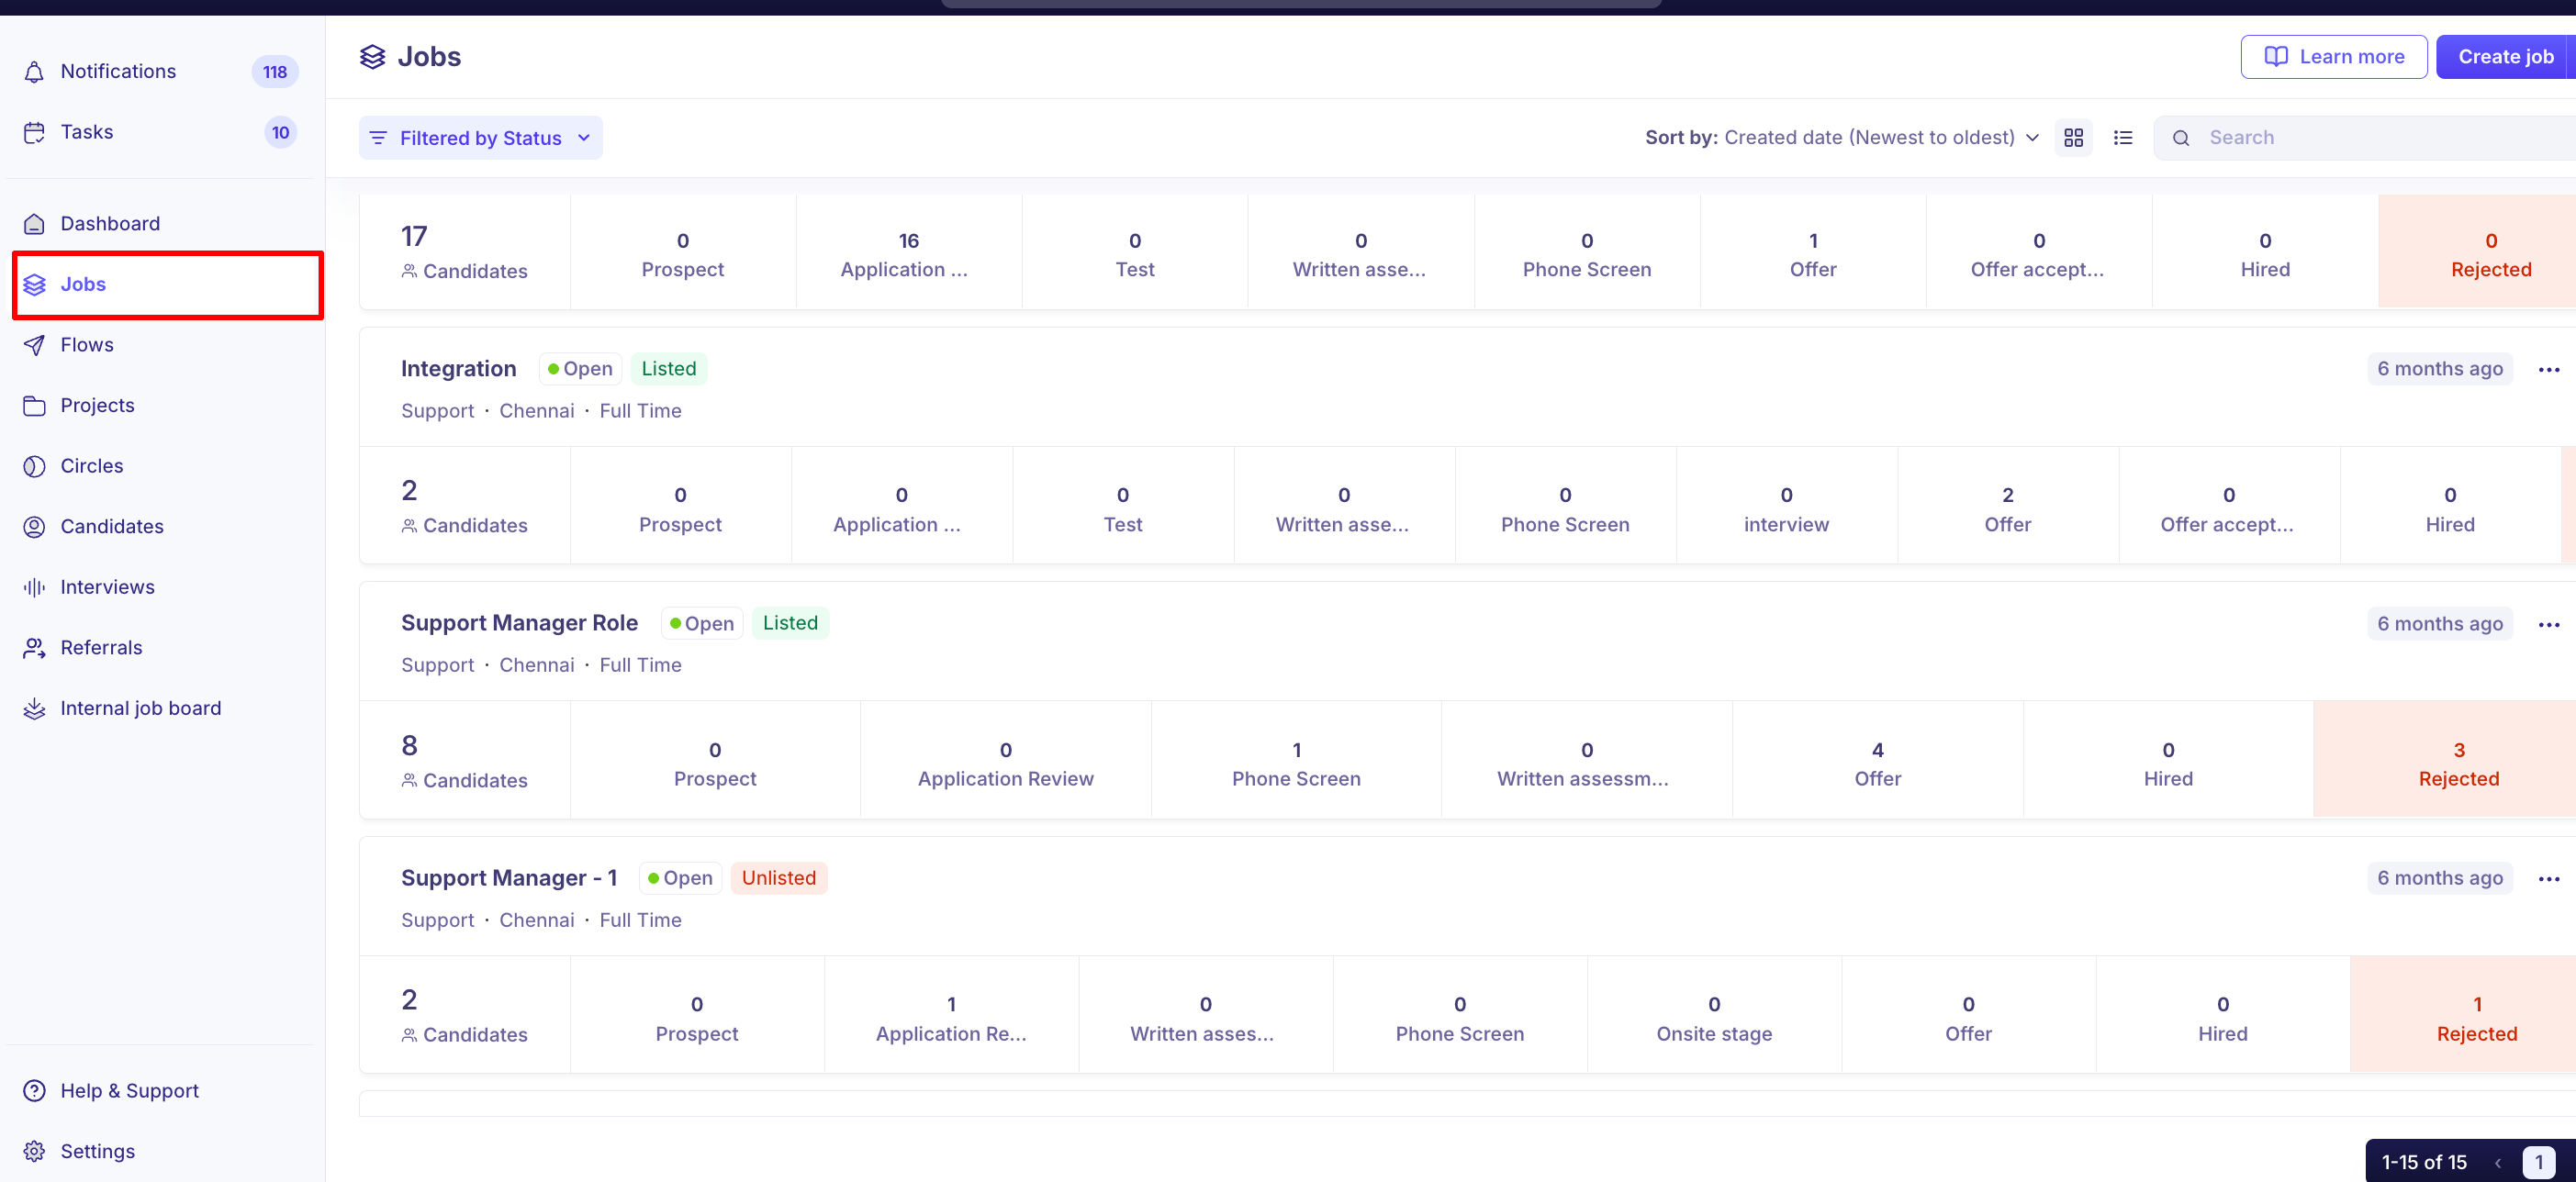
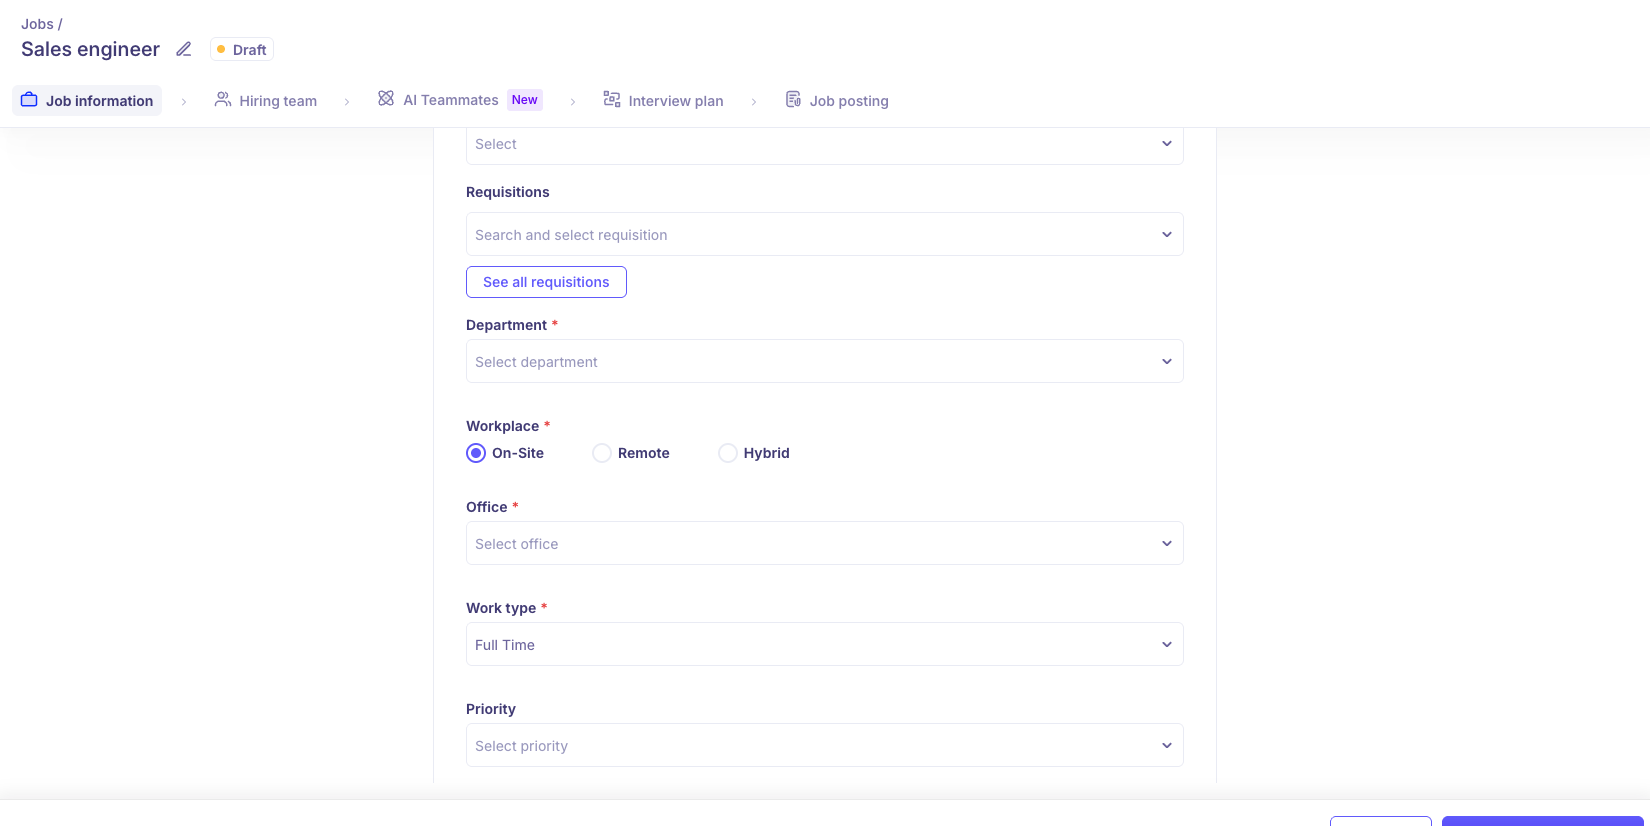
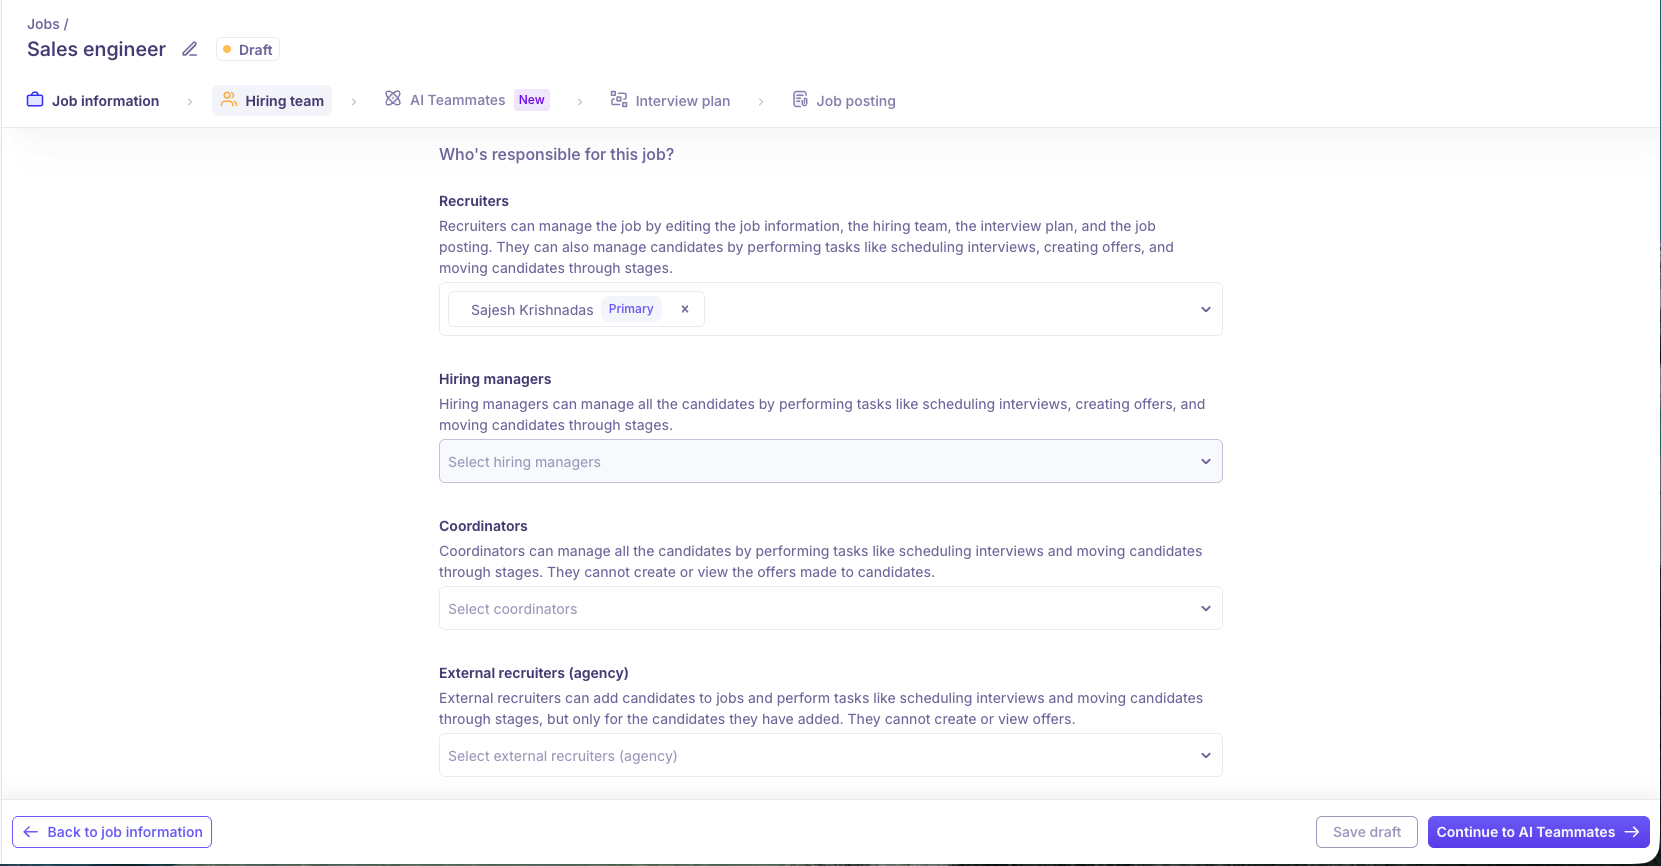
Job creation runs as a set of tabs, and each feeds something you rely on later:
Job information — title, department, office, work type and the job description. Kula can draft the JD, and your admin may have set up templates
Hiring team — recruiters, hiring managers, coordinators, agencies.
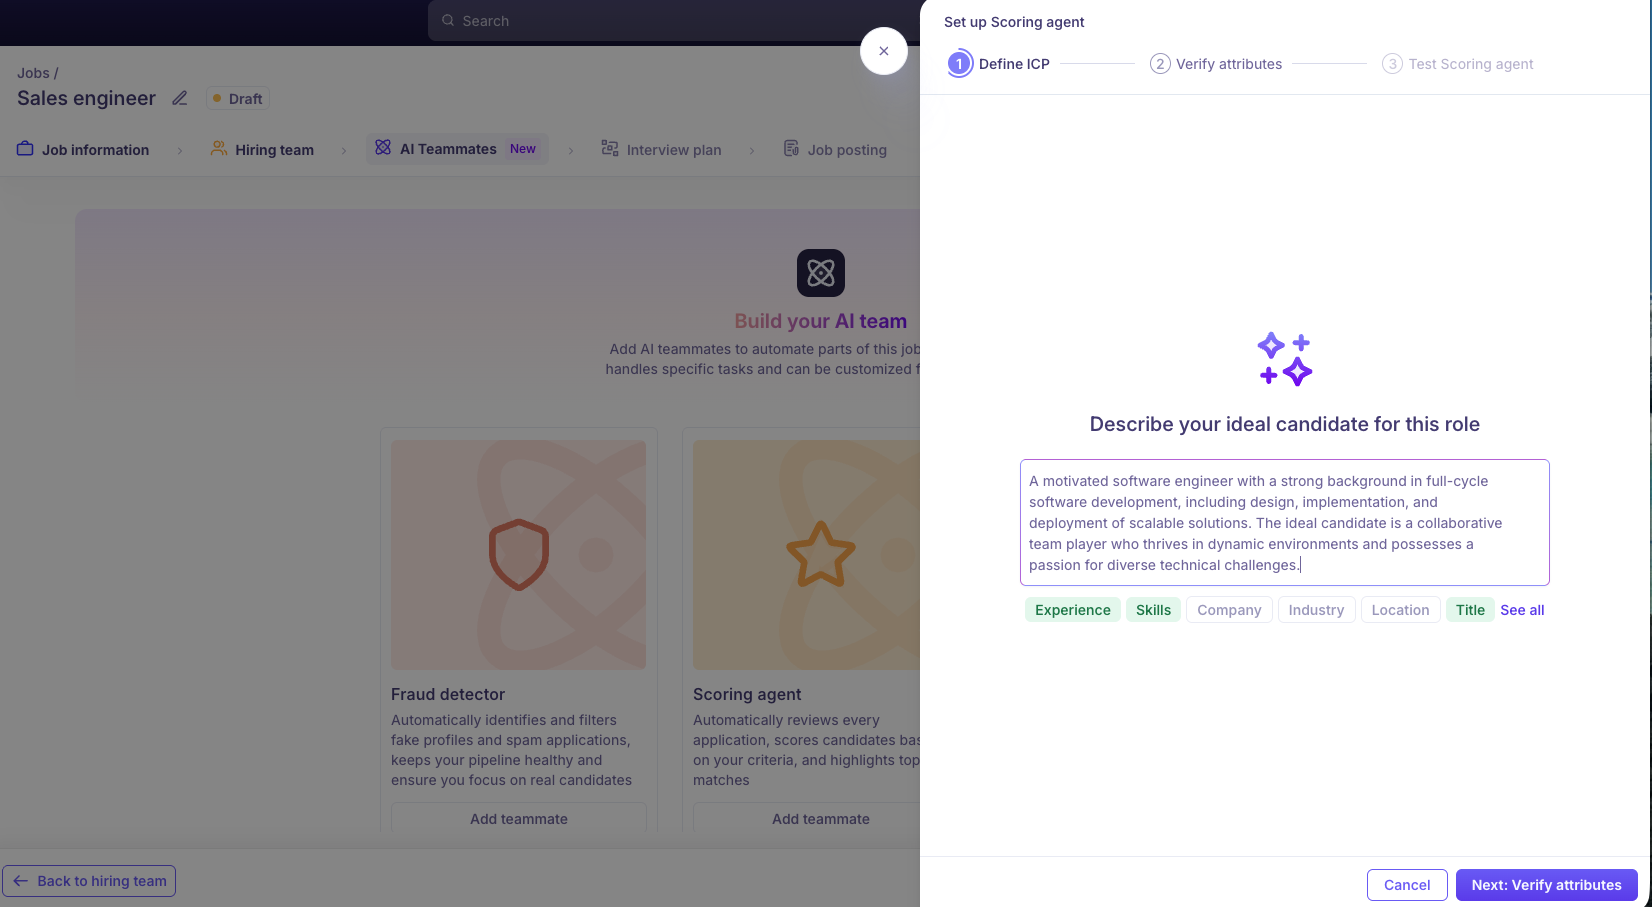
AI Teammates — add the Scoring agent and set the Ideal Candidate Profile it scores against
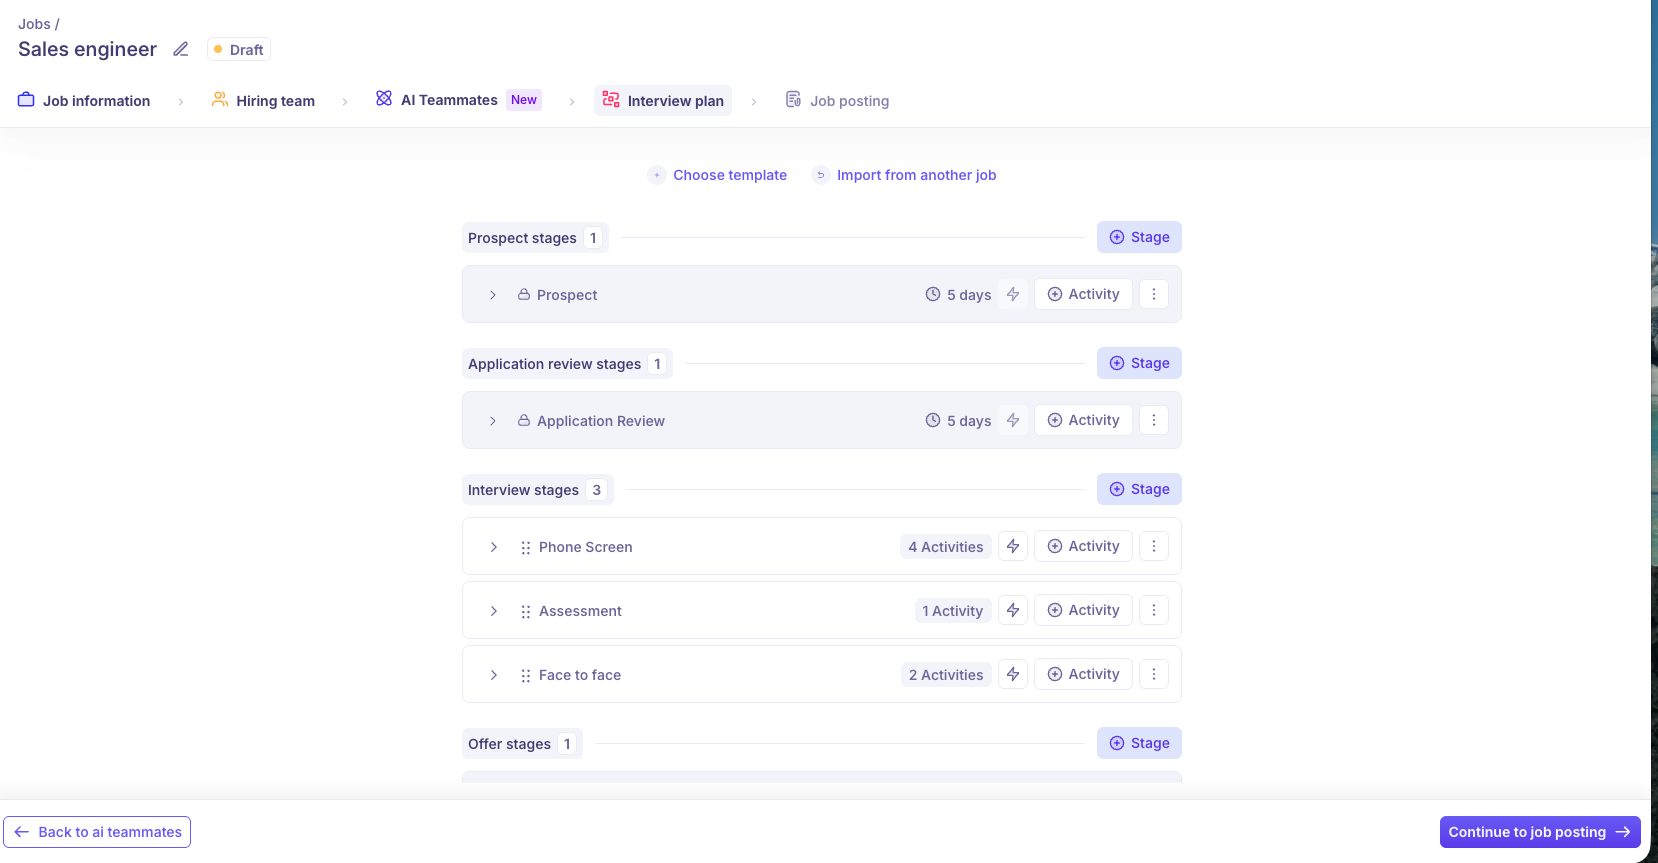
Interview plan — your stages and the interview activities inside them
Job posting — career page, job boards, and the internal job board
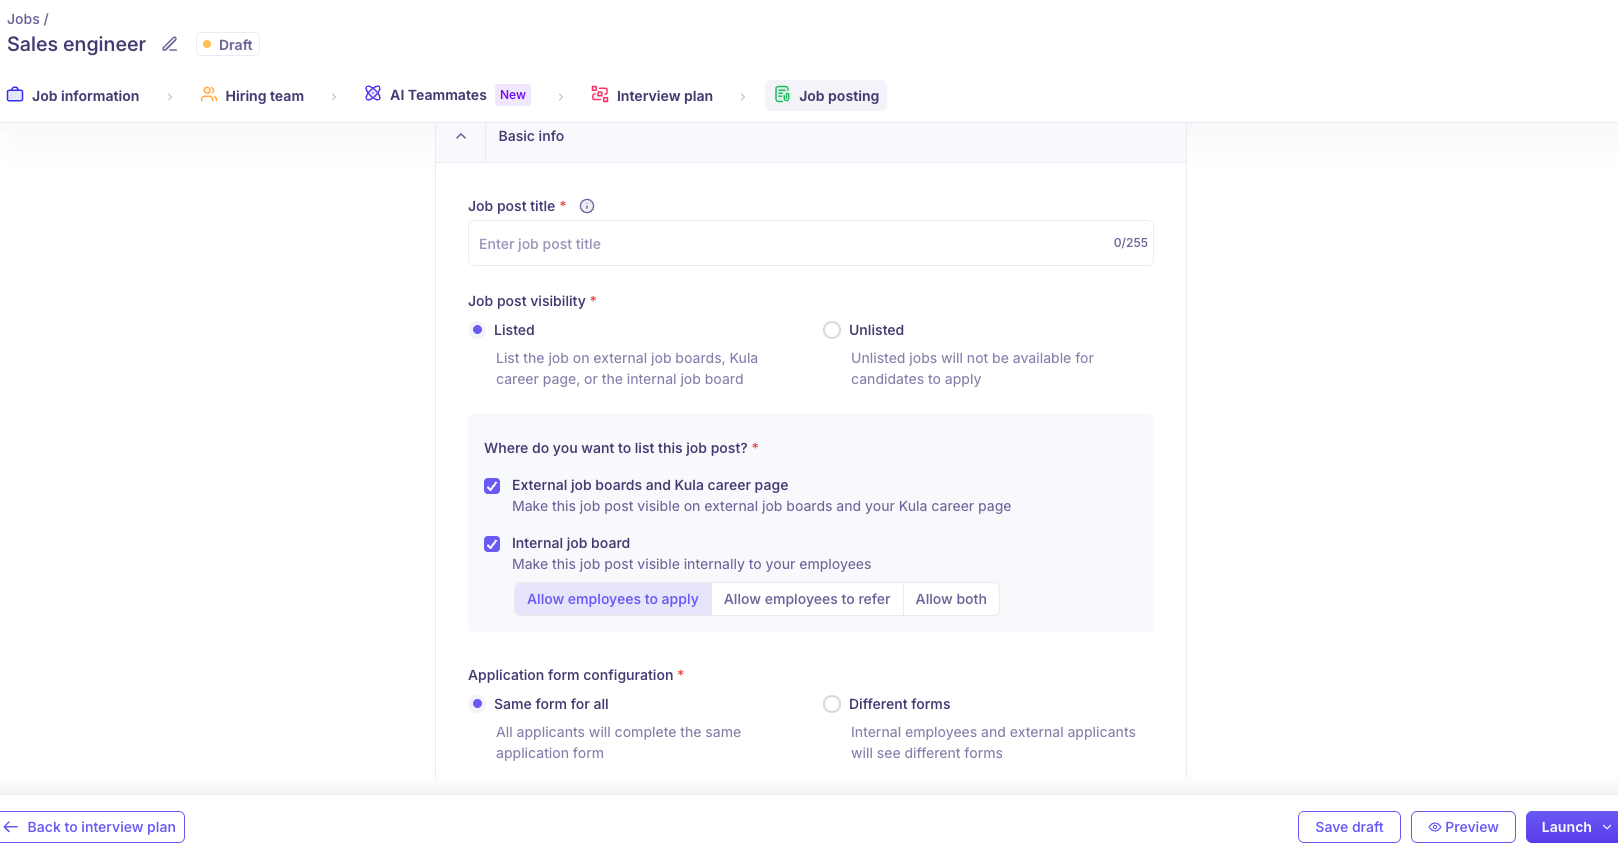
→ For the full walkthrough, see Creating a job in Kula
If your organisation uses requisitions, the job starts with one.
A hiring manager raises the requisition and it goes through approval; you're notified when you're added to it as recruitment partner, and again when it's approved, rejected or moves to the next approval step.
Once it's approved, you create the job and associate the requisition. You'll also get a Requisition filled notification when someone is hired against one you own.
See .
Set up your AI Teammates
On a job's Settings → AI Teammates tab you add the agents that do the repetitive work:
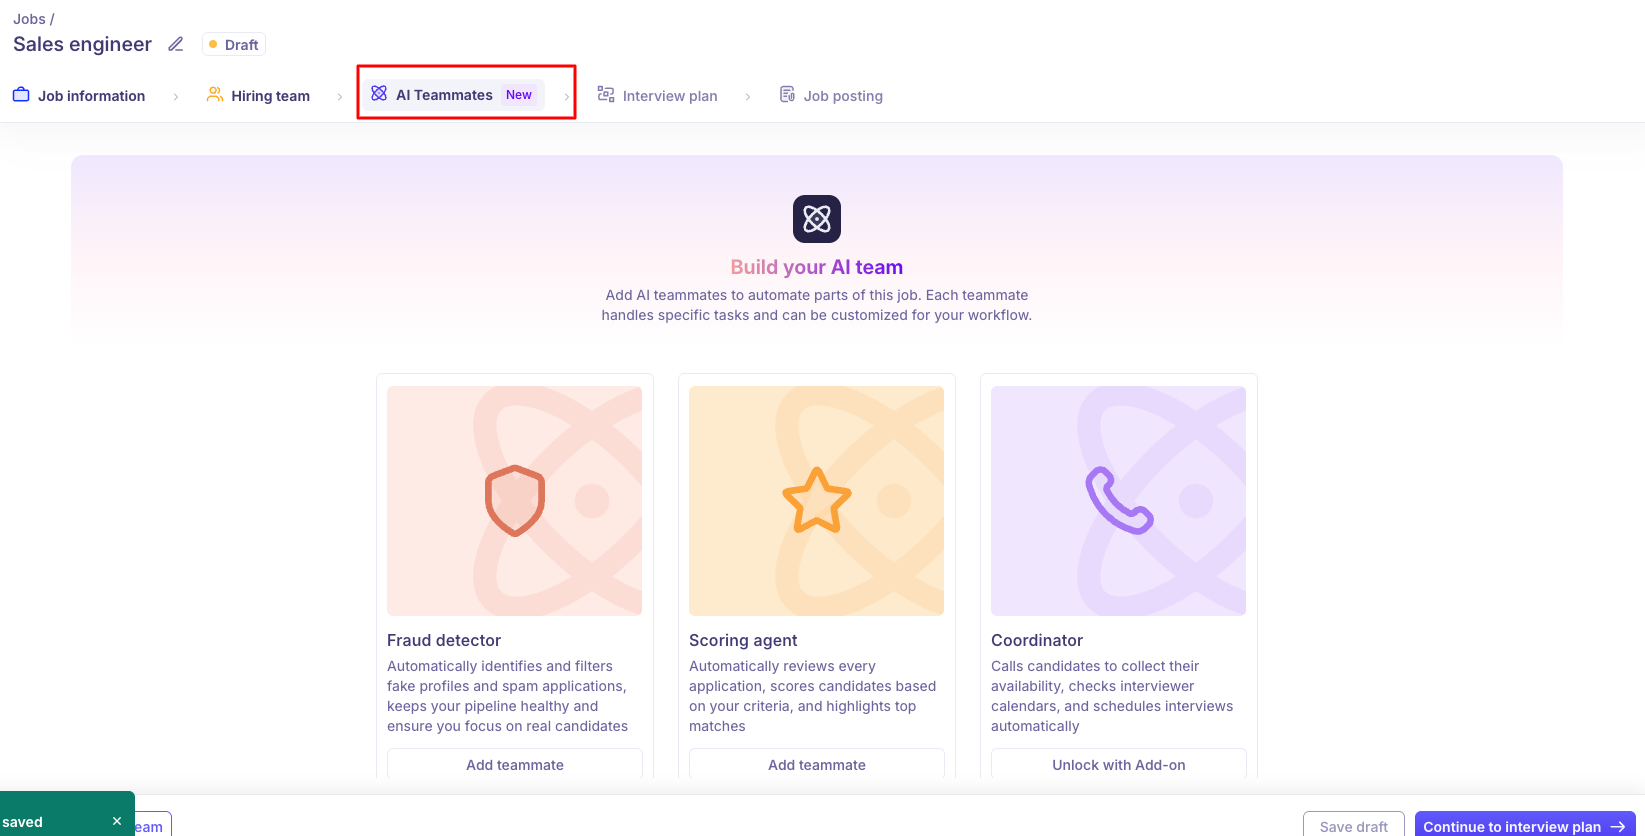
Scoring agent — Kula's AI scoring. Reviews every application, scores it against your criteria and surfaces the top matches
Fraud detector — filters fake profiles and spam applications. An add-on
Coordinator — calls candidates for availability, checks interviewer calendars and books the interview. An add-on
Add-ons show Unlock with Add-on, which opens a note to support.
→ For the full walkthrough, see What are Kula Teammates?
Get the Scoring agent right
It ranks applicants against an Ideal Candidate Profile that you define on the job's AI Teammates tab (or Settings → Job Information → Set up AI scoring) so the ranking is only as good as the ICP.
Add the attributes that matter — experience, skills, title, industry, target companies, location
Set each attribute's priority, so the score weights what you care about
Test on a sample before applying it to the whole pool
Read the attribute-level breakdown, not just the number
→ For the full walkthrough, see
Launch the job
Creating a job and opening it to candidates are two different things. A job sits in Draft until you publish it, and where it appears is controlled separately from whether it's open.
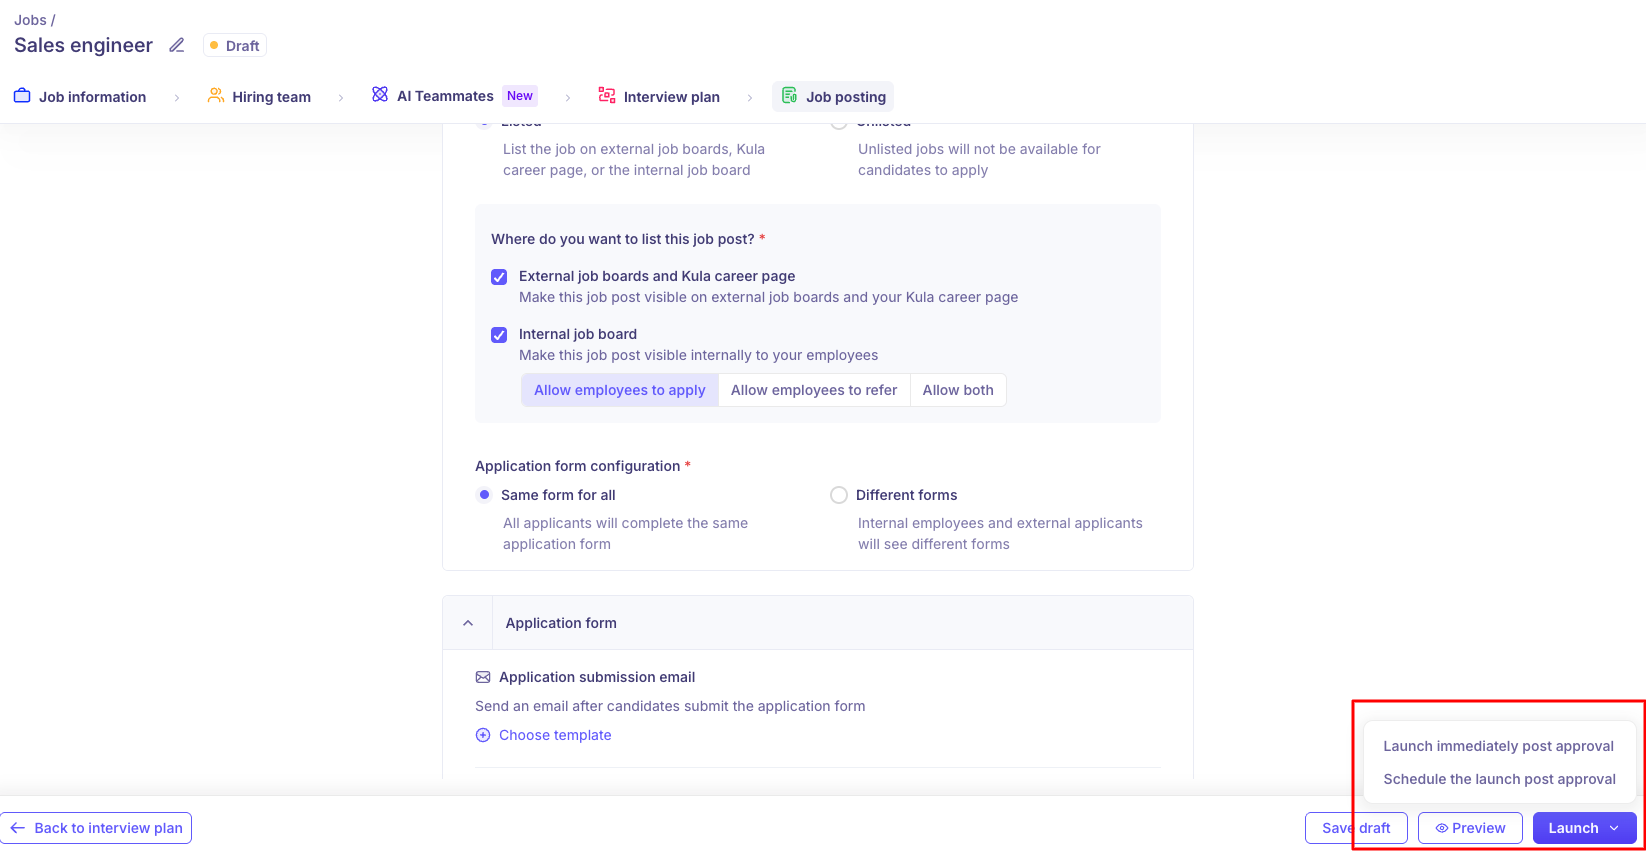
Get it approved first, if your admin set up job approvals — the job waits on sign-off before it can go live
Publish now or schedule it for a date, so a role can go out on the morning you want it to
Listed or Unlisted decides whether it appears on your career page and job boards. An open job that's unlisted is live for you but invisible to candidates — useful for confidential roles
Pick your job boards and post to them. Publishing to your career page is a separate action from posting to LinkedIn
Choose the internal job board setting — allow employees to apply, to refer, or both
Include EEO questions on the post if you report on them
Once it's published, share the job link, and applications start landing in your first pipeline stage.
→ For the full walkthrough, see Publishing and launching a job
Add candidates
Six routes in, and most teams use several:
Apply — career page, job boards or internal job board
Resume upload — one candidate or several at once
Existing candidates — anyone already in your database
CSV import — for lists built elsewhere
MailDrop — every job has its own email address, copied from the Add candidate menu. Forward resumes to it and they're parsed straight in
Kula Everywhere — source from LinkedIn, setting source and credited-to as you go
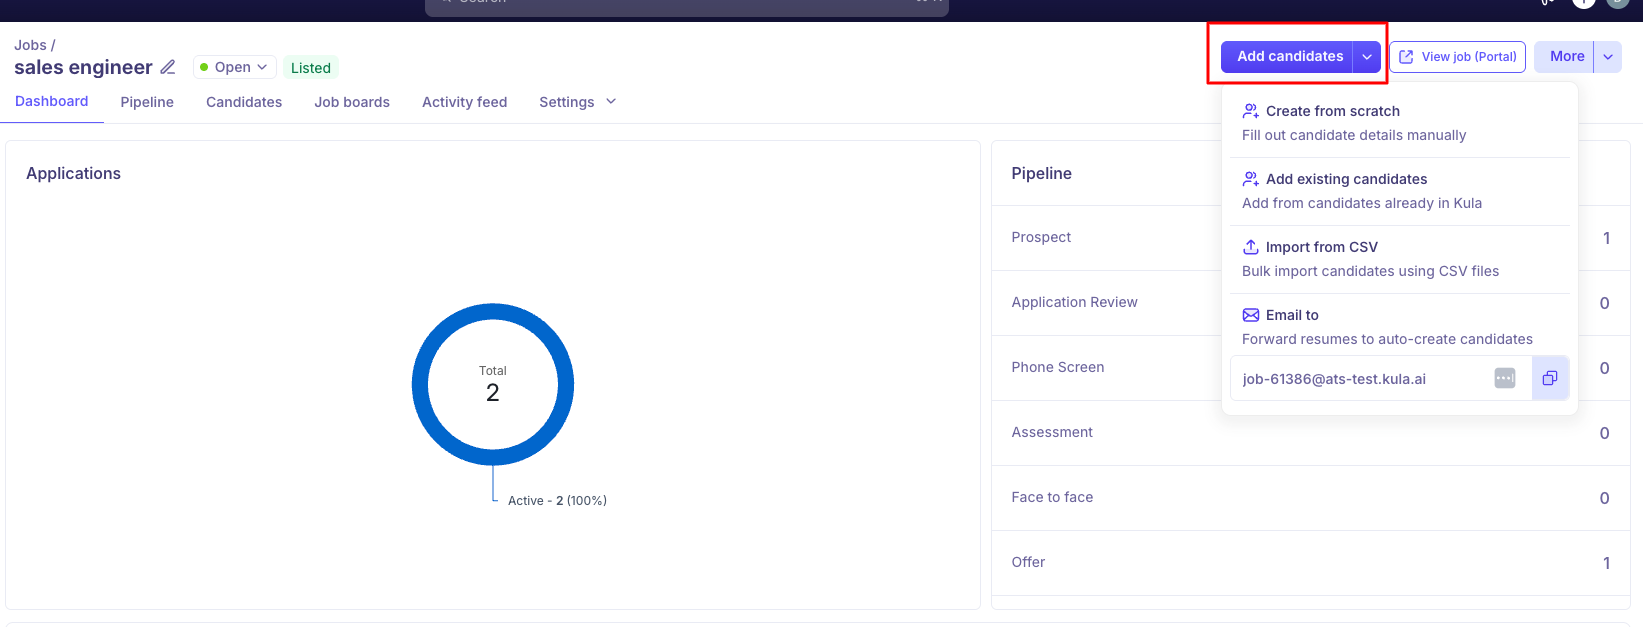
→ For the full walkthrough, see Adding candidates to a job
Review a pipeline quickly
Don't open profiles one at a time. Quick review works the queue: hit Review now from the candidates list or the application-review column, and Kula shows one candidate at a time with resume and AI score. Advance, reject or skip in a single action — rejections can send the email in the same step.
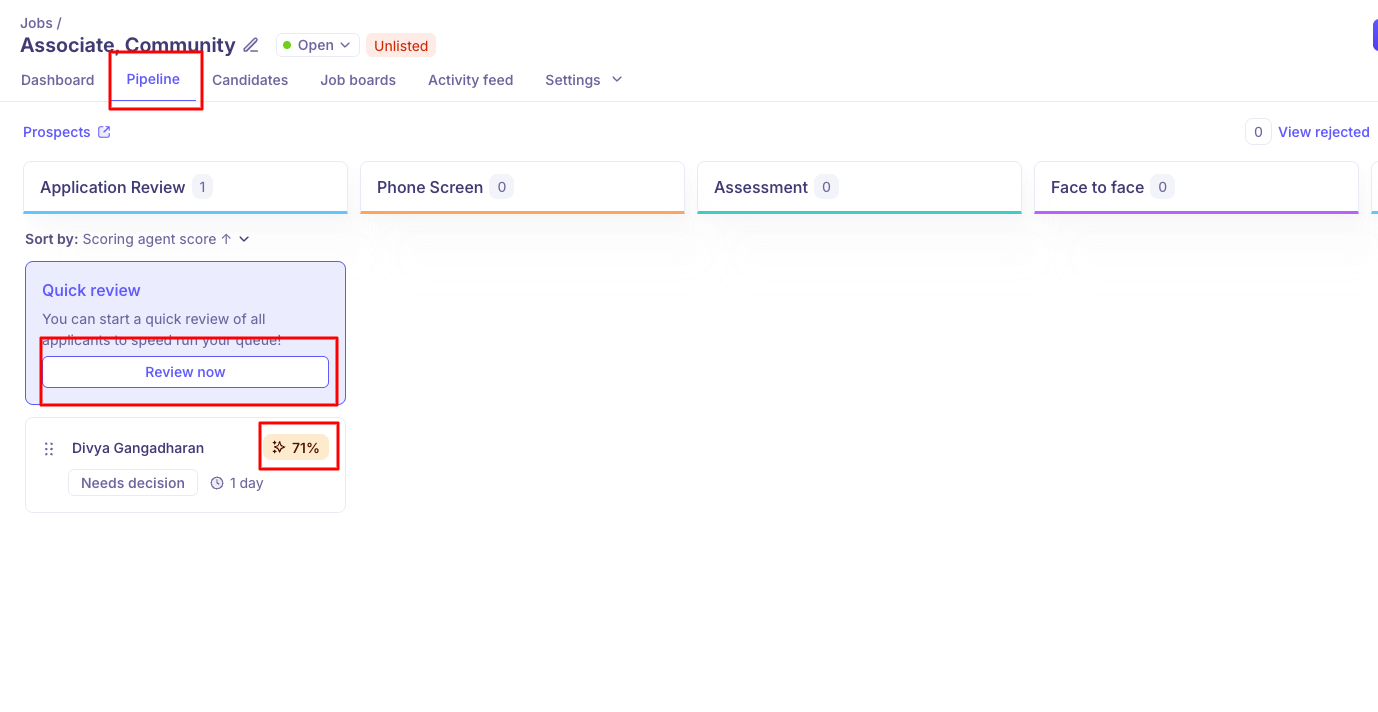
→ For the full walkthrough, see Reviewing candidates with Quick review
Schedule interviews
Schedule from the interview plan activity, not by creating a one-off interview. Going through the plan is what makes the rest happen automatically — the calendar invite goes to the candidate and every interviewer, interviewers get RSVP and prep reminders, the right scorecard is attached and distributed, and the AI notetaker is set up to join. See
There are three ways to land on a time:
Find time — you pick the slot. Kula shows your interviewers' real availability side by side, so you book directly
Self-schedule — the candidate gets a booking link and picks a slot themselves, from the times your interviewers are free
Candidate availability request — the candidate emails back the times that suit them, and you book from those
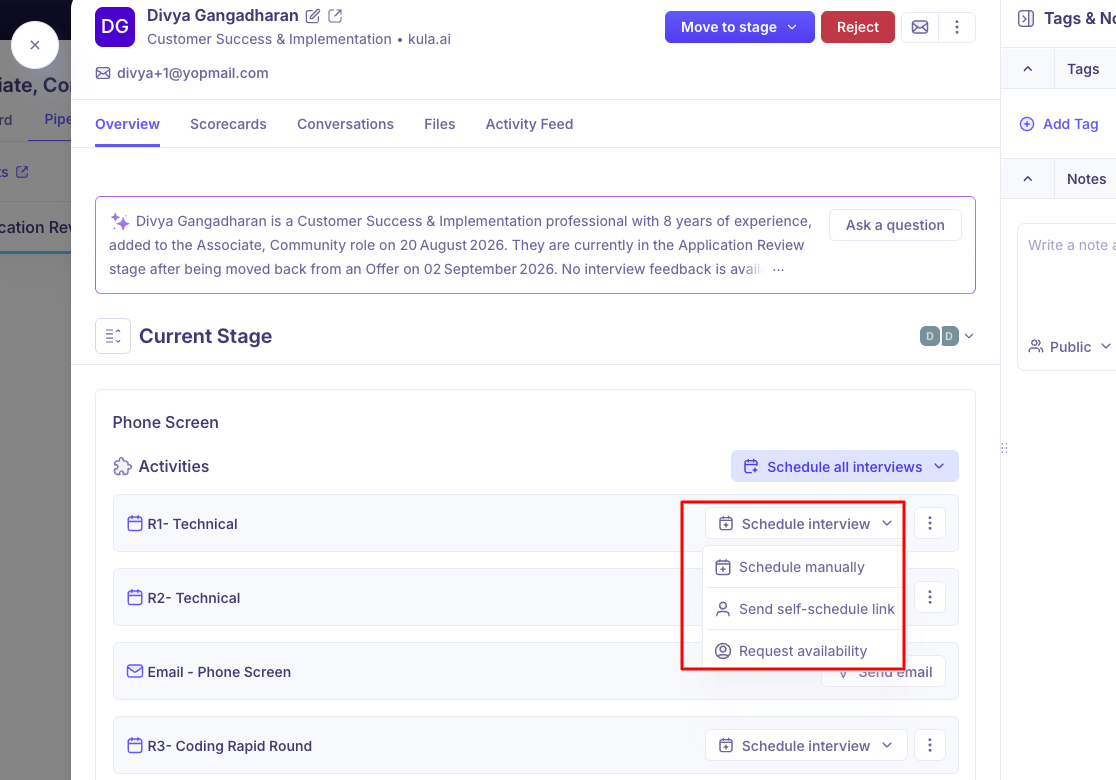
If your account has the Coordinator add-on, it does this for you: it calls the candidate to collect availability, checks interviewer calendars, and schedules the interview automatically.
Work a candidate and move them along
Opening a candidate gives you everything about them in one panel, with tabs for Overview, Scorecards, Conversations, Files and Activity Feed. An AI summary sits at the top of Overview — who they are, when they were added, where they are now — and the resume renders underneath.
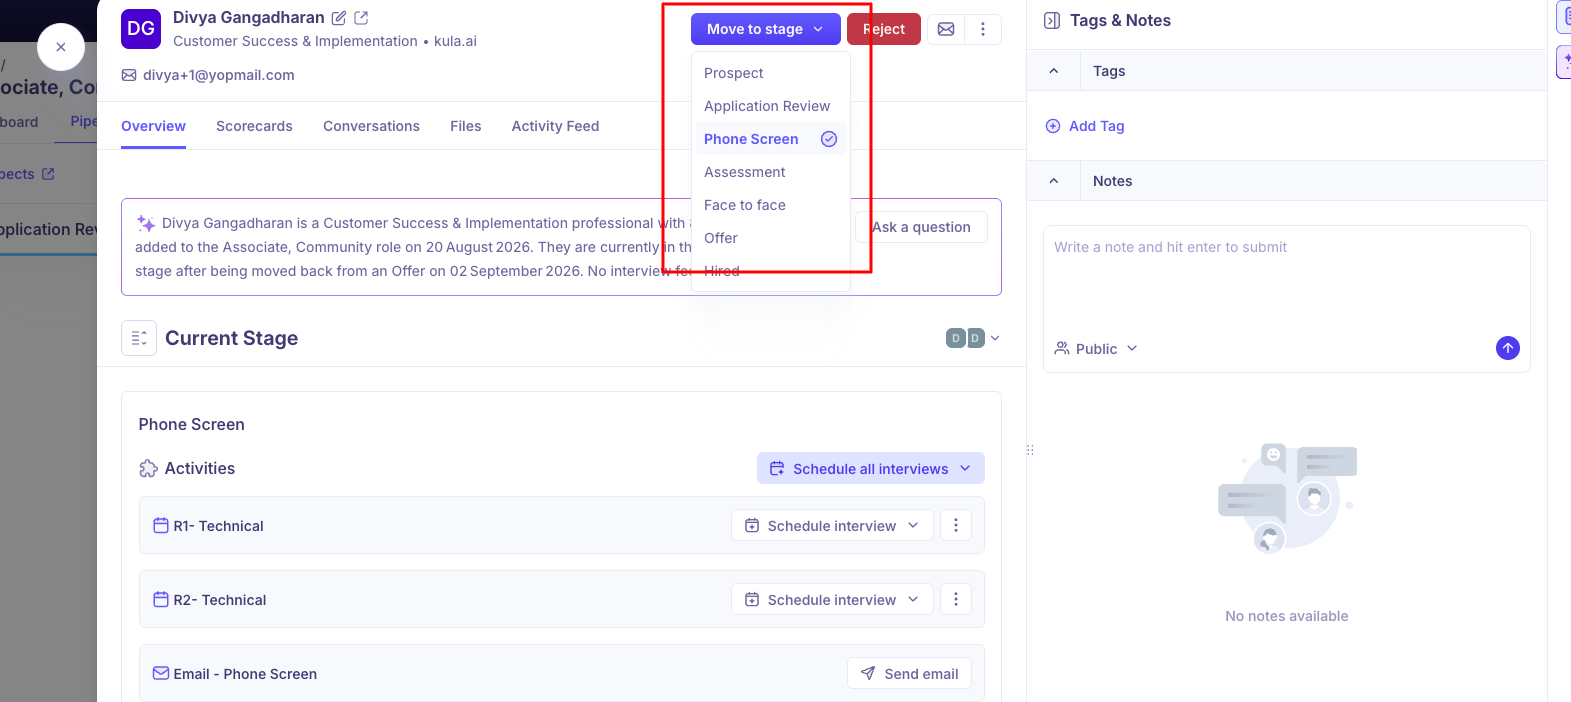
Move them on with Move to stage, or Reject to end it and send the rejection email. The stage you move them into is what triggers its activities — scorecards, assessments, reviews.
The ⋮ menu holds the one-off actions, the things you do for this candidate rather than every candidate in the stage:
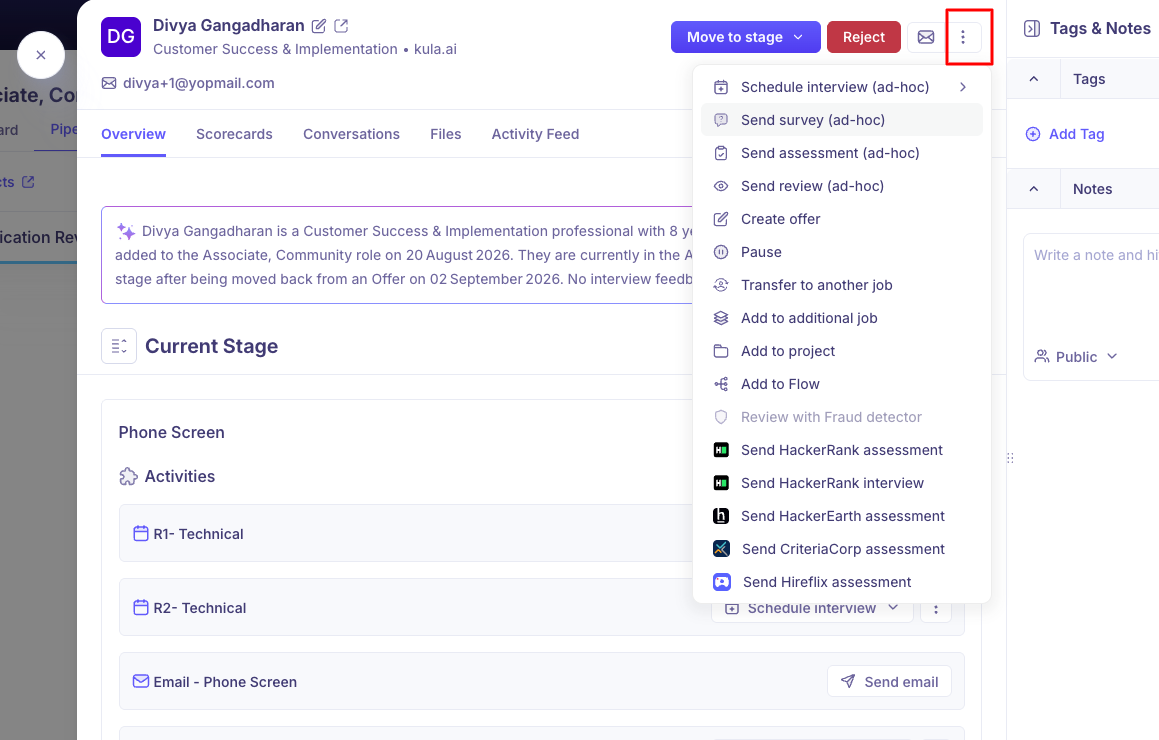
Schedule interview, Send survey, Send assessment or Send review — ad-hoc, outside the interview plan
Create offer, or Pause the candidate if they've asked for time
Transfer to another job, or Add to additional job to run them for two roles at once
Send a HackerRank, HackerEarth, CriteriaCorp or Hireflix assessment, where your admin has connected them
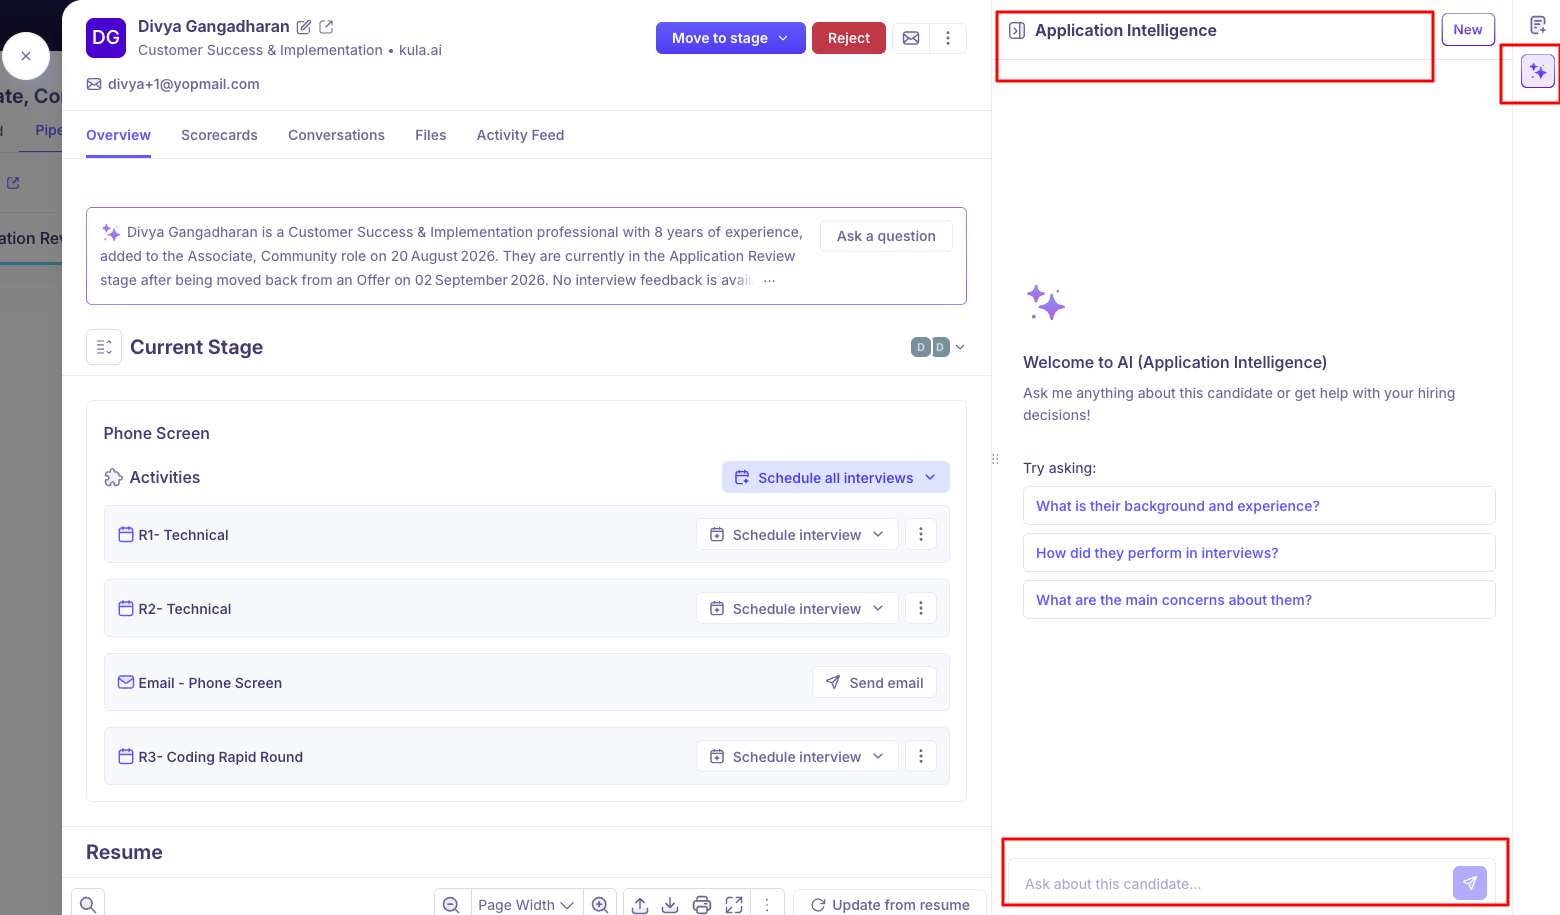
Ask Application Intelligence anything about the candidate from the right-hand panel — "How did they perform in interviews?", "What are the main concerns about them?" It reads the resume, screening answers and interview feedback, which beats scrolling three tabs before a debrief.
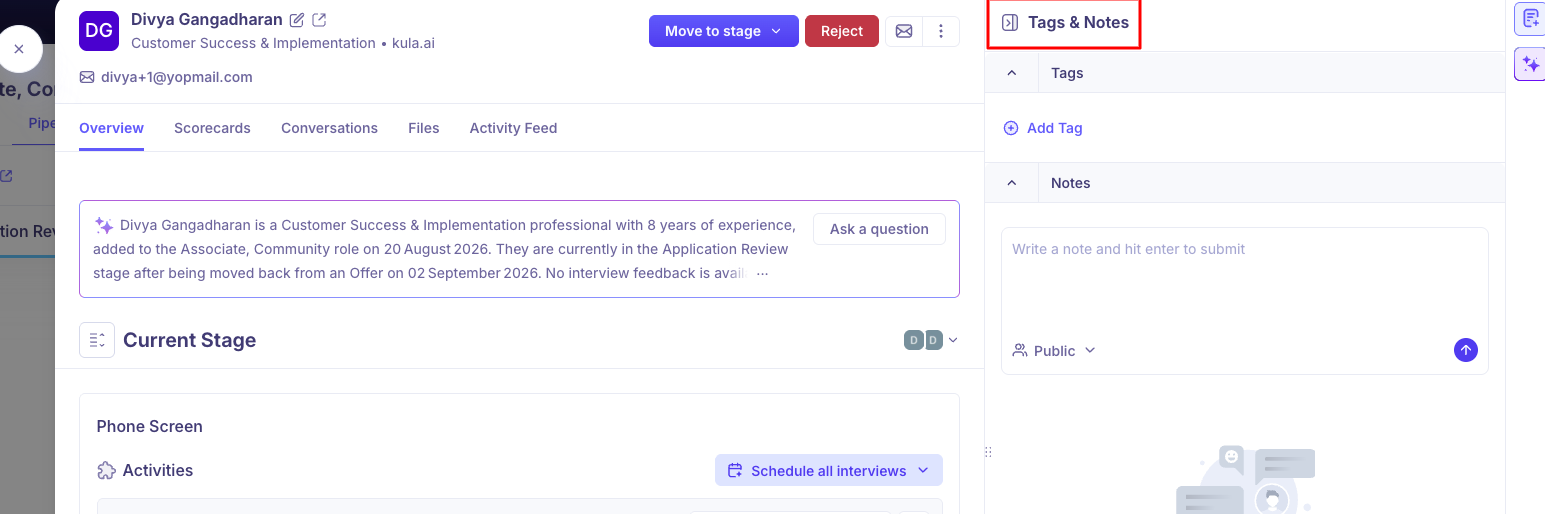
Keep notes and tags in the other panel. Notes can be public to the hiring team or private, and tags make a candidate findable later — worth the two seconds when someone is good but not for this role.
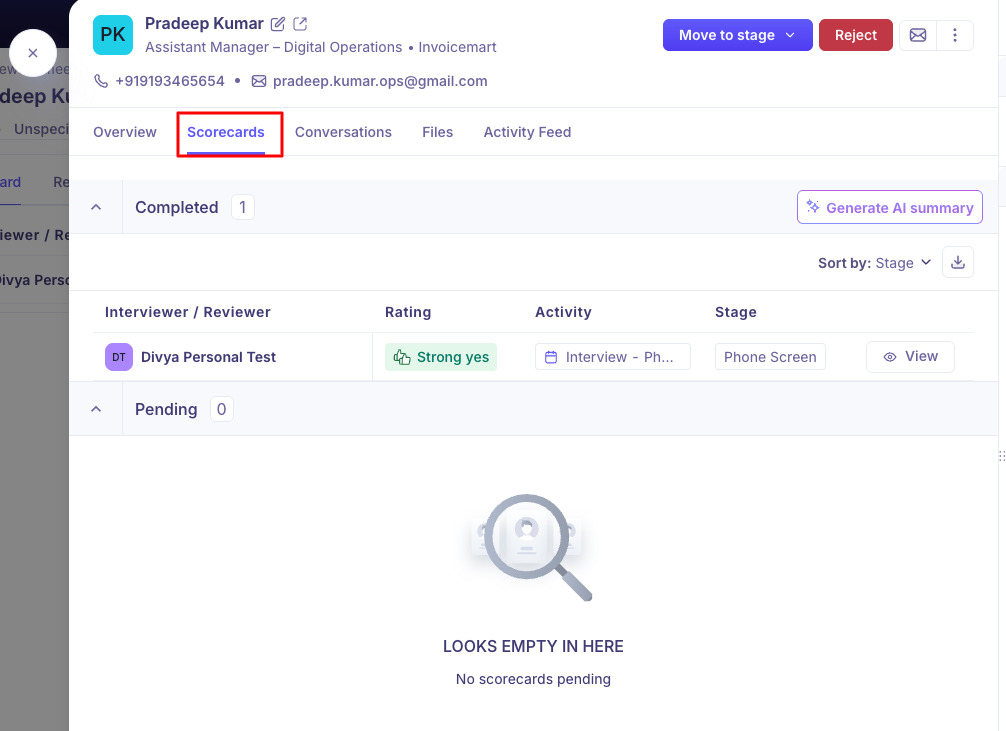
Chase scorecards from the Scorecards tab, which splits Completed from Pending and gives you Send Reminder on each outstanding person.
Submit, Collect and read feedback
Kula chases interviewers on Slack, email and in-app, and they can submit straight from the Slack notification. On the candidate's Scorecards tab you can read every round, ask the AI to summarise them all, and download the set as a PDF for an offer packet. See
You'll be filling scorecards too. Any interview you run — a phone screen, a first-round call — sends you the same scorecard reminder once it ends, with AI-generated notes attached where the notetaker joined. Kula drafts what it can from the transcript; you check it, correct it, and add the judgement only you have.
Submit from wherever you happen to be:
The interview page, straight after the call — the candidate's resume sits alongside the scorecard
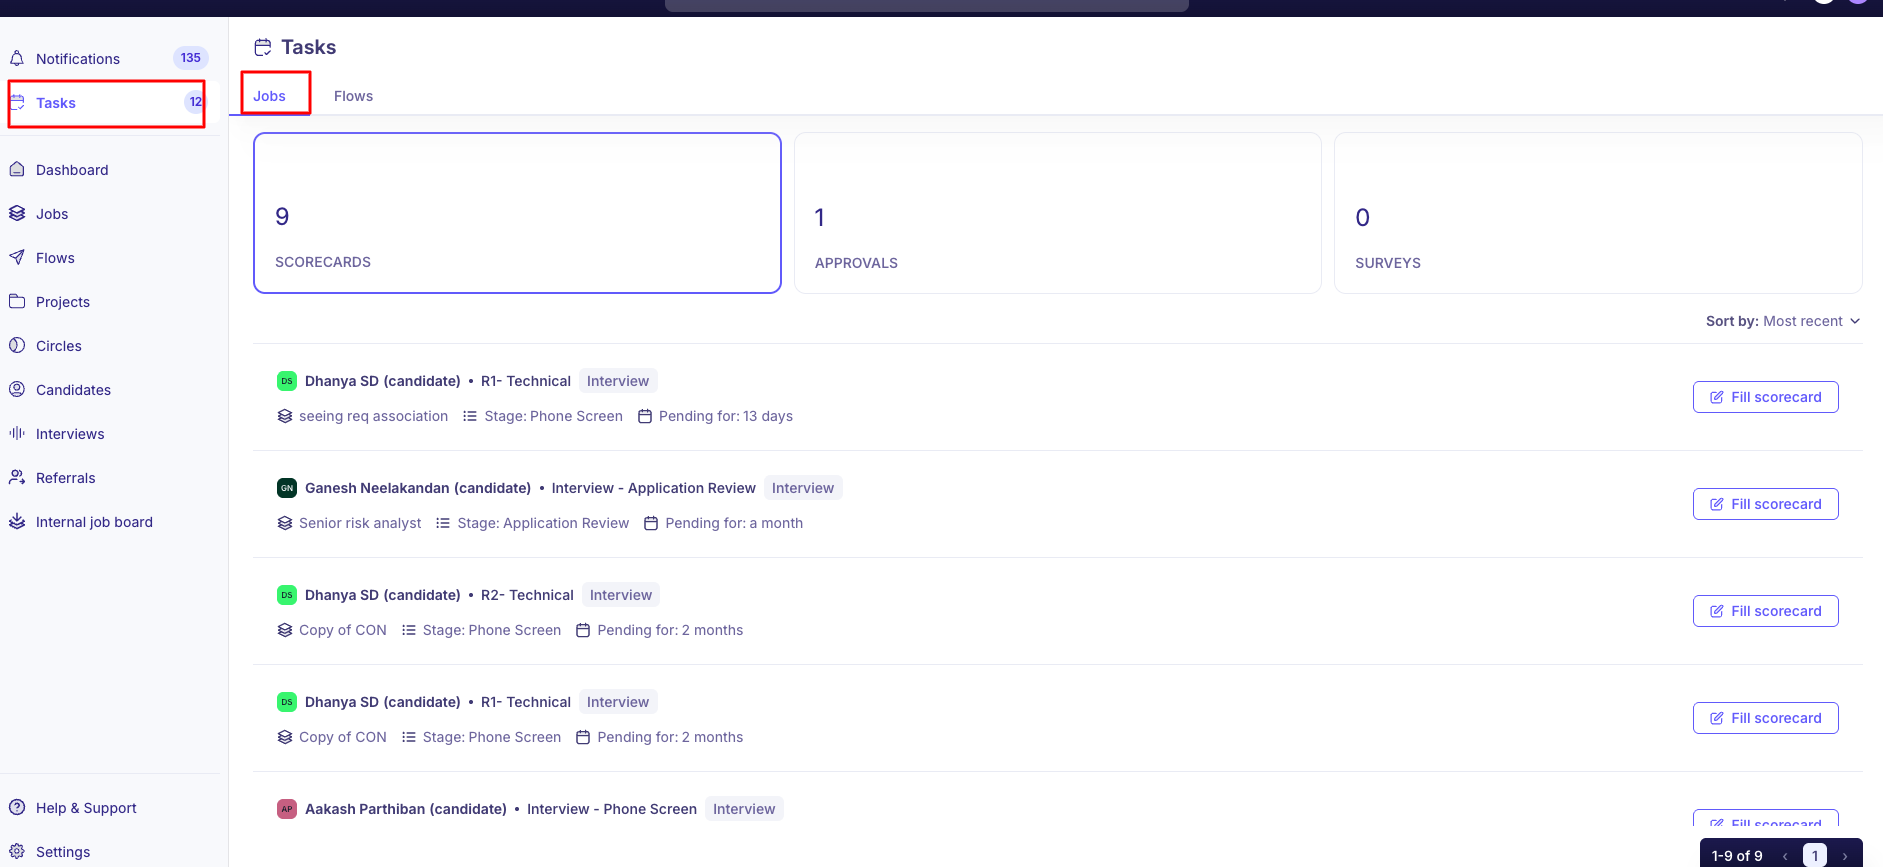
Tasks → Scorecards, which lists everything outstanding with a count in the navigation
The candidate's application page, on the Scorecards tab
The Slack reminder, without opening Kula
Your phone — the scorecard page is mobile-friendly
Tasks is also where your Approvals and Surveys queues live, so it's the page to clear at the end of a day.
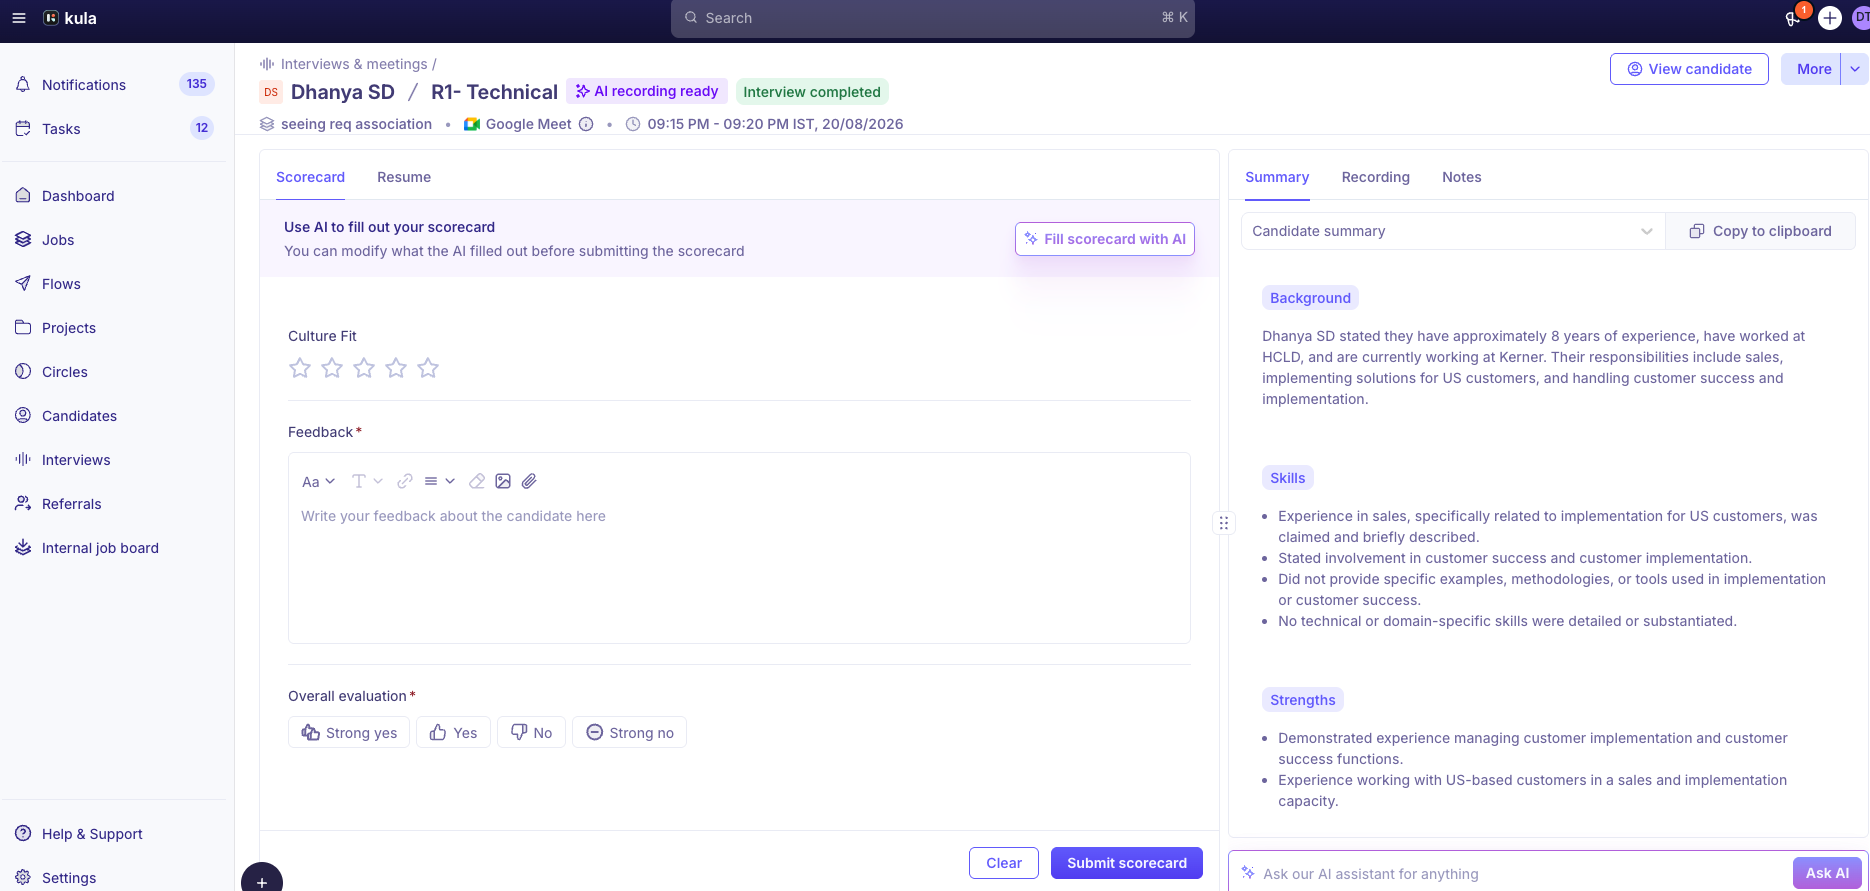
→ For the full walkthrough, see Leaving interview feedback & scorecards and Viewing team feedback as a recruiter
Send an offer
Creating the offer and generating the document are separate steps, so approvals don't wait on the letter. Save a draft, send for approval, then generate and send once it's signed off. Any edit to an approved offer goes back for re-approval.
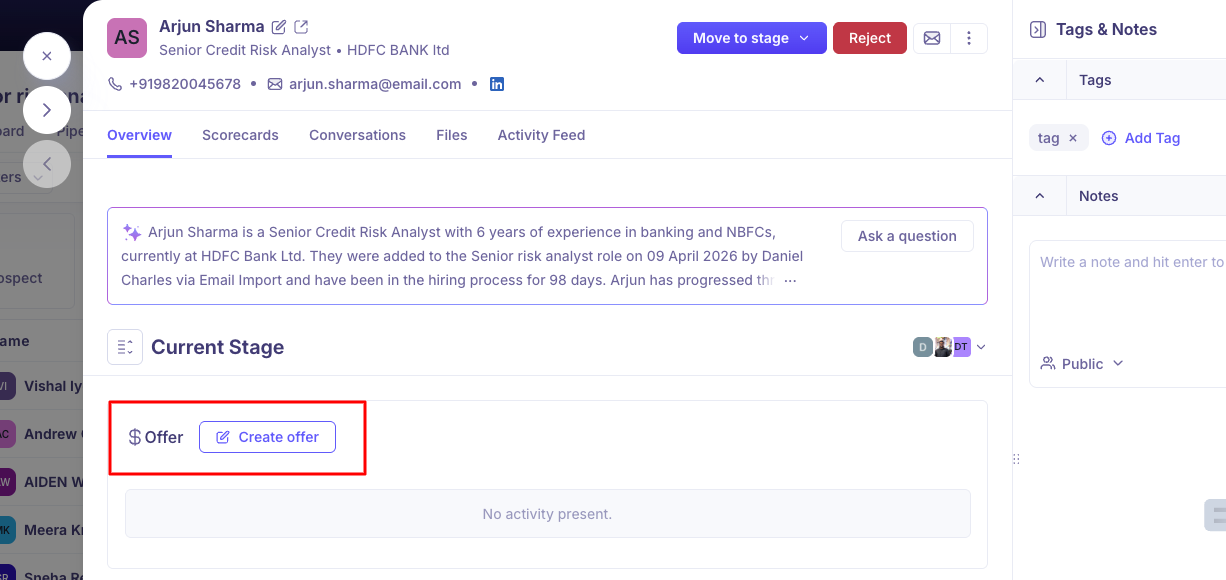
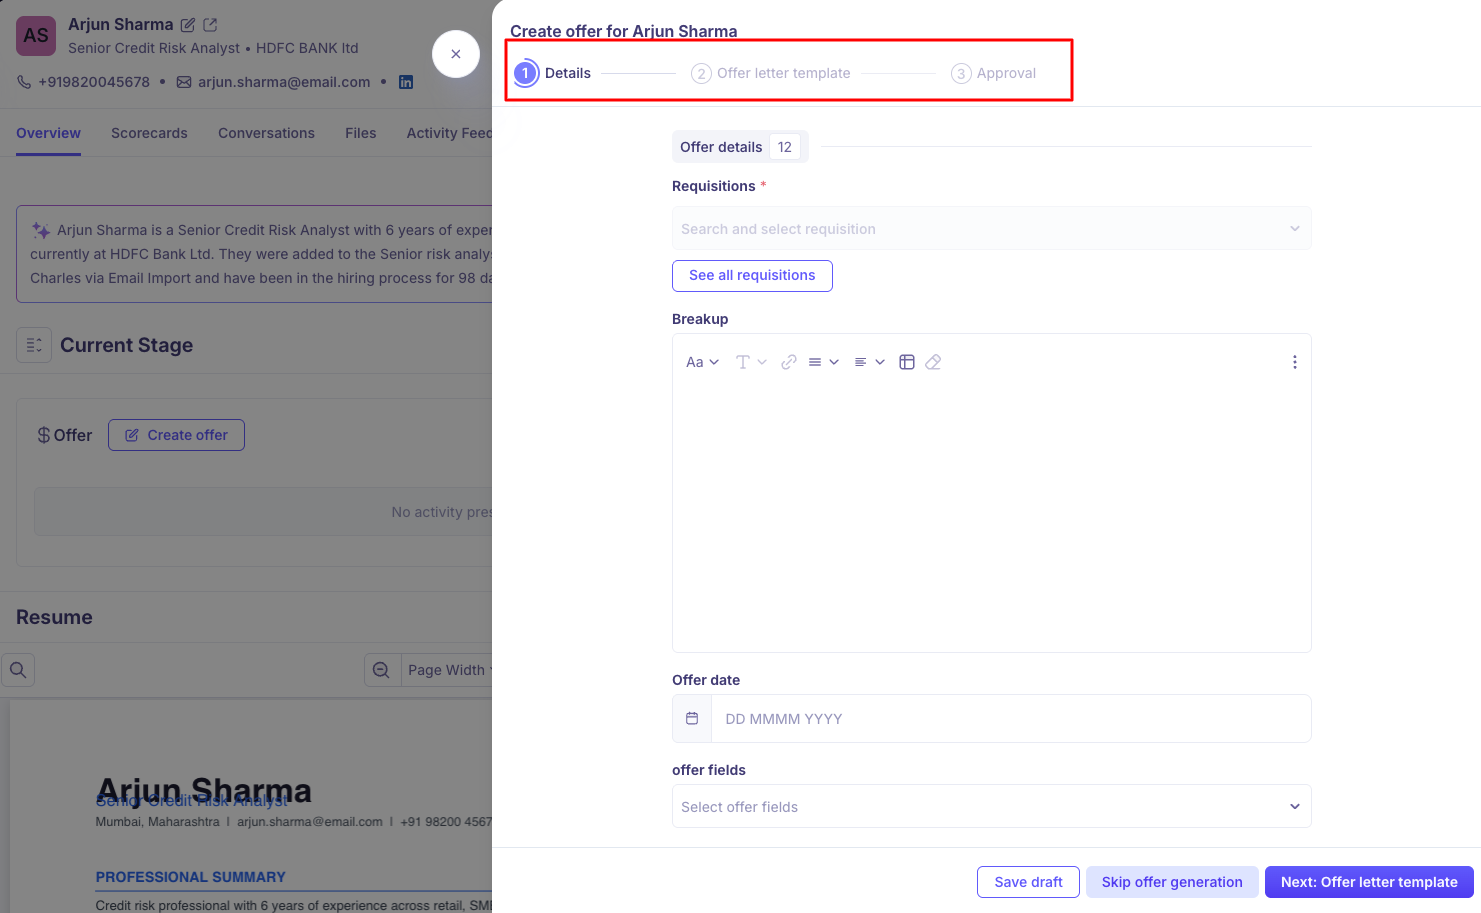
→ For the full walkthrough, see
Hand the hire over to your HRIS
The last step in the journey, and the one people forget exists.
When you move someone to Hired and your organisation has an HRIS connected, Kula shows the option to send them across. You fill a short form of the fields your HRIS needs, and the employee record is created there without anyone rekeying a name.
The option only appears at the Hired stage, so if you can't see it, check where the candidate actually sits.
The full handover is covered in
Need help? If you have questions or need assistance, reach out to us at support@kula.ai or use the in-app chat.